12
Performing a flash upgrade
The firmware in Digital iPEPS is fully upgradable and there are two methods that
you can use:
•Theremotemethod,or
•The‘dipswitch’method.
The most streamlined upgrade procedure is the remote method because it is
carried out completely from a remote system. The ‘dip switch’ method is useful
because it can be carried out even if the firmware within the Digital iPEPS unit
has been corrupted.
Flash upgrade using the remote method
Using this method, the Digital iPEPS is upgraded via remote connection (through
the IP network port). Upgrades are digitally signed by Adder using a secure key.
This prevents unauthorised or altered firmware images being downloaded into
the unit.
To perform a flash upgrade
1 Download the latest firmware revision for the Digital iPEPS from the Adder
website and decompress the download file. View the decompressed files
and make a note of the name and location of the .bin file that was part of
the download file collection.
2 Make a remote connection to the Digital iPEPS unit and login as the admin
user.
3 Once logged in, click the ‘Configure’ button in the top right corner of the
window.
4 Click the ‘Unit Configuration’ button.
5 Click the ‘Advanced Unit Configuration’ button.
6 Click the ‘Upgrade Firmware’ button. A dialogue box will be displayed:
7 Note the IP address shown in the dialogue box and click OK.
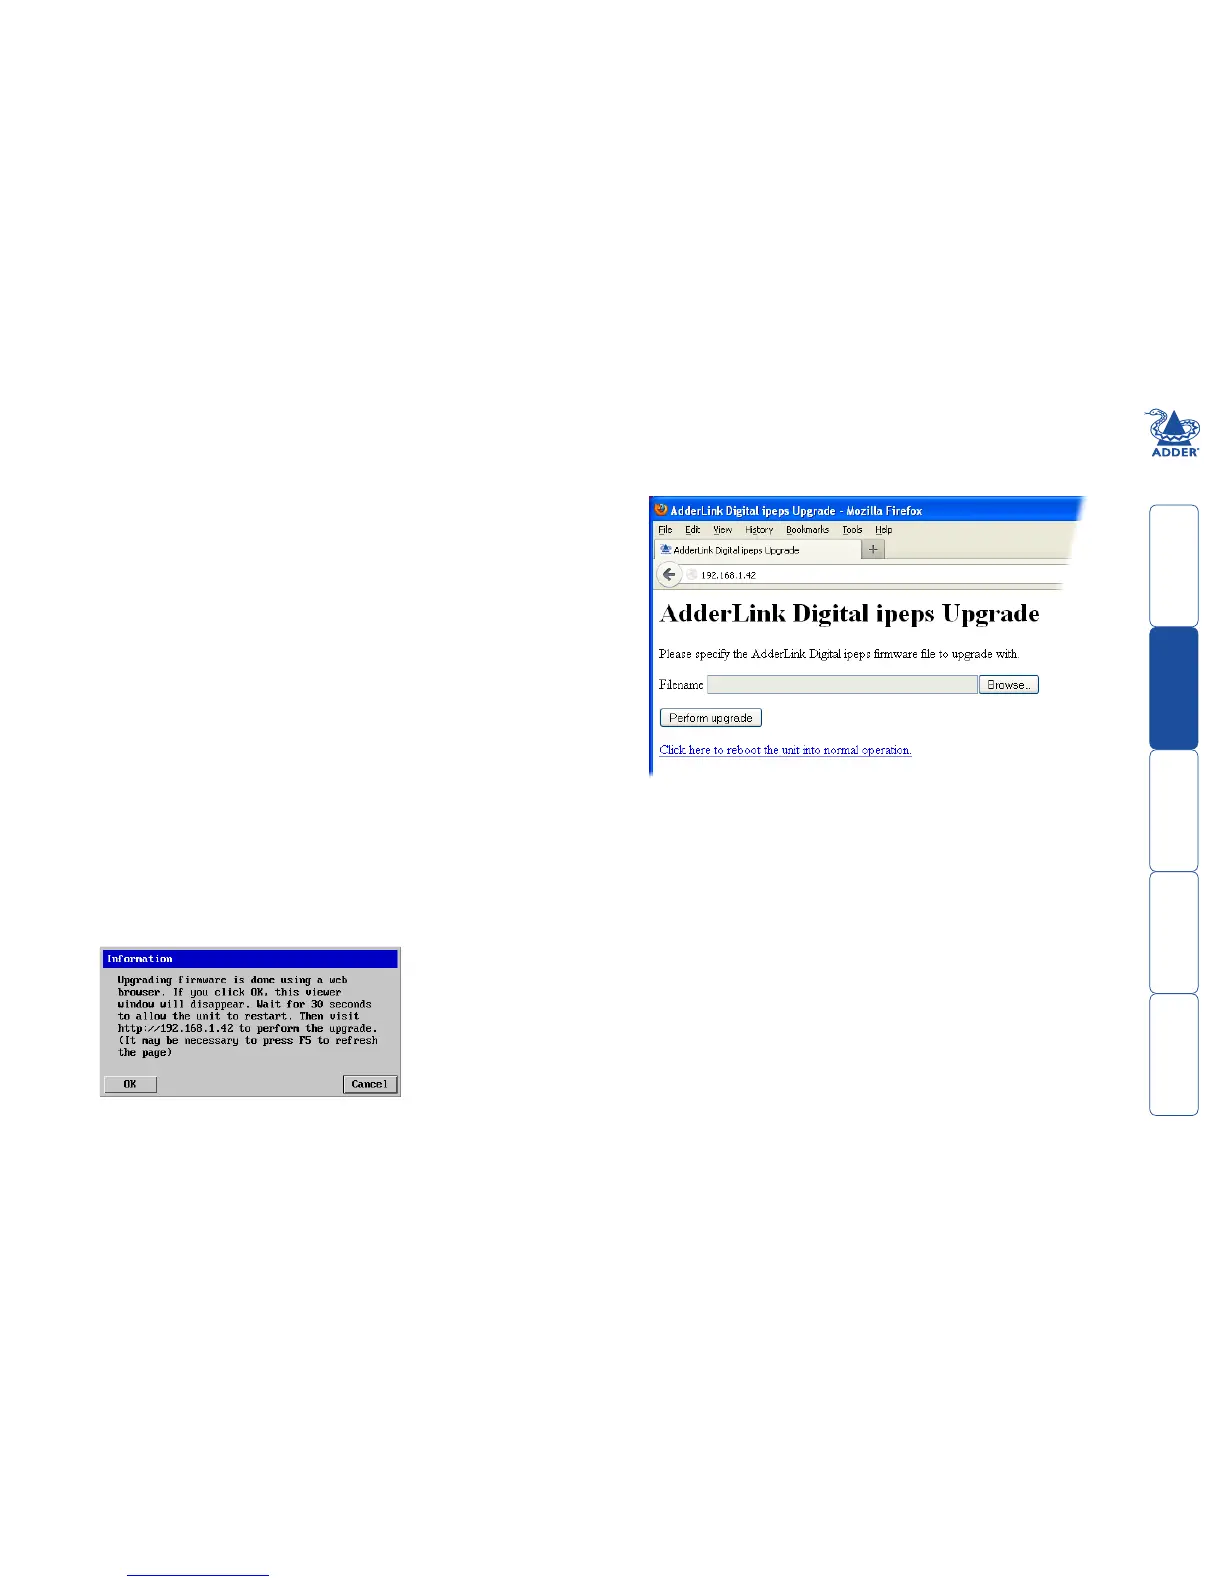
8 The unit is now ready to accept the upgrade files. Open your browser and
log into the Digital iPEPS using the IP address that was confirmed in the
dialog. Once connected, the unit will offer the following screen:
9 Click the ‘Browse’ button and locate the .bin upgrade file that you
downloaded earlier. Click the ‘Perform Upgrade’ button. The upgrade will
take place and its progress will be shown on screen.
10 When the upgrade is complete, click the link ‘Click here to reboot the unit
into normal operation’.
Flash upgrade using the dipswitch method
Use the dipswitch method if the firmware on the Digital iPEPS has become
corruptedandthereisnoaccessfromaVNCsession.Youwillneedtoknowthe
IP address of the Digital iPEPS (the default IP is 192.168.1.42).
1 With the power off, change dip switch 2 to ON.
2 Power On the Digital iPEPS.
3UsingawebbrowsergototheIPaddressoftheDigitaliPEPS.Youshould
see the upgrade page as shown above.
4 Browse to the .bin file and then click the Perform upgrade button.