75
USING ADOBE AUDITION
Effects reference
Last updated 2/16/2012
Ratio Sets a compression ratio between 1-to-1 and 30-to-1. For example, a setting of 3.0 outputs 1 dB for every 3 dB
increase above the compression threshold. Typical settings range from 2.0 to 5.0; higher settings produce the extremely
compressed sound often heard in pop music.
Attack Determines how quickly compression is applied when audio exceeds the threshold. Possible values range from
0 to 500 milliseconds. The default, 10 milliseconds, works well for a wide range of audio. Faster settings may work
better for audio with fast transients, but such settings sound unnatural for less percussive audio.
Release Determines how quickly compression stops after audio drops below the threshold. Possible values range from
0 to 5000 milliseconds. The default, 100 milliseconds, works well for a wide range of audio. Try faster settings for audio
with fast transients, and slower settings for less percussive audio.
More Help topics
“Applying effects in the Waveform Editor” on page 62
“Applying effects in the Multitrack Editor” on page 63
“Use effect presets” on page 61
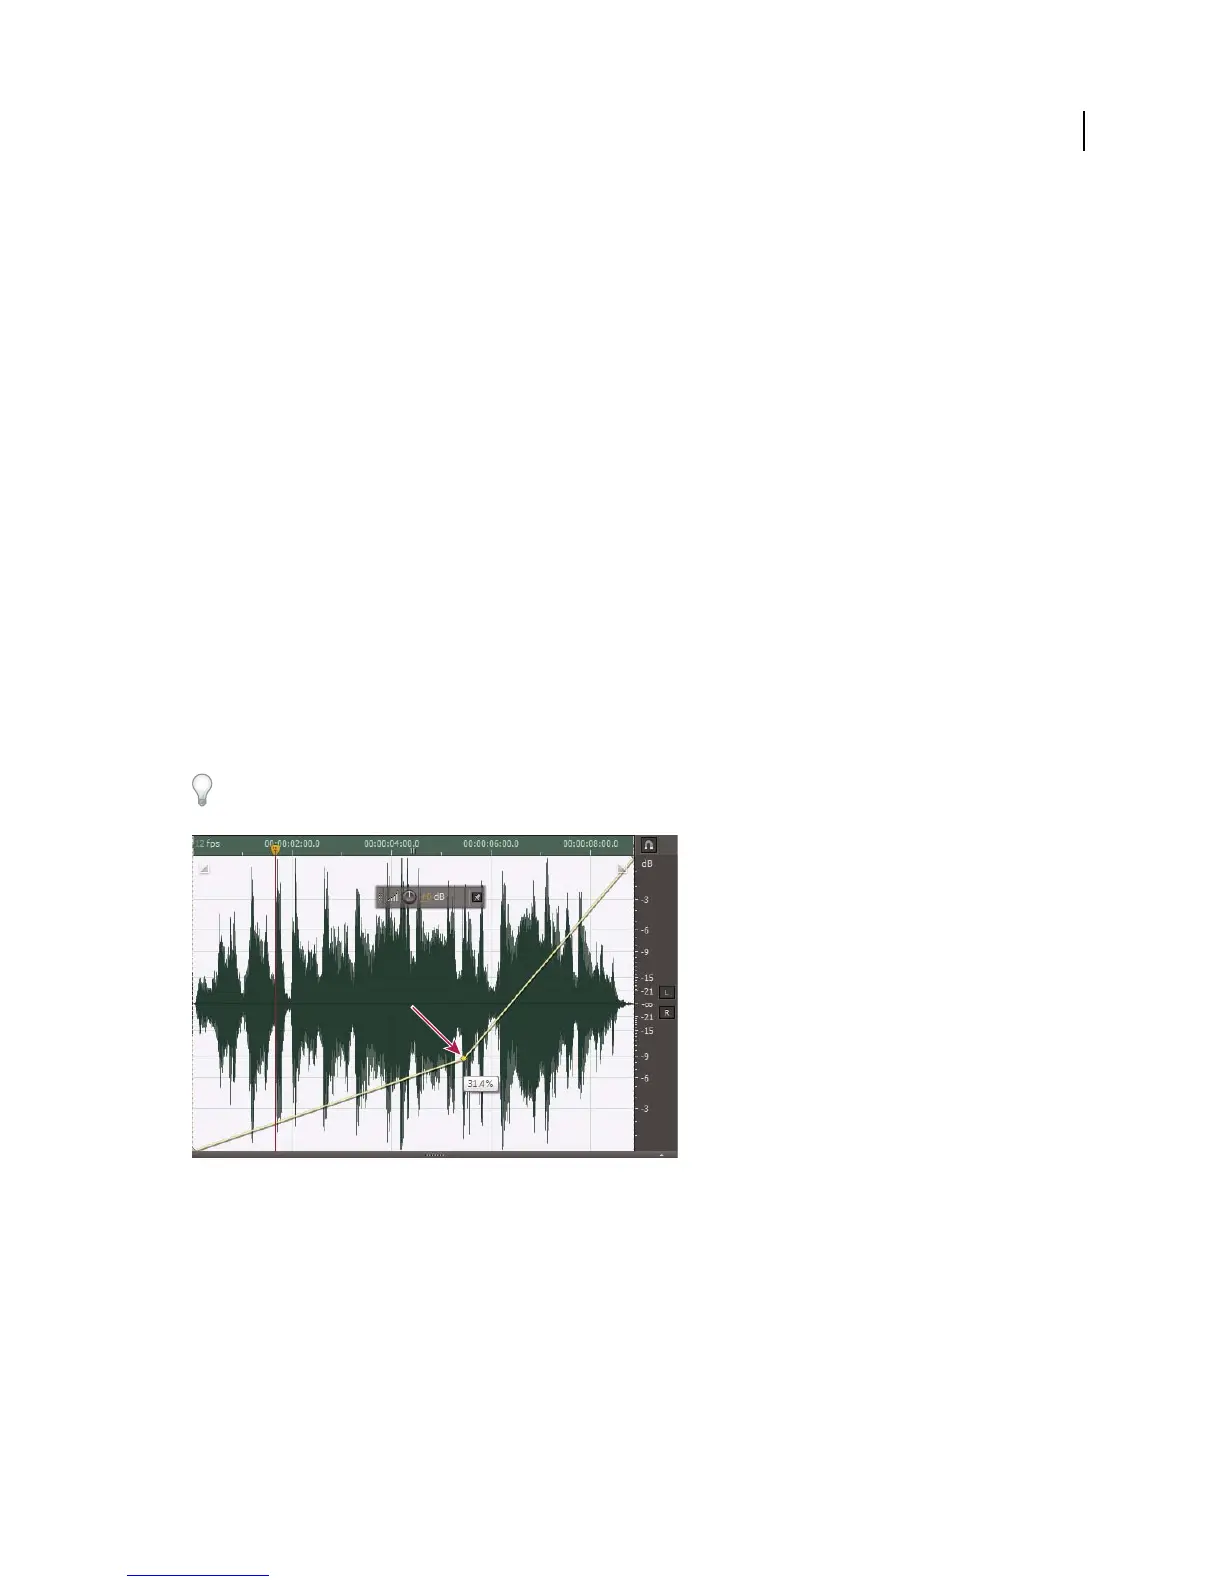
Volume Envelope effect (Waveform Editor only)
The Amplitude And Compression > Volume Envelope effect lets you change volume over time with boosts and fades.
In the Editor panel, simply drag the yellow line. The top of the panel represents 100% (normal) amplification; the
bottom represents 100% attenuation (silence).
Though the Volume Envelope effect isn’t available in the Multitrack Editor, you can use automation lanes to
accomplish the same task. (See “Automating track settings” on page 124.)
Dragging an anchor point in the Editor panel
Yellow envelope line in Editor panel Drag to adjust amplitude percentage, and click to add keyframes for additional
boosts and fades. To quickly select, reposition, or delete multiple keyframes, see
“Adjust automation with keyframes”
on page 126.
Spline curves Applies smoother, curved transitions between keyframes, rather than linear transitions. See “About
spline curves for graphs” on page 61.