31
Anoxomat Mark II CTS User’s guide
Chapter 5 Troubleshooting and service
5.3 To return an instrument for repair or replacement
1. Notify our service department to obtain an RMA
(Returned Material Authorization).
2. Remove the power cord and other accessories (printer
cables, etc) from the instrument.
3. Remove the clamp(s) from the Gas Supply tubing
and slide the Gas Supply tubing o the fittings
on the instrument. Do not remove any fittings or
jar tubes from the instrument.
4. Carefully pack and send everything except supply
items. Be sure to prepay for any shipment to the
factory. Advanced Instruments cannot accept collect
shipments without prior factory approval. Please
insure the shipment, or accept the damage risk.
5.4 Troubleshooting checks
Check operational requirements. If you are experiencing
diculties with your instrument, first carefully review
the operational requirements listed in the product
specifications and the recommended setup and
operating procedures.
Check fuses. You will find the power switch and fuse
holder beside the power cord connector on the left side
of the instrument. Move the power switch to the o
position and disconnect the power cord. Use a small
flat-bladed screwdriver or similar tool to pry open the
fuse compartment door. Slide out each fuse holder.
Visually check for a blown fuse. If there is any doubt, test
the fuses with a continuity checker or ohmmeter or
simply replace them with new fuses.
Check error messages. The software of your instrument
is designed to display specific error messages, many
self-explanatory, that will help you discover the source of
your problem.
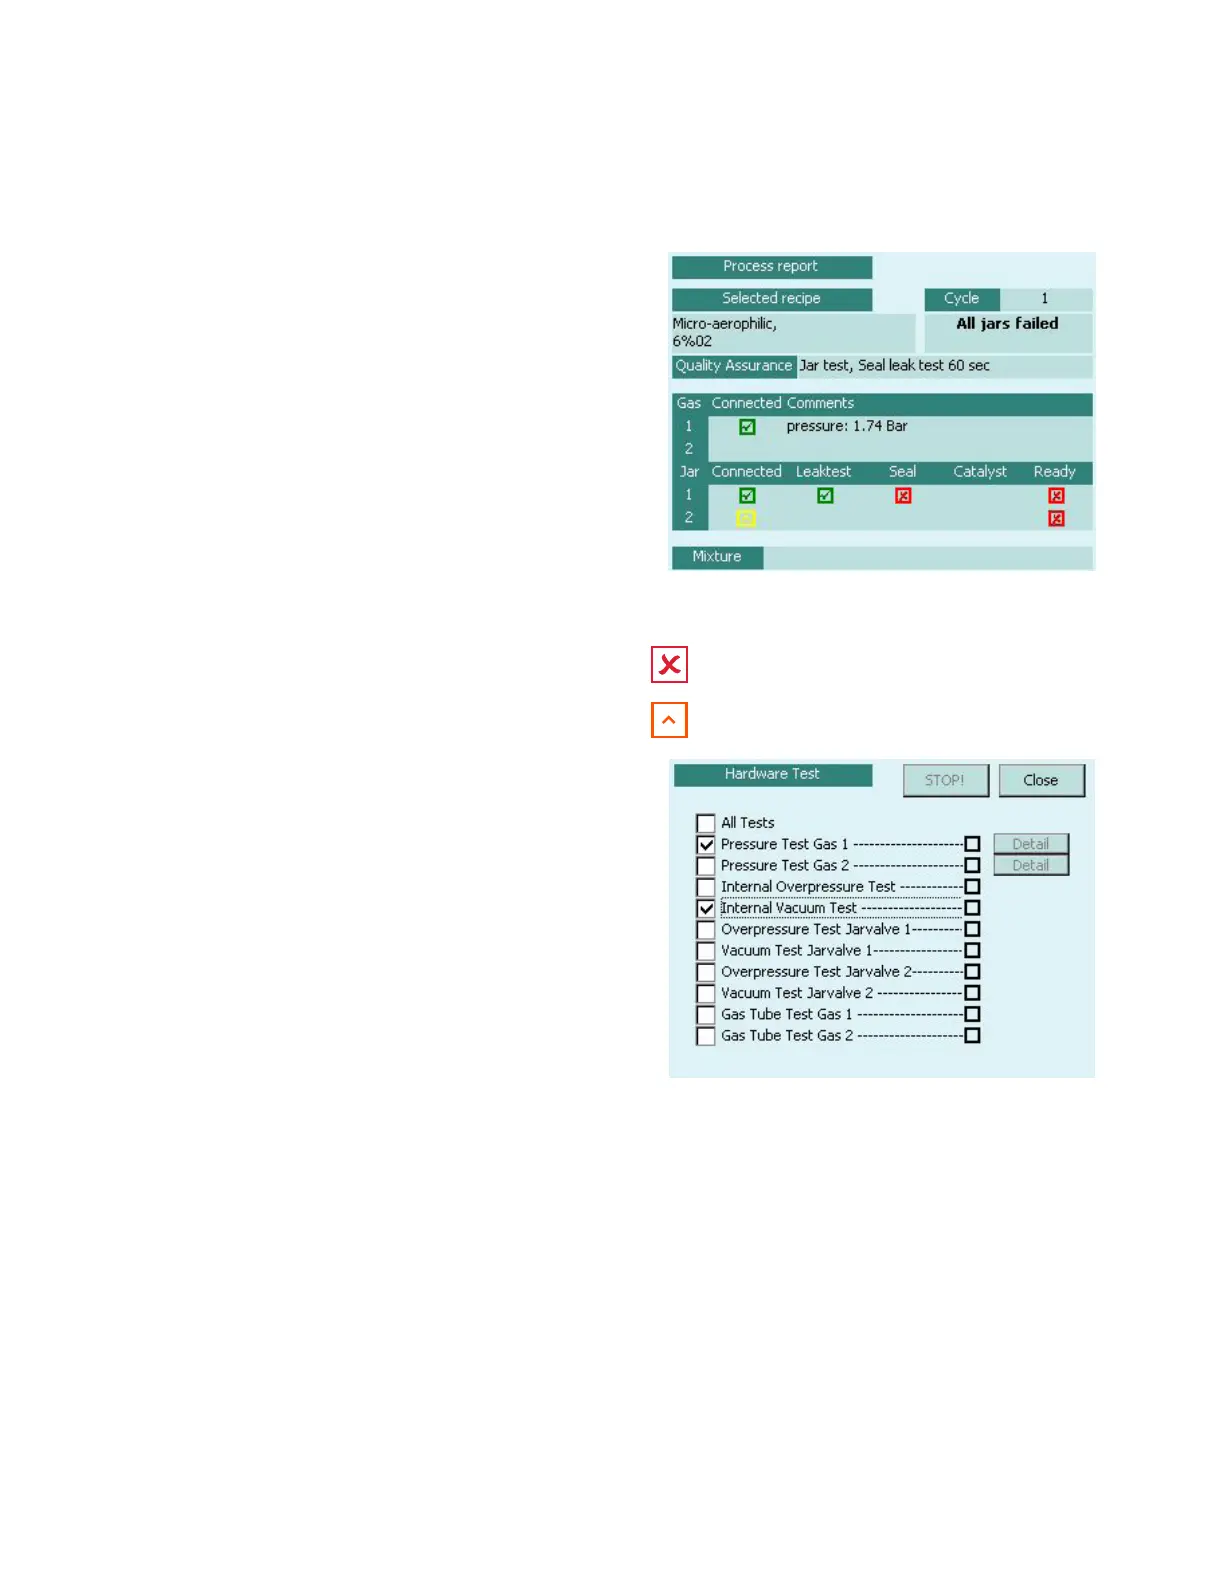
5.5 Process report errors
During a recipe and after it has finished, a “Process
report” will be displayed on the screen (Fig. 5.1).
5.6 Hardware test program
It may become necessary to perform one or more
hardware tests on the system. Hardware tests are
performed without jars so that system failures can be
identified. It is advisable that you contact your
Anoxomat dealer or Advanced Instruments before
performing hardware tests (Fig. 5.2).
5.7 Fuse replacement
If you determine that your instrument is not functioning
because of blown fuses, you will need to replace the fuses
using the following procedure:
1. Switch the power switch to the o position and
disconnect the power cord.
2. Open the door covering the fuses.
3. Check continuity of each fuse with a digital multimeter.
4. Replace fuses that show open circuit.
5. Close fuse door, attach power cord and switch
power on.
Fig. 5.1: Process report
Fig. 5.2: Hardware test
Appears if a jar connection is not used, or
cannot be used.
Appears if vacuum is detected in the jar.

 Loading...


