17
Anoxomat Mark II CTS User’s guide
Instrument operation
Chapter 2
2.1 Function of major components
Operation of the instrument will be quicker and easier if
you become familiar with the locations and functions of
the components, systems and controls described below
before proceeding further.
Jars and Petri dish holders
Petri dish holders are available for all jars and
for the usual Petri dishes. Refer to Appendix B for
additional information.
Catalyst
The catalyst is clipped under the lid of the Standard jars,
or placed in the designated slot in the Ergonomic jar.
The Catalyst consists of a stainless steel sachet with
palladium-coated alumina pellets. Advanced Instruments
advises regenerating catalysts after every incubation to
avoid the use of ineective catalysts. The palladium
pellets can be inactivated by excessive moisture and HS;
therefore, they should be reactivated by heating the
sachet of pellets to 160˚C in a drying oven for 90
minutes. The regenerated catalysts can be stored at
room temperature in a clean, dry environment until ready
for use.
The catalyst should be renewed regularly because
irreversible degradation of catalytic activity takes place
(due to chemical binding with Sulfur ions). The end-of-
life period depends on the type of bacterium cultivated
or, more accurately, the HS production. Therefore, it
cannot be determined exactly how many incubation
cycles can be completed with one sachet.
2.2 Operating procedure
1. Place inoculated dishes, tubes, micro well plates, or
other samples in the jar using the Petri dish holder.
2. Add catalysts to jar for anaerobic bacterial cultivation.
It is also, recommended to use optical oxygen
indicator strip or appropriate QC plate in the jar.
3. Place the lid on the jar and slide the jar clamp over the
lid. Tighten (finger-tight only) the jar clamp screw. If
the ergonomic jars are used, close the clamps on each
side of the jar lid.
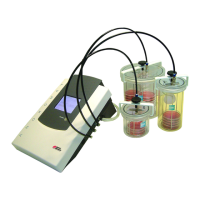
4. Connect the jars to the Anoxomat by pushing the jar
tube connector into the snap-shut coupling on the jar
lid, as shown in (Fig. 2.1). If the Jar tube connector
does not snap in place, pull the outer ring of the
snap-shut coupling downward.
5. Choose the appropriate recipe on the Main screen by
touching the microaerophilic or, the anaerobic button
or the saved recipe button (for any personalized
recipes). The button is highlighted when the recipe
is active.
6. For the standard microaerophilic and anaerobic
recipe, a standard quality assurance level has
been set as default. The Anoxomat automatically
enables this quality assurance level. To disable the
quality assurance setting, press Quality Assurance
enabled: level 1. The button will change to Quality
Assurance disabled. Details of the recipe are displayed
on the right hand side of the main screen (Fig. 2.3).
In order to run your instrument properly, it is important that you read
and adhere to the instructions in this section.
Maximum gas supply pressure to the Anoxomat
should never exceed 2 bar absolute.
Prior to use always check the jar for any cracks
or damage.
When catalyst reaches its end of life, it should be
disposed of in accordance with lab procedures and local
biohazard waste disposal regulations.

 Loading...