332P353 Rev2
(3325 Service Manual)
Page 2 of 3
6. Remove the two screws securing the sole-
noid impactor retaining bracket (F).
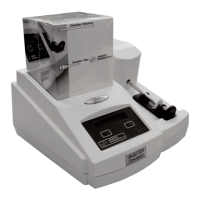
7. Remove the impactor, spring, spring
retainer, and washer (if present).
8. Remove the solenoid body using slip
joing pliers.
9. Remove and save the shims installed
around the threads on the solenoid body.
Make sure that there are no shims remain-
ing around the hole in the cooling assem-
bly where the solenoid is installed.
10. Measure the thickness of the shims
removed. Place them in the correspon-
ding shim bags in the kit. (They can be
reused with other instruments.)
11. Clean the impactor hole and mounting
threads using a solution of 5% sodium
hypochlorite. Make sure that all sample
residue and other debris is removed.
12. Remove the tape holding the impactor
into the solenoid body. Use care to pre-
vent losing the spring and spring retainer.
Set the impactor, spring and retainer
aside.
13. Insert the .160 gauge pin into the sample
probe hole. Check to make sure that the
pin is visible through the impactor hole.
14. Screw the solenoid body halfway into the
mounting hole without adding any shims.
Do not tighten.
15. Insert the impactor, spring, spring retainer,
and washer (if present) into the solenoid
body. Press the impactor in against the
solenoid body as far as it will go.
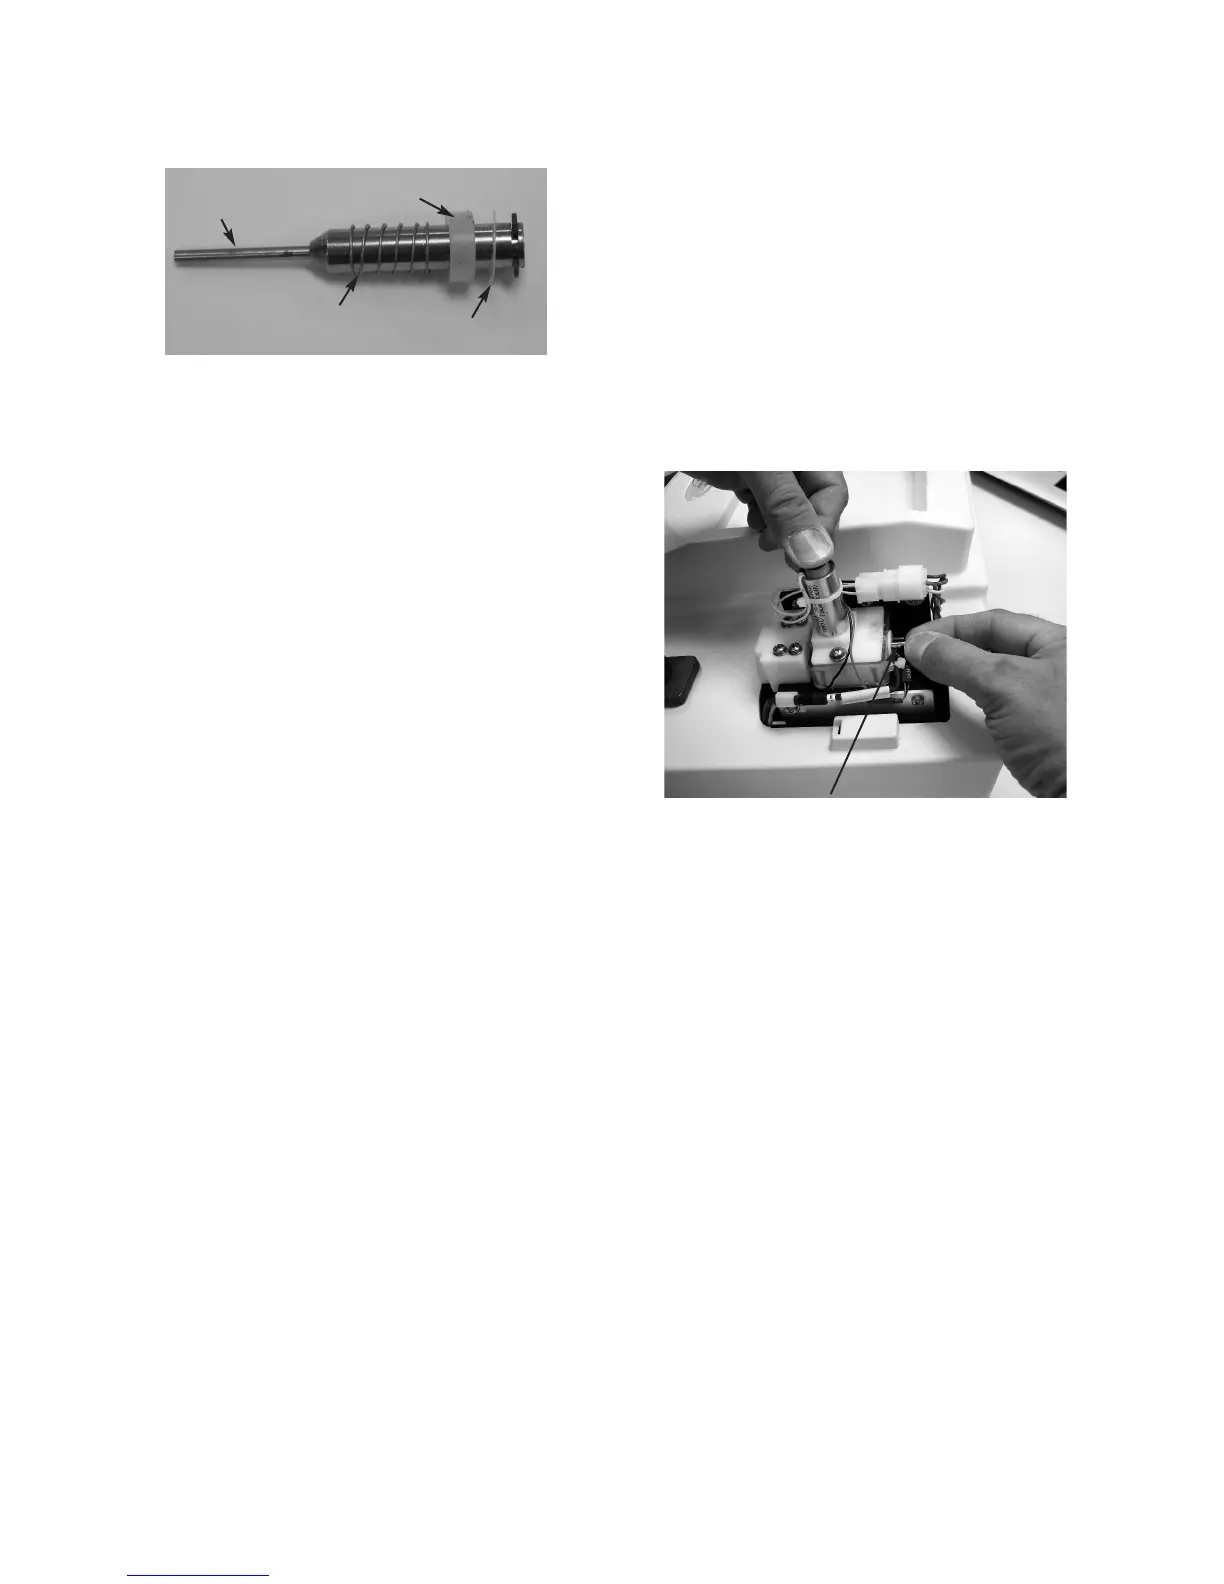
16. Continue to press on the impactor against
the solenoid body and gradually screw in
the solenoid body. Keep checking the
.160 gauge pin (G) until a light, even drag
is felt from the inner, small end of the
impactor contacting the pin.
17. Using a feeler gauge, measure the gap
between the end of the solenoid body and
the plastic block. If no feeler gauge is
available, use one or more shims to deter-
mine the gap, then measure the shims
used to determine the gap.
18. Select a combination of shims that pro-
vide the required thickness determined in
the previous step.
19. Remove the impactor, spring, spring
retainer, and washer (if present) and set to
one side. Remove the solenoid body.
20. Place the shims over the threaded portion
of the solenoid body, then screw the sole-
noid body into the mounting hole.
Tighten the solenoid body using slip joint
pliers.
washer
spring retainer
G
spring
Impactor