NVRAM Battery Replacement
71027R
Reference: Use this instruction with:
Advanced Instruments Inc.
4250 Cryoscopes
3250 Osmometers
3320 Osmometers
2020 Osmometers
4-digit year Model 3300 Osmometers
Intel-based 3D3 Osmometers
Intel-based 4D3 Cryoscopes
Fiske Associates
210 Osmometers
Intel-based MK-3 Osmometers
Intel-based MK-2 Cryoscopes
Tools Needed: Small flat-bladed screwdriver,
static grounding (earthing)
wrist strap (included).
CAUTION: Unplug the power cord
prior to opening or removing covers,
or else you may be exposed to electric
shock, excessive temperatures, or
mechanical hazards.
Performing this service or maintenance
should only be done by a qualified
service technician.
A discharge of static electricity from
contact with the human body or other
conductor may damage system boards
or static sensitive devices. Never per-
form internal maintenance without fol-
lowing recommended static protection
procedures.
Instruction:
1. Turn off the instrument power and remove
the power cord from the rear of the instru-
ment.
2. Open the instrument cover.
3. Attach the static grounding strap accord-
ing to the instructions on its packaging.
4. Locate the processor Printed Circuit Board
(PCB120, PCB125, PCB620, 200016PC,
or 210102PC) and the NVRAM chip:
• If using PCB120, locate U14.
• If using PCB125 locate U13.
• If using PCB620, remove the processor
board from the application board and
locate U15 on the back side.
• If using 200016PC, locate U11.
• If using 210102PC, locate U11.
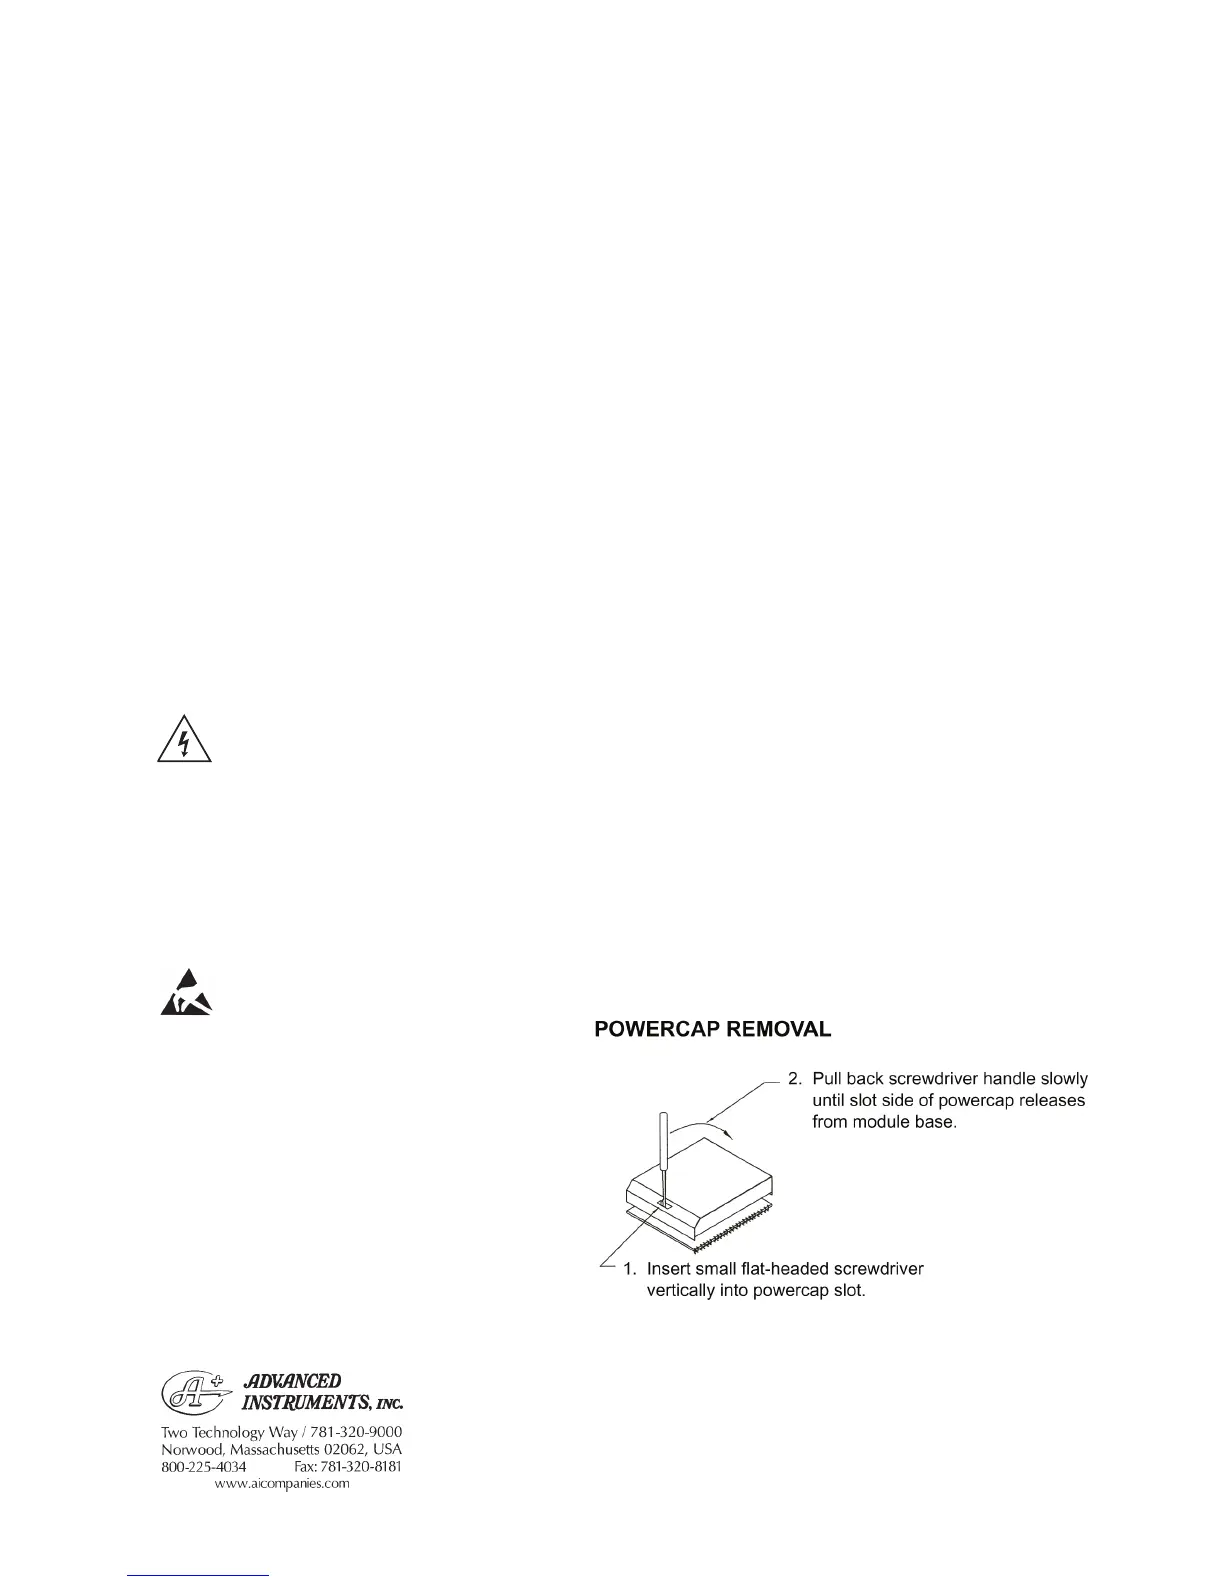
5. Once you have located the NVRAM chip,
locate the small notch and insert the small
screwdriver, as described in figure 1.
Figure 1
71P27R Rev3
(2025/2105/3255/3305/3325/
4D35/MK05 Service Manuals
)
Page 1 of 2
For additional information or technical assistance, please
contact Advanced Instruments Hot-Line
®
Service Center.
(U.S. 1-800-225-4034, outside North America +US 1-781-
320-9000. After normal business hours, dial extension 2191.)