30
MegaTron Quick Steps
Step 4:
This is the Congure Screen. From here push
HISTORY (Button 4) to go to the next screen.
>CONFIGURE<
PASSWORD CONTRAST
RELAYS TEMP SCALE
NETWORK
HISTORY SYS INFO
FLOW SW FACTORY
Step 5:
ThisistheCongureHistoryScreen.Fromhere
push SAVE FORMAT (Button 4) to go to the next
screen.
>CONFIGURE HISTORY<
INTERVAL
W/M HOUR
DELAY
SAVE FORMAT
Step 6:
Set the value of the HISTORY SAVE FORMAT
by using the arrow keys. Then press ENTER to
conrmandgotothepreviousscreen.
>CONFIGURE HISTORY<
INTERVAL
W/M HOUR
DELAY
SAVE FORMAT
HISTORY SAVE FORMAT
--> WEB ADVANTAGE
PRESS UP/DOWN KEYS TO CHANGE
PRESS ENTER TO ACCEPT
Note: WebAdvantage format is required for
uploading history to WebAdvantage for cloud
storage and graphing. Change to Comma
Separated format if using a database software
like Excel.
Press SET UP RUN to return to the RUN
screen.
Step 7:
Remove USB drive and re-insert to initiate the
USB DRIVE DETECTED pop-up window. Repeat
Step 1 from section Exporting Log Data.
Uploading data to WebAdvantage
If the controller does not have a communications card you
can purchase WEBADV-XSCLOUD storage of your unit’s
history. This one-time fee per controller allows the XS
history to be stored on WebAdvantage for using custom
graphing and multiple user internet access. Contact
Advantage Controls or support@advantagecontrols.com
with your unit’s serial number to learn more.
After an XS is set-up for cloud storage, follow these steps:
1. Login to the secure web server:
https://webadvantage.online
2. Locate the controller you have data for and click
Reports
3. Click History Upload on the left
4. Click Choose Fileandselecttheleyouexported.
5. Click Submit and the data will upload
6. You will now be able to view reports and history
data once completed.
Upgrading Firmware
To upgradethermwareon yourXS,copythe updated
softwareversion toaUSB drive.Thele nameshould
be “rmware.bin”With the controller powered up, plug
the USB drive into the XS USB port. The USB DRIVE
DETECTED pop-up window will appear. If a password is
in the unit, the USB will ask for it.
Select --> Update Firmware by using the Arrow buttons.
Then press ENTER.
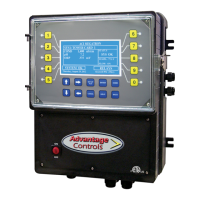
XS Controller
3 ALARMS! RELAYS
Friday, February 6, 2015 15:50:47 Wk1
SYS1: Towers 1-4
COND: 0 uS/cm
pH: 3.2
ORP: 548 mV
TEMP1: 68°F
WM1: 0.0
WM2: 0.0
FLOW: ON
DR
USB DRIVE DETECTED
--> Update Firmware
PRESS UP/DOWN KEYS TO CHANGE
PRESS ENTER TO ACCEPT
Warning: Do not remove power or USB during
updating. It may take a few minutes to complete. Once
therstupdateiscomplete,poweroandremoveUSB.
Wait 20-30 seconds to power back on and reinstall the
USBaftertheRUNscreenappearsandloadthermware
a second time.
XS Controller - USB Functions