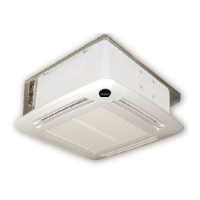
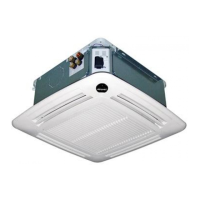
INSTALLAZIONE DELL’UNITÀ
La gamma dei ventilconvettori FCA è prodotta in due taglie
identificabili dalla presenza di uno o due motoventilatori,
le versioni con ventilatori binati rispetto alle monoventila-
tore hanno dimensioni doppie, così come pure i filtri pre-
caricati, i componenti dei convogliatori, le staffe di fissag-
gio, le viti, i nottolini, i ganci sono in quantità doppia
rispetto alle versioni mono, di conseguenza le operazioni
di montaggio e smontaggio dovranno essere ripetute per
ogni elemento doppio.
Per installare l'unità procedere come segue:
- Aprire l'imballo in cartone della macchina, rimuovere la
parte superiore del materiale di imballaggio utilizzato per
proteggere l’unità durante il trasporto.
- Sollevare con cautela l'unità.
Non maneggiare l'unità mediante gli attacchi idraulici
ma servirsi delle apposite staffe (fig. 13).
- Solo per FCA binato: montare le 4 staffe di installazione
al basamento dell’unità. (fig. 14)
- Se è necessario montare eventuali kit (resistenze elettriche,
kit aria di rinnovo o mandata in locale attiguo) eseguire
queste operazioni prima di installare a soffitto la macchina.
- Scegliere la posizione dove installare la macchina in fun-
zione della pianta della stanza, del numero di unità da
installare e di eventuali limitazioni architettoniche.
Controllare che nella posizione prescelta sia possibile
rimuovere i pannelli dal controsoffitto, in misura suffi-
ciente all'installazione ed alla manutenzione.
- Installare a soffitto quattro aste filettate da M8 per soste-
nere il telaio.
- Sollevare la macchina tramite le staffe (fig. 13) e tenendo-
la leggermente inclinata fissarla alle 4 barre filettate utiliz-
zando 8 dadi di cui 4 autobloccanti. Agire sui dadi per
regolare l’altezza, verificare infine che la macchina sia
installata in posizione orizzontale.
- Portare le linee idrauliche attraverso il controsoffitto in
corrispondenza della piastra attacchi sull'unità;
- Eseguire i collegamenti idraulici come descritto nel capi-
tolo relativo.
- Portare la tubazione di scarico condensa in corrisponden-
za al rispettivo raccordo sulla piastra attacchi;
- Eseguire il collegamento di scarico condensa come
descritto nel capitolo relativo.
- Portare i cavi elettrici di alimentazione e dei comandi alla
scatola elettrica come descritto nel capitolo relativo;
- Sceglire le tre velocità del ventilatore adatte all’impianto
fra le quattro disponibili.
- Portare i cavi di collegamento in corrispondenza dei
rispettivi morsetti ed eseguire tutti i collegamenti come
indicato negli schemi elettrici;
Se è necessario montare eventuali kit (resistenze elettriche,
kit aria di rinnovo o mandata in locale attiguo) è necessa-
rio togliere il cabinet in polistirolo dall'unità, eseguire le
operazioni di montaggio dei kit e rimontare il cabinet sul-
l'unità nel seguente modo:
SMONTAGGIO
- Solo per FCA-R: rimuovere la scatola della scheda elettro-
nica dal cabinet svitando le 2 viti (fig. 15B).
- Smontare il convogliatore (2 per le versioni binate) (fig. 16)
installato sul cabinet svitando le 4 viti autofilettanti che lo
fissano alla struttura in polistirolo.
- Svitare le 4 (8 per le versioni binate) viti i fissaggio del
cabinet (fig. 17);
MONTAGGIO
- Solo per FCA: Nel caso si intendesse collegare un pannel-
lo comandi elettronico, verificare che le impostazioni dei
Dip Switch interni al pannello corrispondano alle esigen-
ze dell’impianto, altrimenti modificare il settaggio come
indicato nelle istruzioni allegate al pannello comandi.
- Eseguire lo sfiato dell'aria delle batterie (fig. 19-20) prima
di montare il cabinet.
INSTALLATION OF THE UNIT
The FCA fan coils product range is produced in two sizes,
identifiable by the presence of one or more motion fans,
the versions with twin fans in comparison to single fans
are double in size, and the preloaded filters, the conveyor
components, the installation brackets, the screws, the cat-
ches, and hooks are provided in a double quantity in
comparison to the single version, therefore the assembly
and dismantling operations must be repeated twice for
each element.
Proceed as follows to install the unit:
- Open the machine's cardboard packaging, remove the
upper part of the packaging material used to protect the
unit during transport.
- Lift the unit carefully.
Do not handle the unit through plumbing connections
but use the appropriate brackets (fig. 13).
- For the double FCA only: fit the four installation supports
at the base of the unit. (fig. 14)
- If it is necessary to fit any kit (electrical resistors, fresh air
kit or delivery to an adjacent room) do these operations
before installing the machine on the ceiling.
- Choose where to install the machine according to the
layout of the room, the number of units to be installed
and any limitations imposed by the architecture. Check
that it is possible in the position chosen to remove the
panels of the suspended ceiling sufficiently for the instal-
lation and maintenance of the machine.
- Install four M8 threaded rods into the ceiling to hold the
frame.
- Lift the machine by the brackets and hold it slightly inclined
while fixing it to the four threaded rods using eight nuts, four of
which are self-locking. Tighten the nuts to regulate the height,
check in conclusion that the machine is installed horizontally.
- Feed the hydraulic pipes through the suspended ceiling to
the attachment plate on the unit;
- Make the plumbing connections as described in the relati-
ve chapter.
- Bring the condensate drainage pipe to the respective fit-
ting on the attachment plate;
- Make the condensate drainage connection as described in
the relative chapter.
- Lead the electrical power and command cables to the
electrical box as described in the relative chapter;
- Choose the three fan speeds suited to the system from the
four available.
- Lead the connection cables to the respective terminals
and make all the connections as indicated in the wiring
diagrams;
If it is necessary to fit any kit (electrical resistors, fresh air kit
or delivery to an adjacent room) it is necessary to remove
the polystyrene cabinet from the unit, fit the kits and refit
the cabinet on the unit as follows:
DISMANTLING
- Only for FCA-R: remove the electronic card box from the
cabinet by undoing the two screws (fig. 15B).
- Dismantle the conveyor (2 for the tracked versions) (fig. 16)
on the cabinet by undoing the 4 self-threading screws (8 for
the twin versions) that fix it to the polystyrene structure.
- Undo the four cabinet fixing screws (fig. 17);
ASSEMBLY
For FCA-R only: If you intend to connect an electrical control
panel, check that the positions of the Dip Switches inside
the panel correspond to the system's needs, otherwise
modify the setting as indicated in the instructions attached
to the control panel.
- Bleed the air from the batteries (fig. 19-20) before fitting the
condensate basin.
- Place the cabinet on the unit, being careful to align it cor-
29
 Loading...