48
BASE UNIT CONNECTION TO ACCESSORIES
All base units have been designed to facilitate the conguration and
customisation through modular accessories that fully meet the customer
needs.
To ensure this, standard union modes have been implemented to simplify
the coupling between base unit and accessories, or even between multiple
accessories and the same unit.
We supply, with all accessories, an assembly kit
consisting of screws and self-adhesive at gasket to be applied on the contact
walls in order to prevent air leaks between one or more modules.
The accessories can be assembled both with machine earthed (in case of new
installation) and with machine already installed.
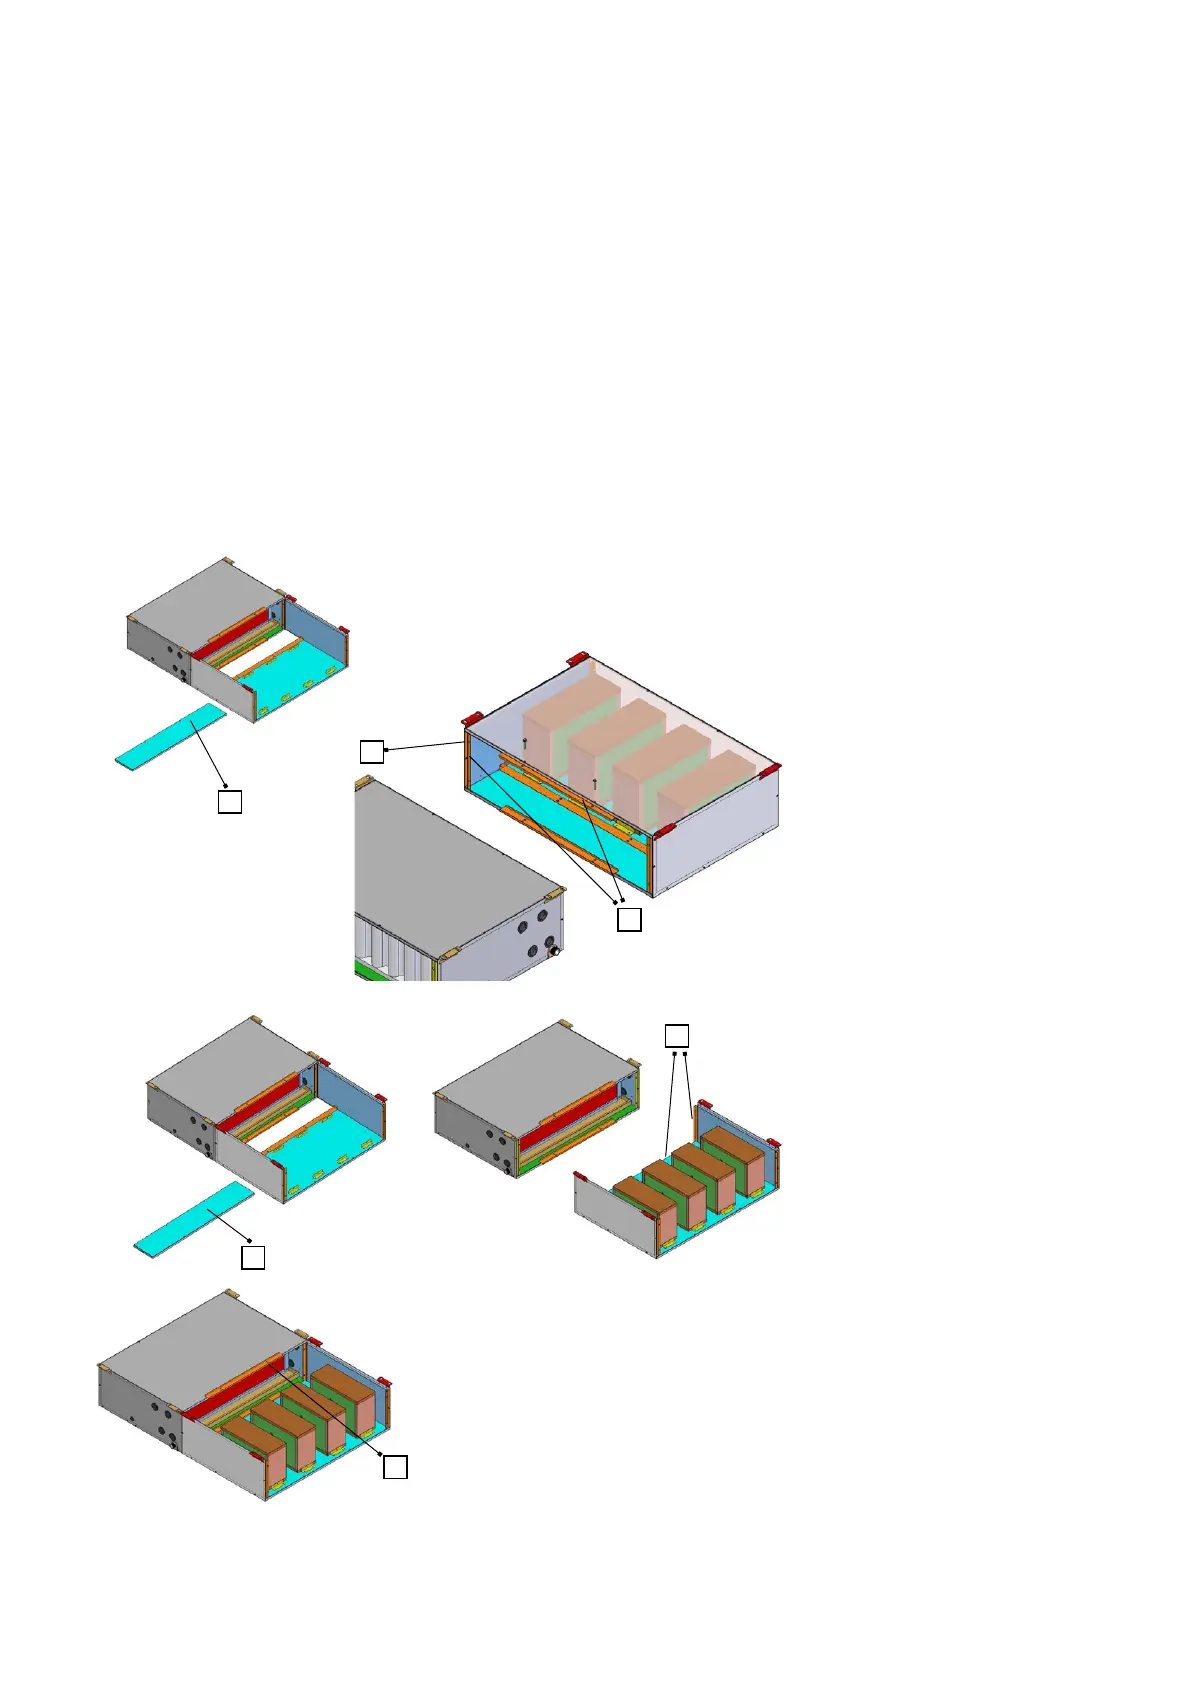
1a
2a
1b
3b
3a
2b
Below is an examination of the earth unit union:
1a) remove the inspection panel on the bottom of the accessory to allow
access inside the accessory set - base unit or accessory - accessory.
2a) apply the provided self-adhesive gasket on the edges of the accessory
that will be connected to prevent air leaking during functioning.
3a) near the two modules and tighten the brackets (upper, lower and side) of
the two modules using the provided metric screw.
4a) close the inspection panel of the accessory.
If the base unit is already installed and an accessory needs to be installed at a
later stage, you can proceed as follows:
1b) remove the inspection panel on the bottom of the accessory to allow
access inside the accessory set - base unit or accessory - accessory.
2b) apply the provided self-adhesive gasket on the edges of the accessory
that will be connected to prevent air leaking during functioning.
3b) remove the bracket located inside the upper long side of the accessory
and re-assemble it from the outside of the same side: fastening by xing
the screws from the inside. Near the two modules and tighten the upper
and side brackets of the two modules using the provided metric screw.
4b) close the inspection panel of the accessory and secure the lower bracket
from the outside.
The outlined method refers to all types of accessories, even if the diagram shows the assembly of an SSL
silencer