9
Ovens
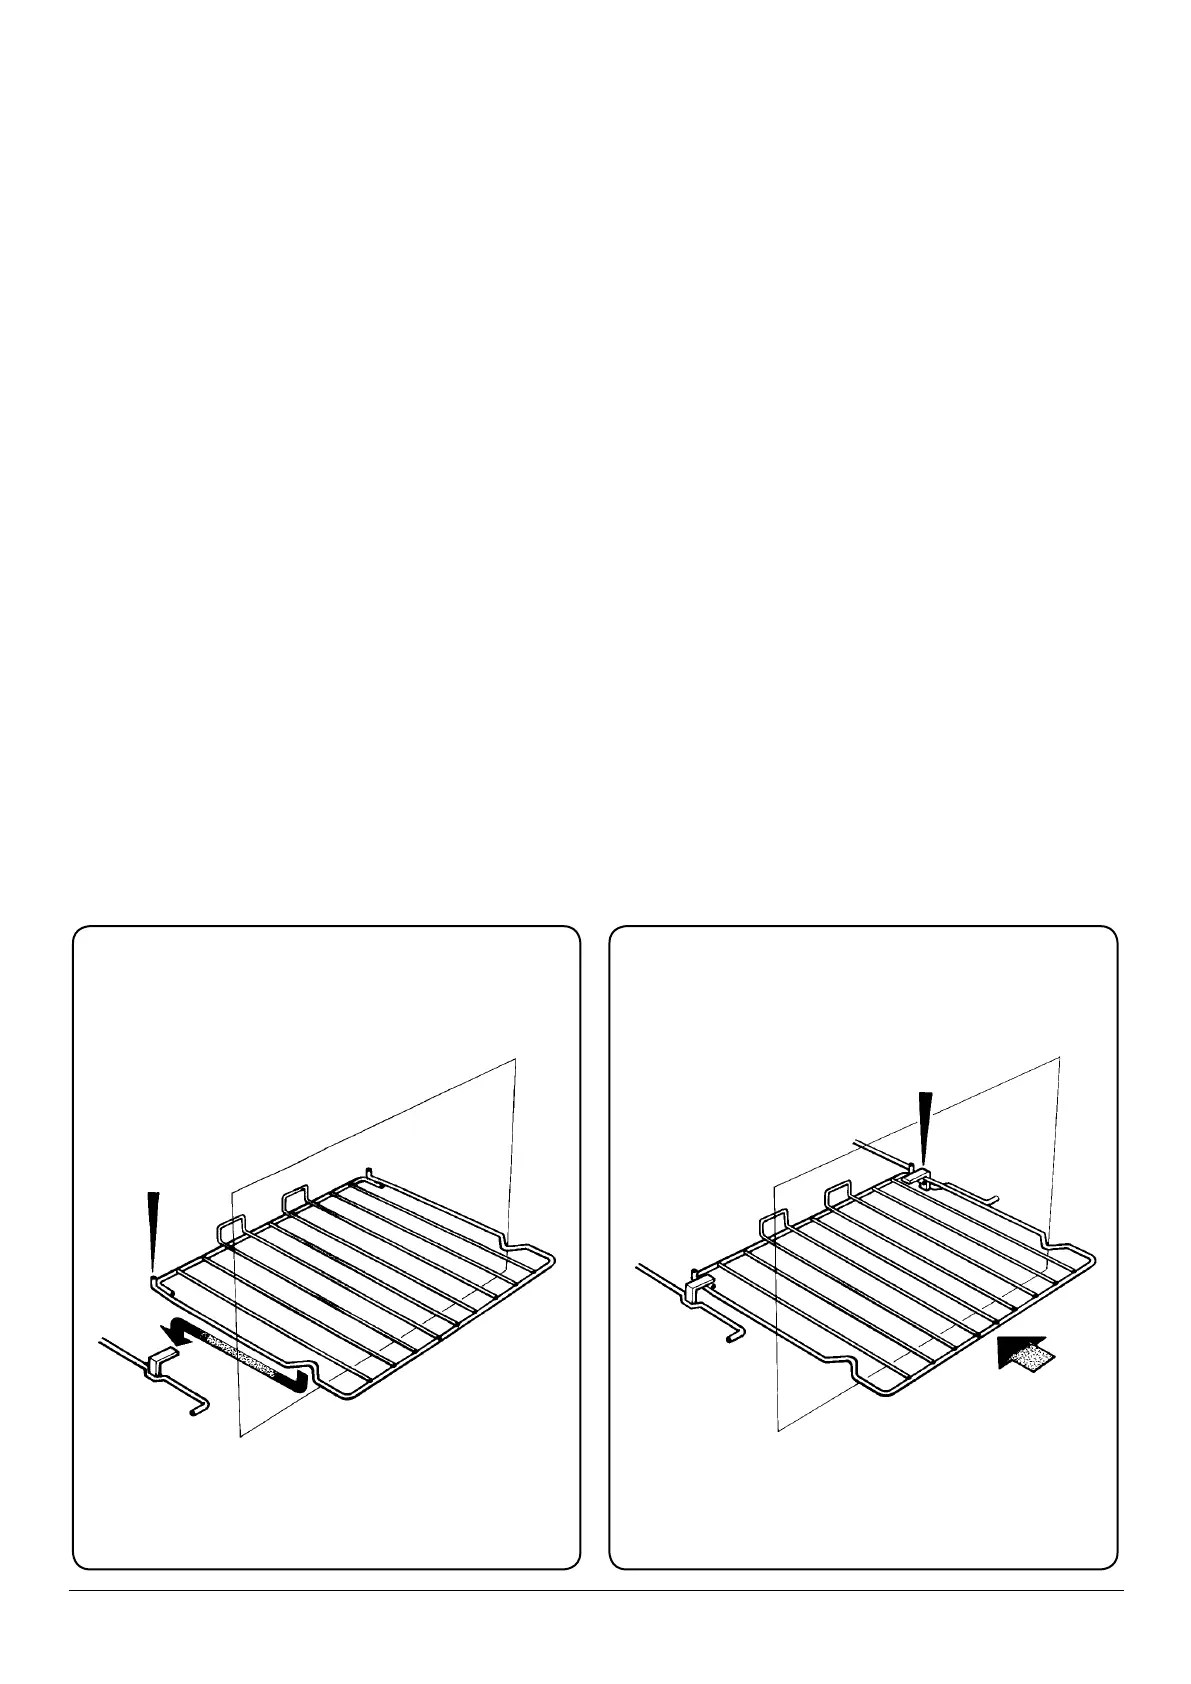
Fitting and removal of shelves These shelves are designed to slide out Note: Shelf slides out to stop position.
DESN 511867 DESN 511866
Fig. 4.1 Fig. 4.2
STOP ON SHELF
MUST PROJECT
UPWARDS
SHELF STOP
AND ANTI TILT
BRACKET
General
The shelves are designed to be non-tilt.
To remove a shelf lift clear of the side notches and slide
forward.
To replace a shelf insert into the oven with the short prongs
at the rear, facing upwards. Slide into position above the side
notches then allow to drop down on the runner.
DO NOT place the grid shelf or food on the base of the
ovens. Food will burn on the base of the top oven and air
circulation will be aected in the lower oven.
Pre-heat the ovens at the appropriate settings until the neon
light goes out.
When cooking in both ovens at the same time you may need
to reduce the temperature and cooking times (especially for
baked foods).
For eective heat distribution. leave a gap of no less than
12mm between the dishes and the sides of the oven, to allow
hot air to circulate.
The grill pan supplied is not designed to t in the lower oven.
If you also have an AGA DO NOT use the small roasting tin
provided with the AGA in the Module. Please use utensils
provided and place on the grid shelves.
Condensation
Condensation may form on the cooker. This is quite normal
and nothing to worry about. The condensation forms when
heat and moisture are present, for example during cooking.
Whenever possible try to make sure that food which contains
a lot of moisture for example casseroles are covered. If you
do notice any condensation, wipe it up straight away.