SERVICING - WARNING
Disconnect from electricity and gas before servicing. Check ap pli ance is safe when you have finished.
51
Gas Regulator
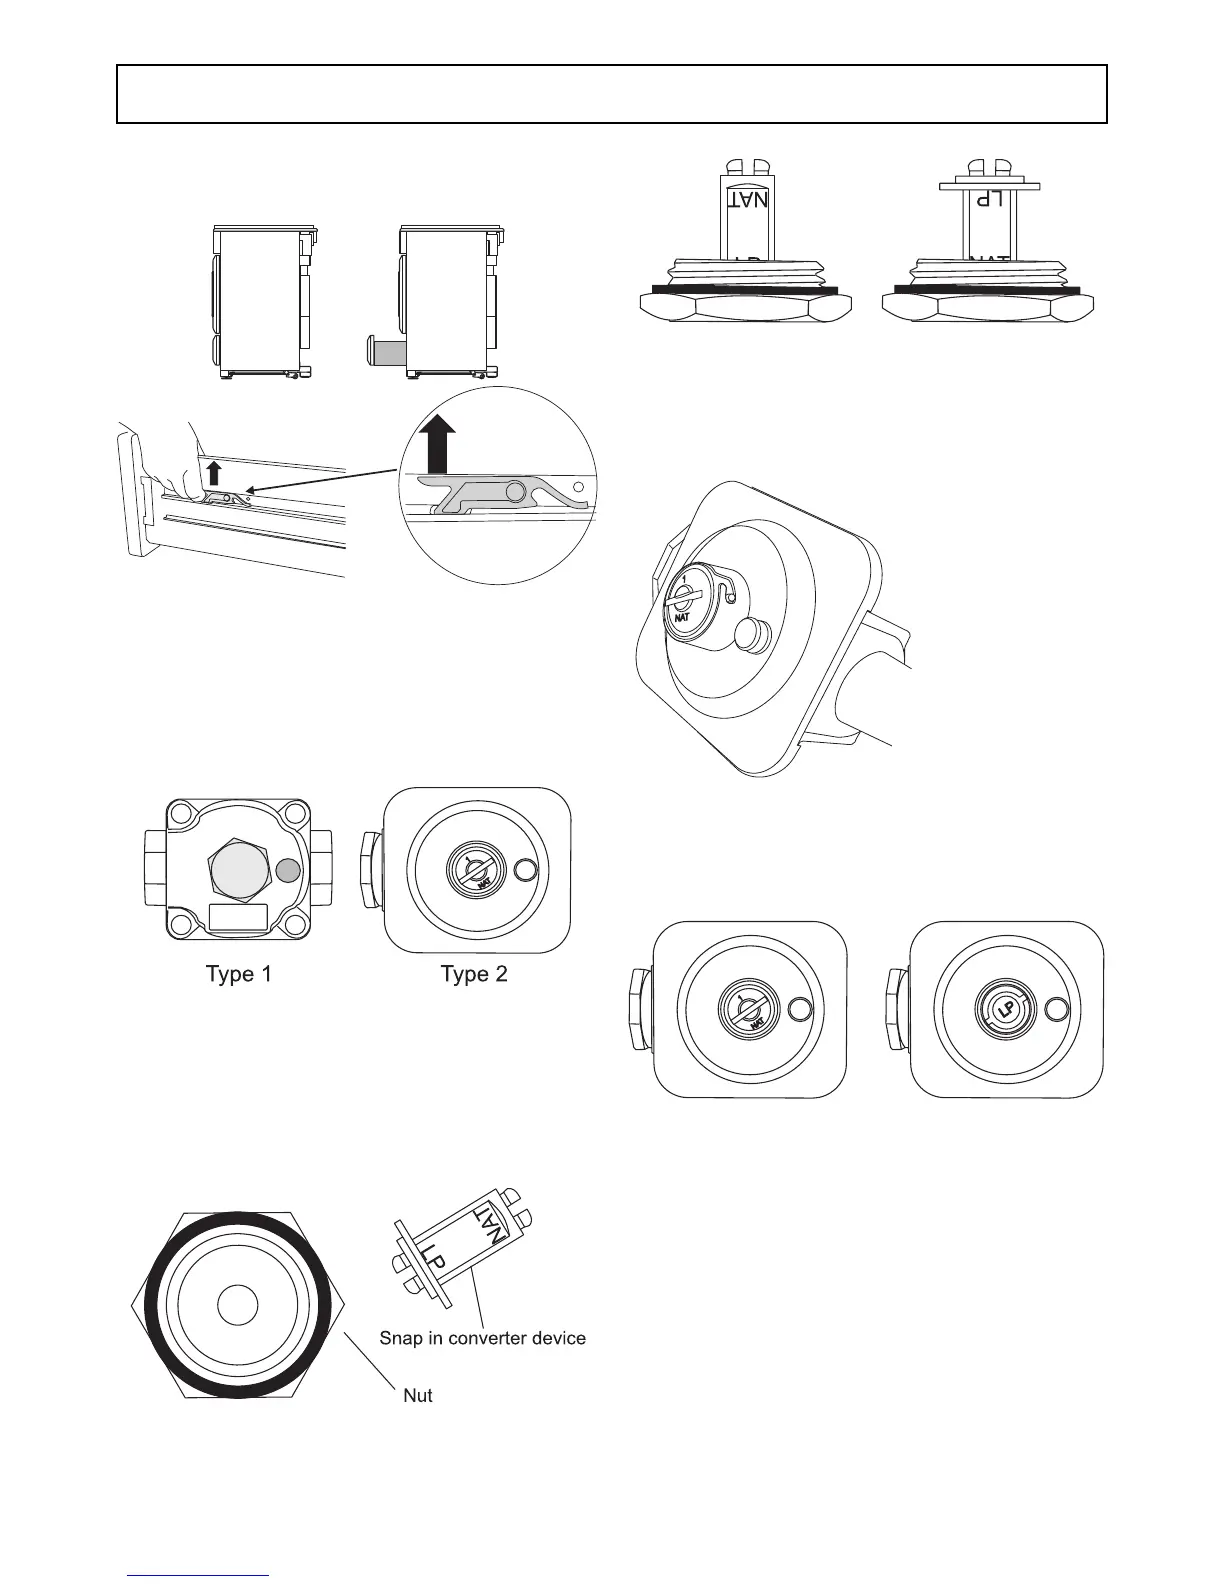
Remove the storage drawer. Pull it out to its
furthest point.
Lift up the ends of the plastic clips (one each
side) to release the catches holding the drawer
to the side runners and at the same time pull the
drawer forward and away from the side runners.
For safety’s sake push the drawer runners back
out of the way.
The regulator is now accessible.
The regulator may be one of two types.
Type 1
Unscrew the hexagonal nut in the front of the
regulator. The regulator nut has a plastic snap
in converter device on the underside, to convert
the regulator snap the device out of the nut and
refi t the other way up.
set for Natural gas set for Propane gas
The snap in converter device is marked to show
which gas it is set for. Make sure the device is
secure in the base of the nut and refi t the nut to
the regulator.
Type 2
The regulator has a
bayonet mounted top
cap.
Using a small coin
press in and turn the
cap to remove it.
Turn the cap over so that the letters “LP” are
visible on base of the hollow in the cap. Refi t
the cap making sure that the bayonet pins are
securely located.
set for Natural gas set for Propane gas
Stick on label
Stick the appropriate label on to the data badge
to indicate the gas the appliance is now set for.
Pressure Testing
Connect the appliance to the gas supply. Check
the appliance is gas sound.
The gas pressure can be measured at the
pressure test point on the appliance side of the
pressure regulator.
 Loading...