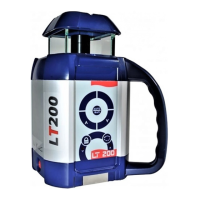
10
Checking & Calibrating X & Y Axes
1) Place the laser on a flat surface or tripod 100 ft. (30 m) away from a
wall. If too bright to see the beam, use a detector with a pole or grade
rod. Position so that -X is facing the wall (this is the side of the laser
with the On/Off key). Use the sighting groove on top of the instrument
for alignment.
2) Hold AUTO/MAN key. While holding, momentarily press the ON key.
Look for:
Y/Z LED flashes, then X LED flashes. Release Auto/Man key.
X LED will blink rapidly, indicating leveling. When the LED blinks
slowly, the laser is ready to verify X axis calibration.
3) To rotate laser beam: Press SCAN key on the remote (or press the
rotation key on the laser keypad).
4) Check X calibration:
a) With detector, mark center of the beam (-X).
b) Rotate laser 180° so +X is facing wall or pole.
c) With detector, mark center of the beam (+X).
d) At 100 ft., the two marks should be no more than 1/4" apart.
(At 30 m, no more than 6 mm apart.) If the marks are close enough,
X axis is within calibration; proceed to Step 6.
5) If not, the laser must be calibrated to bring the beam to the center of
the two X marks. Use the
∧
or
∨
keys on the remote (< or > on the
laser keypad) to move beam up or down to the calibration target.
Note: With the arrow keys, make small inputs: one click, two clicks, three clicks,
etc. Do NOT hold key down.
6) After calibrating X, check Y. Rotate laser 90° degrees so that -Y is facing
the wall (this is the side of the laser with the keypad).
7) Select the Y axis by pressing the double arrow key (>>
l
)
on the remote
(or the HI key on the laser keypad).
Look for:
Y/Z LED blinking rapidly, indicating leveling. When the LED blinks
slowly, the laser is ready to verify Y axis calibration.