Chapter 4 Assembly Level Troubleshooting 85
3. If all voltages are good, the power supply assembly is good.
4. If a voltage is high, the Inguard Power Supply (A4) assembly is
defective. Go to the Assemblies Removal/Installation Procedures in
Chapter 3 of this manual to replace the assembly.
5. If a voltage is low, other assemblies in the inguard may be loading
down the power supply. Continue with the next step.
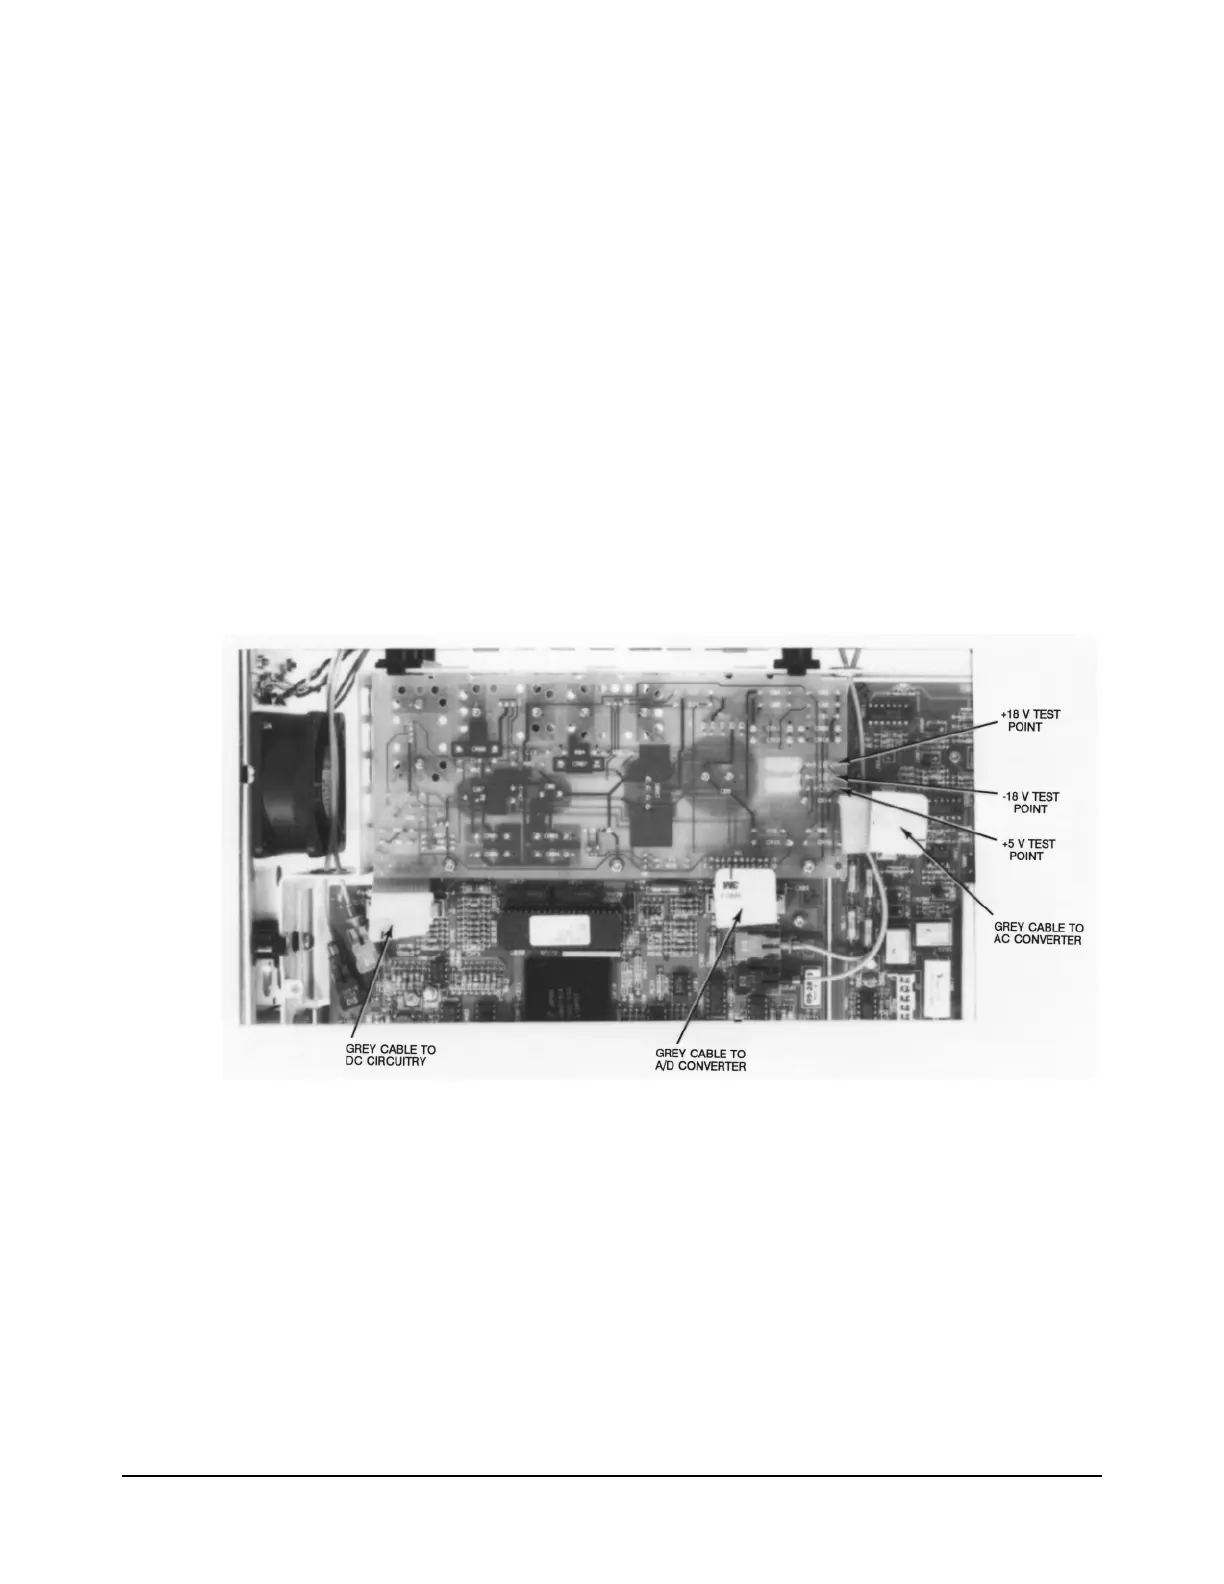
6. Refer to Figure 30 to locate the grey 20-pin cable that connects the
Inguard Power Supply (A4) assembly to the DC Circuitry (A1)
assembly. Unplug the cable at the power supply assembly.
7. If the power supply voltage that was low is now good, the DC
Circuitry (A1) assembly is defective. Go to the Assemblies
Removal/Installation Procedures in Chapter 3 of this manual to
replace the assembly.
Figure 30. Inguard Power Supply
8. If the power supply voltage is still low, locate the grey 20-pin cable
that connects the Inguard power Supply (A4) assembly to the AC
Converter (A2) assembly. Unplug the cable at the power supply
assembly.
9. If the power supply voltage is now good, the AC Converter (A2)
assembly is defective. Go to the Assemblies Removal/Installation
Procedures in Chapter 3 of this manual to replace the assembly.
10. If the power supply voltage is still low, locate the grey 20 pin cable

 Loading...


