2 Getting Started
30 N9342C/43C/44C User’s Guide
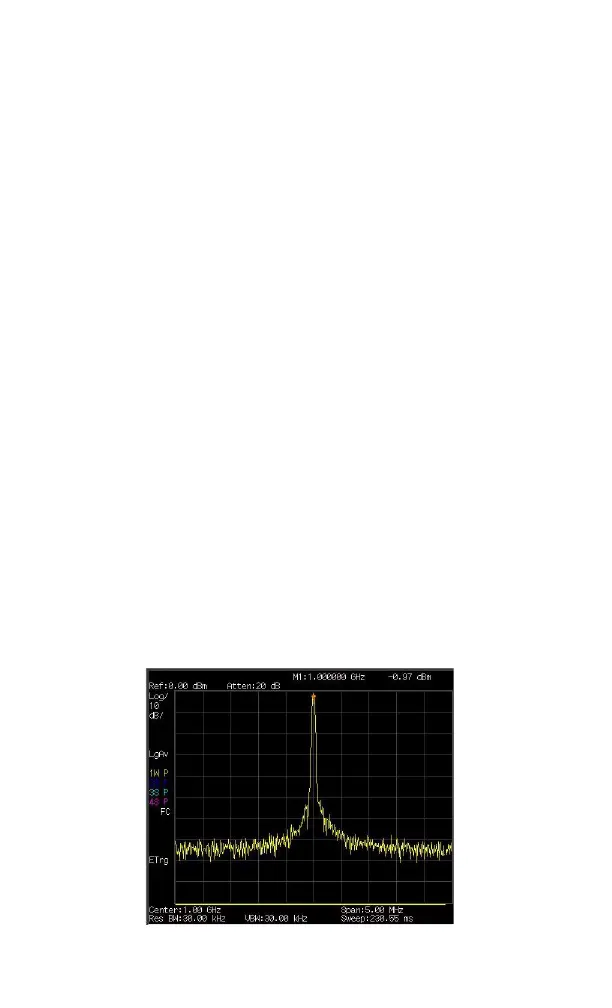
Viewing a Signal on the Analyzer
1 Use a signal generator to generate a CW signal
of 1.0 GHz, at a power level of 0.0 dBm.
2 Press [System] > {PwrOn/Off Preset} > {Preset Type}
and select DFT to toggle the preset setting to the
factory- defined status.
3 Press the green [Preset] key to restore the
analyzer to its factory- defined setting.
4 Connect the generator’s RF OUT connector to the
analyzer’s RF IN connector.
5 Press [Freq] > 1 > {GHz} to set the analyzer center
frequency to 1 GHz.
6 Press [Span] > 5 > {MHz} to set the analyzer
frequency span to 5 MHz.
7 Press [Peak] to place a marker (M1) at the high-
est peak (1 GHz) on the display.
The Marker amplitude and frequency values appear
in the function block and in the upper- right corner
of the screen.
Use the front- panel knob, arrow keys, or the
softkeys in the Peak Search menu to move the
marker and show the value of both frequency and
amplitude displayed on the screen.
Figure 2-1 View a signal (1 GHz, 0 dBm)
 Loading...


