- 21 -
6-2
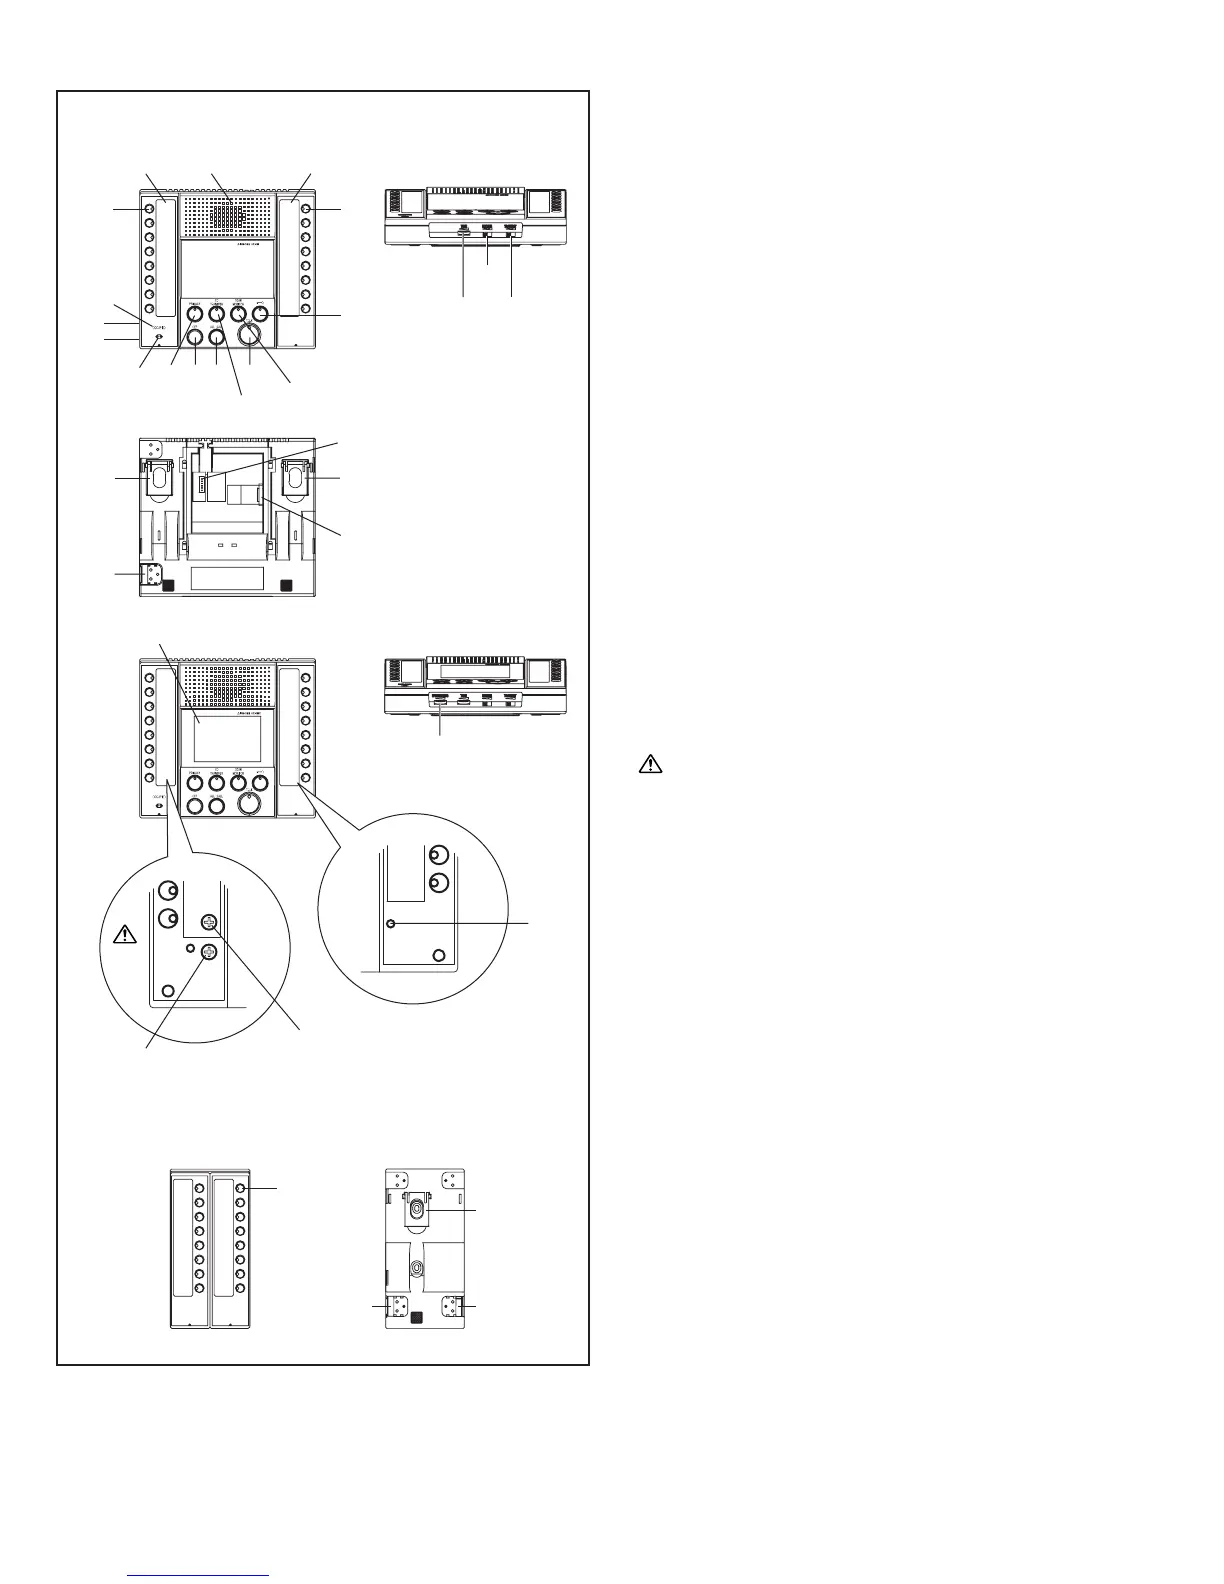
Names (Master station)
[1] Individual door station selector button (w/LED)
[2] Individual master station selector button (w/LED)
[3] Door release button (w/LED)
[4] Scan monitor button (w/LED)
[5] CO transfer button (w/LED)
[6] Privacy button (w/LED)
[7] TALK button (w/LED)
[8] ALL CALL button
[9] OFF button
[10] Occupied LED
[11] Speaker
[12] Microphone
[13] 3.5 inch color LCD monitor
[14] Receive volume control switch (low, medium, high)
[15] Transmit volume control switch (low, medium, high)
[16] Tone volume control
[17] LCD brightness control
[18] Headset receiver jack
[19] Headset microphone jack
[20] Master station directory card and cover
[21] Door station directory card and cover
[22] Desktop stand
[23] Headset receiver volume control
[24] Headset microphone volume control
[25] Reset switch
[26] Connector (RJ45) for control unit
[27] Optional connector
[28] Connector for add-on selector or master station
The headset receiver volume control and headset microphone
volume control under the master station directory card are set
at the factory. Do not adjust.
∗ If normal calling and communicating can not be made, press
the reset switch with the tip of a ballpoint pen or pin.
∗ Fill-in name on directory card
a. Push the directory card cover up from the bottom and bend it to
remove.
b. Take out the directory card cover and fill-in name on the
directory card.
c. Put the directory card cover back in place.
AX-8M / 8MV
AX-16SW
[13]
[22]
[27]
[26]
[4]
[11]
[2]
[10]
[5]
[6]
[12]
[3]
[9] [8] [7]
[21][20]
[1]
[1]
[18]
[19]
[22]
[28]
[14]
[15]
[17]
[16]
[23]
[24]
[25]
[22]
[28][28]