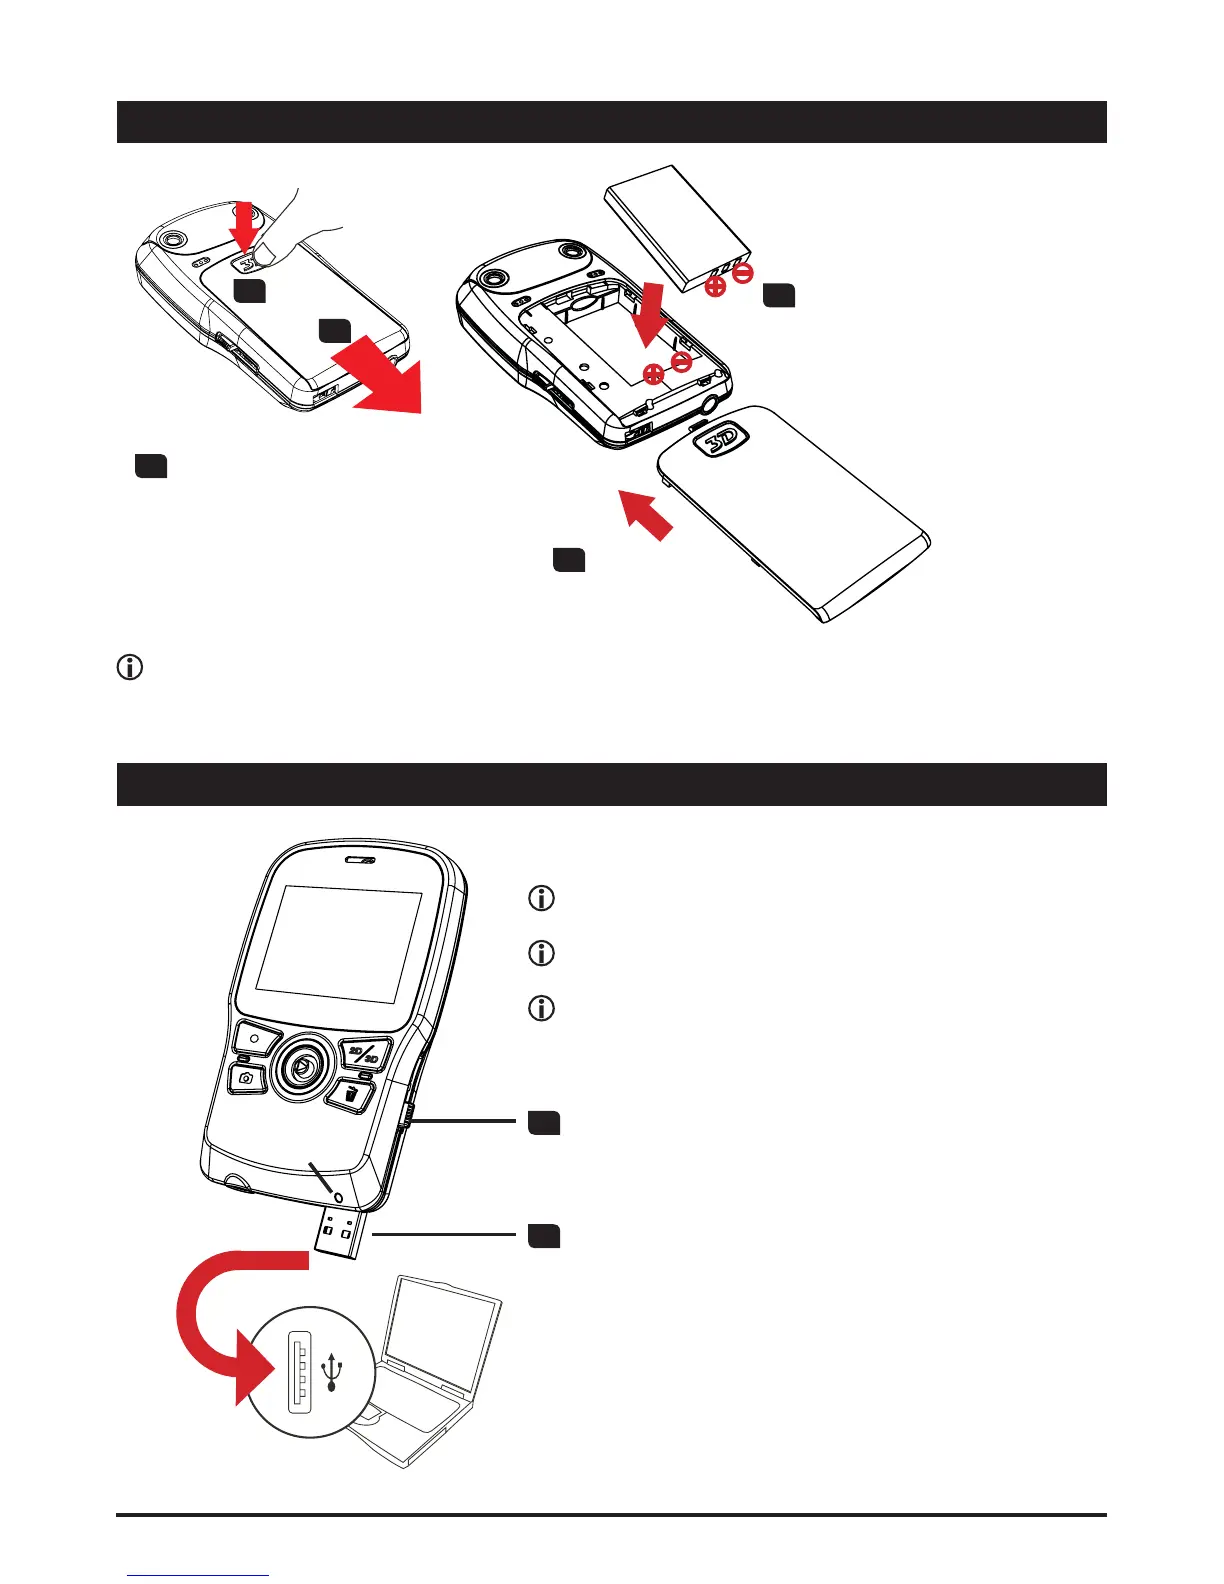
2
Loading the battery
1
Press the “3D” mark and
then, while pressing,
pull the battery cover to
remove it.
2
Place the battery into
the compartment. Align
the + and - metallic ends
carefully.
3
Replace the
battery cover.
Charging the battery
1
Slide the USB switch downward
to reveal the USB connector.
2
Connect the USB connector to a USB port of
a powered PC and the charge will begin. Use
an extension cable if necessary.
The LED light turns amber when the charge is
in progress. After the charge is complete, the
LED light will turn green.
Before charge:
3RZHURIIWKHXQLW¿UVWDQGPDNHVXUHWKH/LLRQ
battery is installed.
Make sure your PC is powered on during the
charge.
It is recommended to charge the battery for at
OHDVWKRXUVEHIRUHWKH¿UVWWLPHXVDJH
LED light
Note that the + and - metallic contacts must be aligned with the corresponding contacts
in the compartment.
1.1
1.2