Installation Data
Re-Orientation To Vertical Discharge
1 Remove the xings securing the unit to the pallet.
2 In line with horizontal discharge lifting instructions, lift the unit suciently to gain access to the lower leg xings.
3 Reposition and secure the lower 2 legs to the corner of the unit using the xings and hole positions provided to
both faces. Note, model sizes CR80 & CR105 have an additional mid support leg, this should also be adjusted and
secured.
4 Lower and rest the unit down to oor and reposition and secure the upper legs as described in Step 3.
5 In line with vertical discharge lifting instructions lift the unit slowly into vertical orientation.
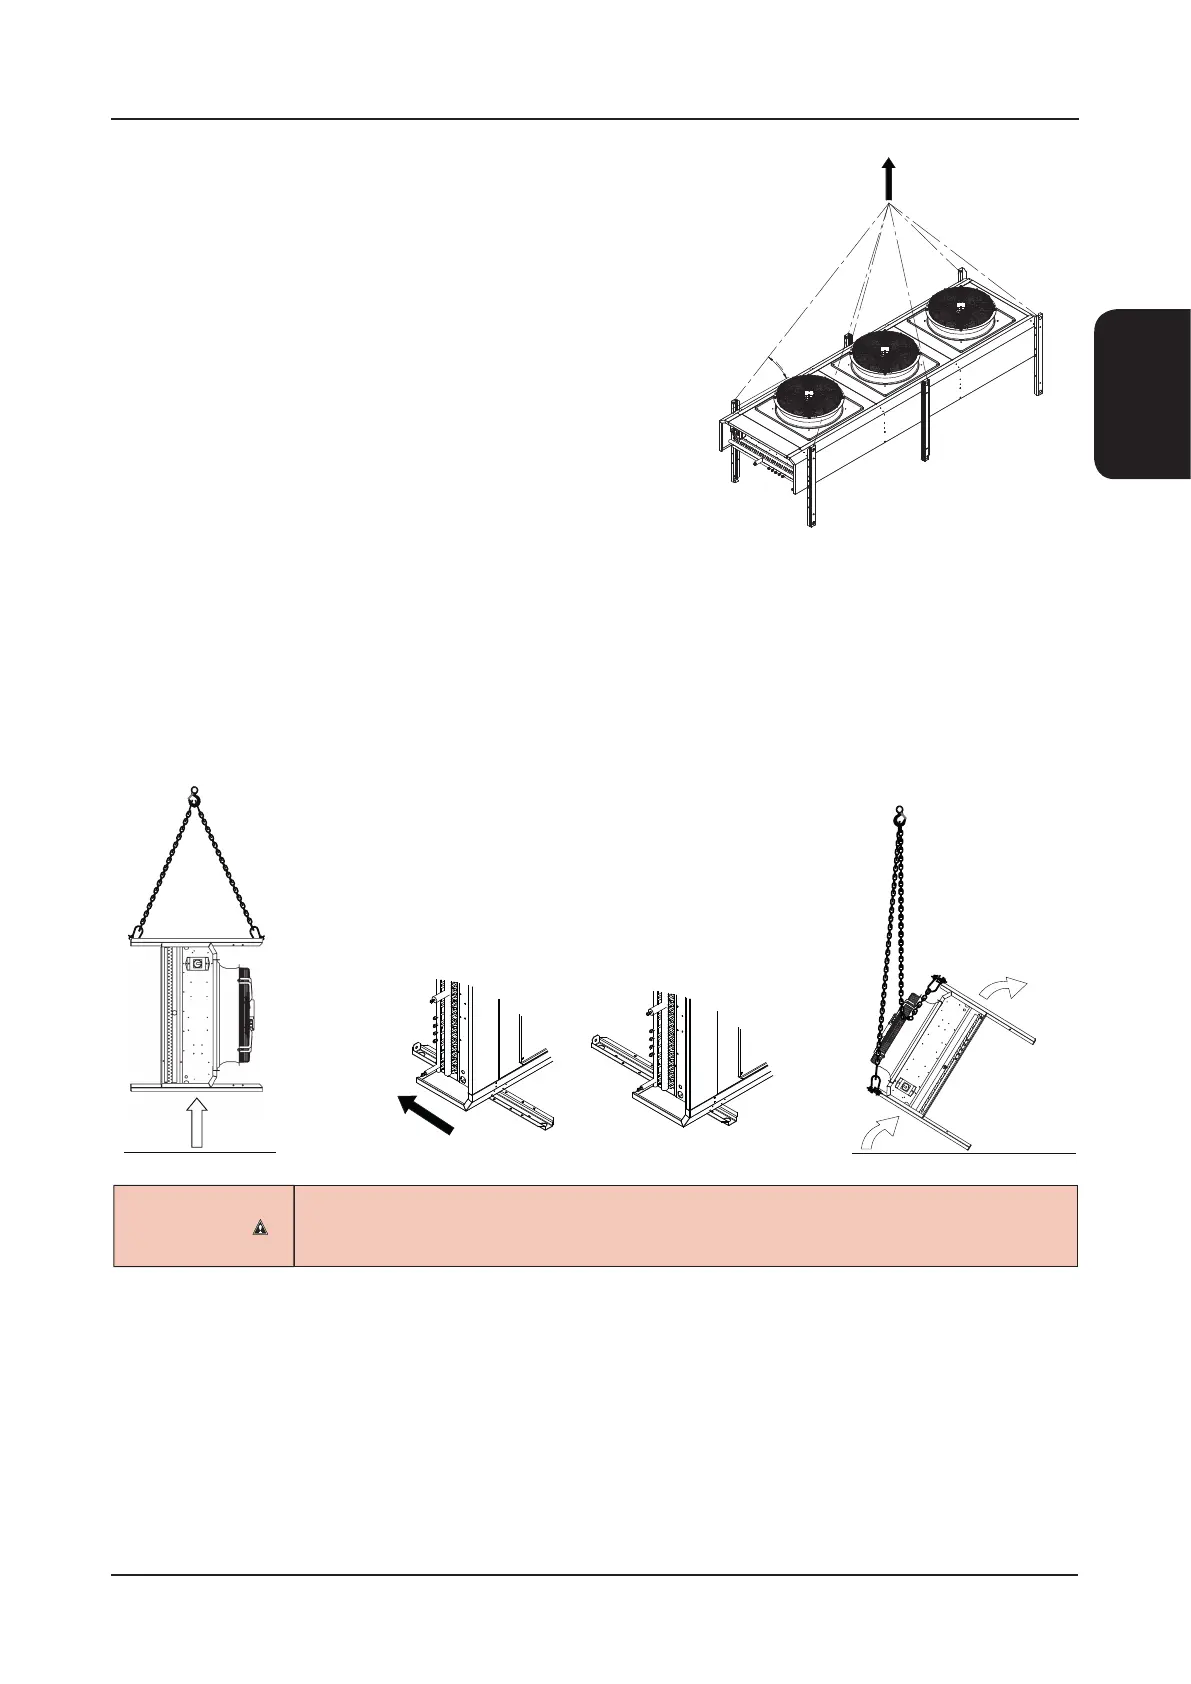
Vertical Air Discharge
Use lifting eyes attached to individual slings/chains (supplied by others)
and attach 1 to the top of every leg using the holes provided as illustrated.
Maximum of 8 slings/chains.
It is strictly prohibited to use the connections, which are delicate parts of the Coil, as anchoring
points when lifting or handling the unit. This would cause serious damage to the Coil and serious
risks for the safety of persons and goods.
CR12 - CR165 50/60HzCONDENSERS
13
Condenser Technical Manual 6666879 V2_02_2020
Installation