Remote Control
Signal Receiver
Aim the remote
control towards
this spot on the PDP.
Power Indicator
Power Off : LED Red
Power On (Timer On) : LED Green
Power On (Timer Off) : LED Off
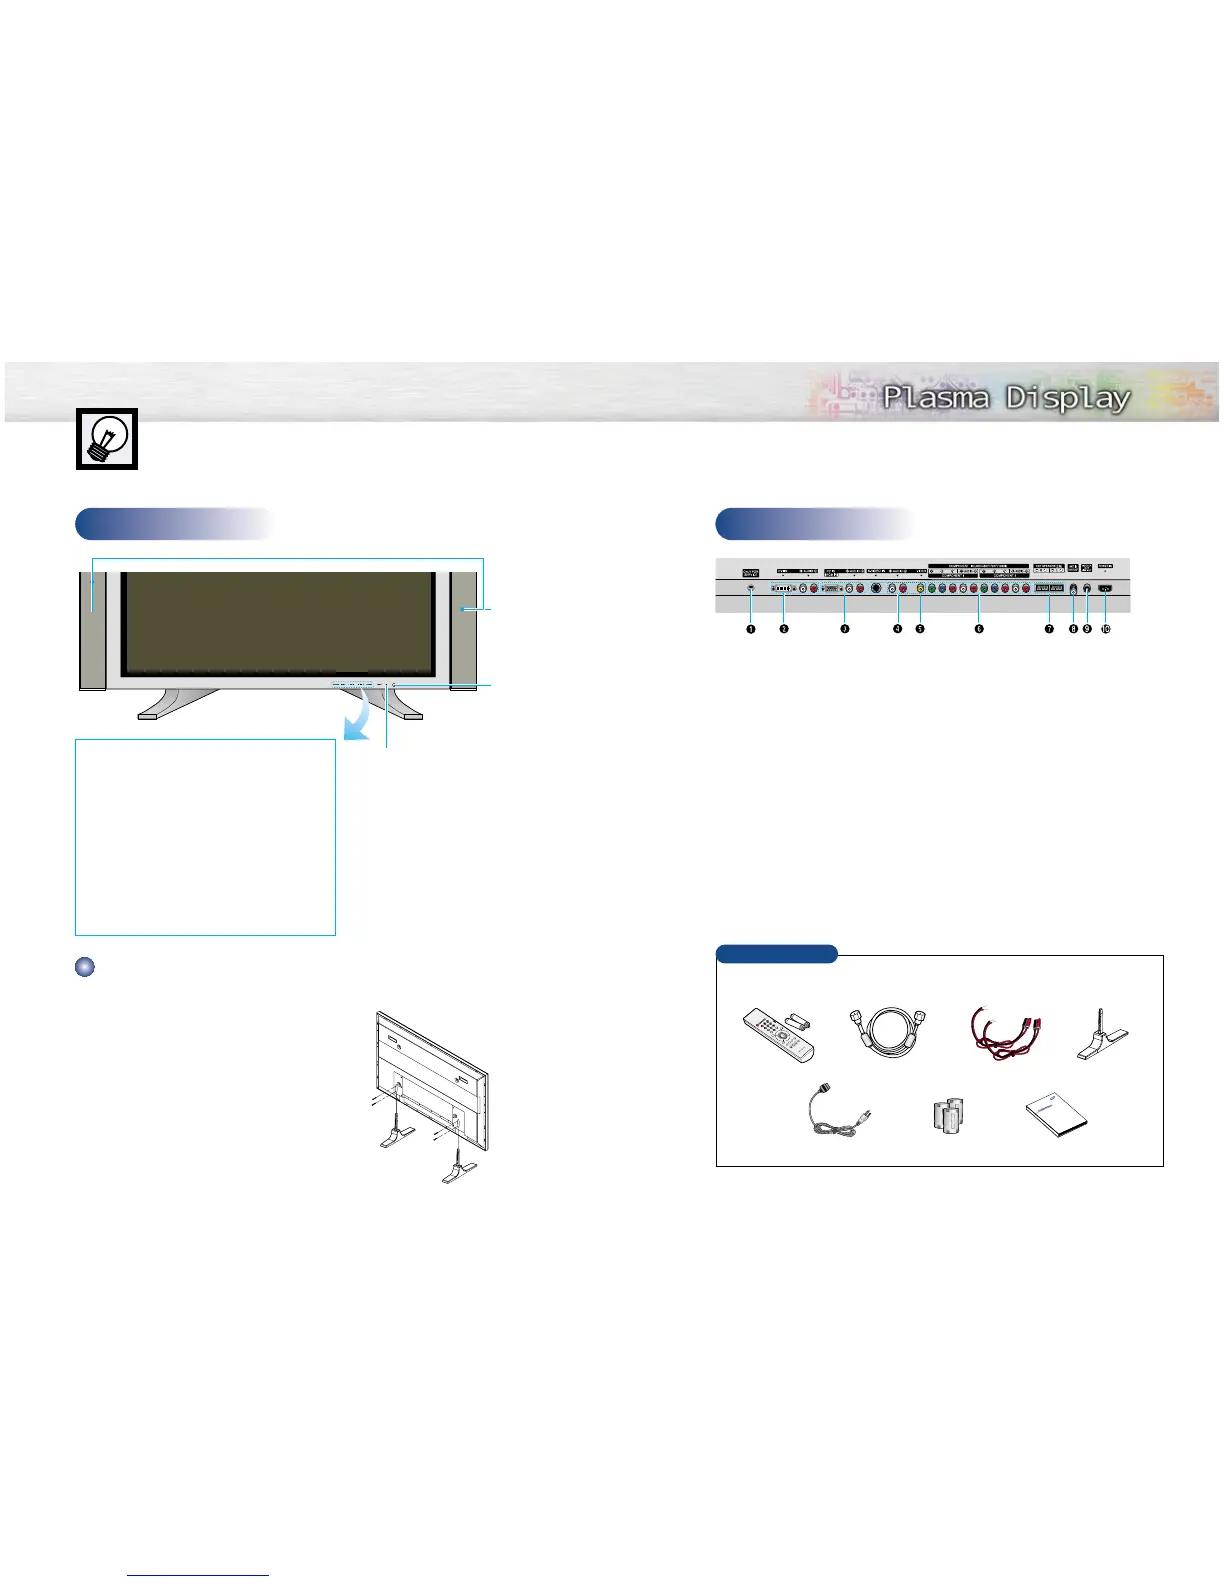
Front Panel
11
Your New Plasma Display Panel
10
Rear Panel
Checking Accessories
Remote Control/AAA Batteries
Antenna Cable Speaker Cables
Power Cord Owner’s Instructions
ŒService jack
For service only.
´DVI Input jacks
Receives the digital video/audio signals from a
set top box or PC.
ˇPC(RGB) Input jacks(15pin)
Connect to the video/audio output jacks on
your PC.
¨S-Video Input jacks
Connect S-Video/audio signals from external
sources such VCRs or DVD players.
ˆVideo Input jacks
Connect video/audio signals from external
sources such VCRs or DVD players.
ØComponent Video/Audio Input jacks
(Y/P
b
/P
r
/Audio L/Audio R)
Connect to the audio and component output
jacks of a DVD player or Set-Top Box.
∏External Speaker Out jacks
Connect external speakers.
”Antenna jack
Connect to antenna.
’Sub-woofer speaker output jack
Connect to the Sub-woofer speaker jack.
˝Power Input jack
Connect the supplied power cord.
Speakers
(optional)
SOURCE button
Press to display all of the available video sources
(ie., Video, S-Video, Component1, Component2, PC ).
MENU button
Displays the main on-screen menu.
VOL(+,-) button
Press to increase or decrease the volume. Also used
to select or adjust items on the on-screen menu.
CH(▼,▲) button
Press CH▲ or CH▼ to change Channels.
Also
used to move up or down in the On-screen menu.
POWER button
Press to turn the PDP on and off.
Stand-Base
(2EA)
Ferrite Cores(3EA)
Once you have unpacked your PDP, check to make sure that you have all the parts shown here.
If any piece is missing or broken, call your dealer.
Assembling the Stand-Base
Fit the Stand-Base into the guide hole on the bottom of the monitor and tighten the left and
right sides using four screws for each side.
Two or more peple should carry the PDP.
Never lay the PDP on the floor because of possible damage
to the screen. Always store the PDP upright.