MicrowaveradiorelaylinkZENITH80
31/52 1.2
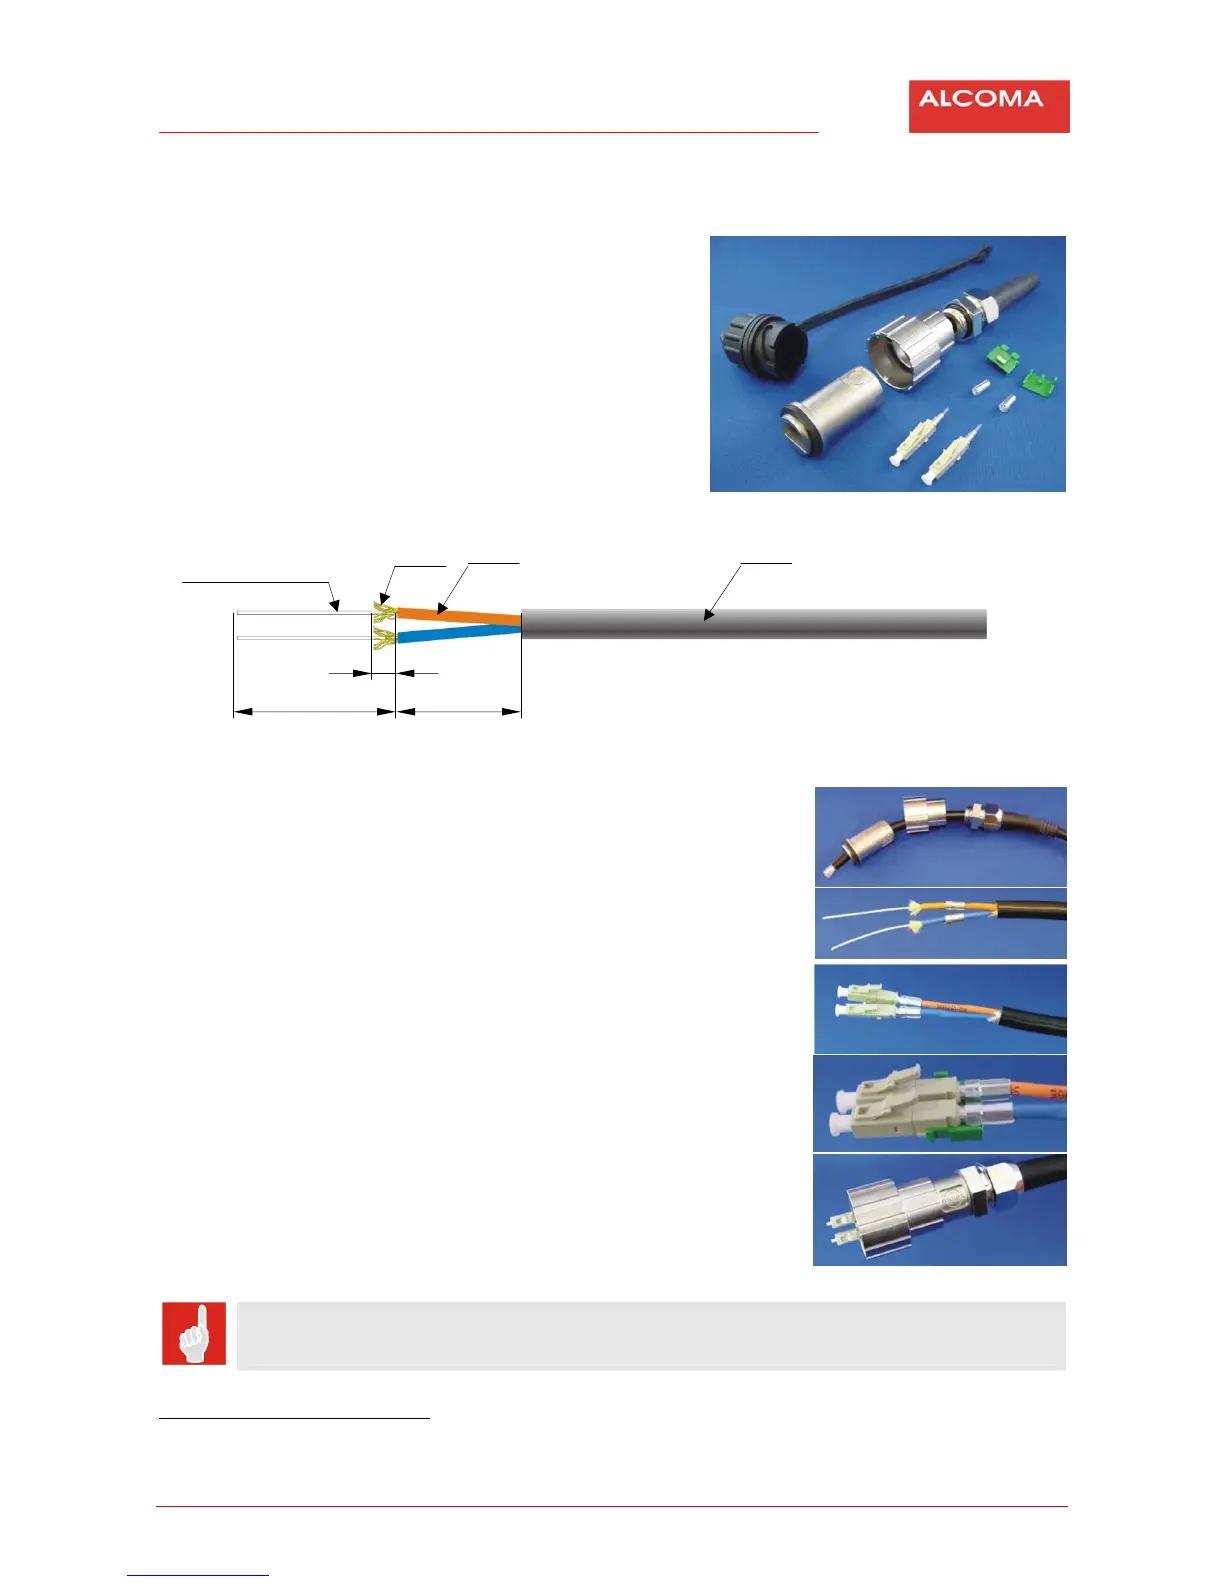
3.12 INSTALLATIONOFOPTICALCONNECTORMOLEX106059
3.12.1 Packagecontent
1. Dustcover
2. Connectorca se
3. Bayonetnut
4. Securingcablenut
5. LC3mmconnectorbodywithinjectionpipe
forglue2x
6. LCcrimpring2x
7. Duplexjunction(upperandlower)
3.12.2 Opticalcablepreparation
3.12.3 Connectorassembliing
1. Slipsecuringcablenut,bayonetnuandconnector
casetothecable.
2. Prepareopticalcableaccordingtothesketchabove.
3. Slipcrimpring(1ringto1fibre).
4. Injectgluethoughthepipetotheconnectorcase
2
.
5. Takeouttheinjectionpipe.
6. Applyactivatortoprotectivelayerofthefibre.
7. Sliptheconnectorbodyuptotheopticalfibrecase.
8. Shiftcrimpringoverkevlarandconnectorbodybackend.
Oringisontherightwhenlookingtotheconnectorfrom
theback
andlocksonbodyareorientedupwards.
9. Crimpthering.
10. Cutopticalfibreoverlapupright,clean,
fileandpolishthefibre.
11. Chekwhetherthecutiscleananduprightpolished.
12. Attachupper andlowerjunctiontoLCconnectorbody.
13. Assembliing ofconnector.
The opposite end of the cable must be connectorized in the way that each optical fibre
connectsopticaltransmitterwithopticalreceiver.
2
LOCTITE638glue+activator7649arerecommended
1
2
3
4
5
6
7
900µmprotectivelayer
+opt.cablecore
kevlar Ø2,5mmopticalfibrecase Ø7mmoutercablecase
37,4 29
7
1
2‐3
4‐12
13
14