20
(4.3) Recording
T
o record:
1. Press the M
ode button so that Normal Mode (Kit, Voice, Song) is active.
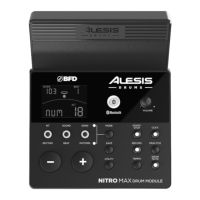
2. Press R
ecord. The button's LED will flash and the metronome will turn on
automatically. This means the module is record-armed.
3. To start recording, press Start/Stop, or hit any pad. The Record LED will light
solid. (To cancel recording instead, press R
ecord again.)
4. To stop recording, press S
tart/Stop, or press Record. The Record LED will turn
o.
5. To play the recording, press P
lay/Practice. Press it again to stop playback.
N
otes:
• In Learning Mode when Start/Stop is pressed, your performances are
automatically recorded.
• If F
UL appears on the display, it means the module's memory became full while
recording. You can clear/overwrite the memory by simply making a new
recording.
To record your performance with a Song:
1. Adjust the Song number (S
NG) (as described in the To adjust the recording
s
ettings section below).
2. Start recording (as described in the T
o record section above).
3. To play the recording, press P
lay/Practice. Press it again to stop playback.
T
o adjust the recording settings:
1. Press R
ecord. The button's LED will flash and the metronome will turn on
automatically. This means the module is record-armed.
2. Press M
ode until the desired setting appears on the display:
• S
NG (Song number): The song that will play in the background.
• K
IT (Kit): The drum kit that will be recorded.
• B
PM (Tempo): The recording tempo.
• S
IG (Time signature): The recording time signature.
• I
NT (Interval): The subdivisions that the metronome will play.
• D
RM (Drum mute): When not set to a song (---) or when set to Song 61-80,
this setting is disabled because an actual song is not selected (Songs 61-80
are actually just samples that can be assigned to the pads). When set to
Song 1-60, you can set this to O
N or OFF to turn the original drum part on or
o. Alternatively, you can press the D
rum Mute button.
• P
RC (Pre-count): When set to ON, there will be a one-measure count-in
before the recording starts. When set to O
FF, the recording will start
immediately after you press S
tart/Stop or hit a pad.
3. Use the –
and + buttons to adjust the value. The settings will be automatically
saved.