6
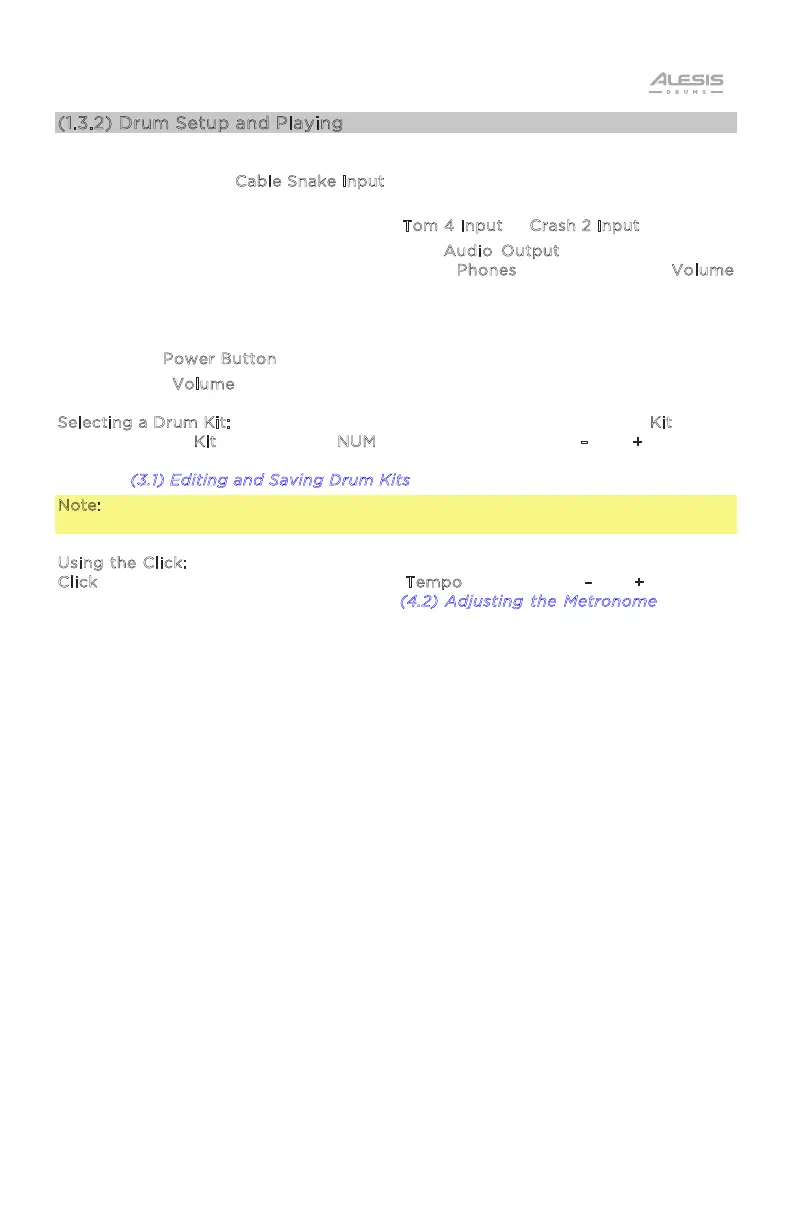
(1.3.2) Drum Setup and Playing
1. Connect your electronic drum kit's pads to the cable snake, then connect the
cable snake to the C
able Snake Input on the module's bottom panel.
2. Optional: If you have any additional pads (e.g., an extra tom, an extra crash
cymbal), connect them to the module's T
om 4 Input or Crash 2 Input.
3. Connect speakers (sold separately) to the A
udio Output and/or connect 1/8"
stereo headphones (sold separately) to the P
hones output. Turn the Volume
knob all the way down (counterclockwise).
4. Connect the module to a power source, using the included power adapter (9V
DC, 500 mA, center positive).
5. Press the P
ower Button to turn the module on.
6. Adjust the V
olume knob to an appropriate level and play some drums!
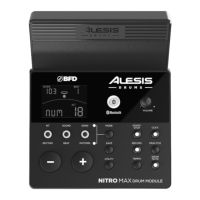
S
electing a Drum Kit: After powering on the module, or after pressing the Kit button,
you will see the K
it indicator and NUM on the display. Use the – and + buttons to
select a drum kit, and start playing! Kits 01-32 are Preset Kits. Kits 33 - 48 are User
Kits (see (
3.1) Editing and Saving Drum Kits for more information).
Note: The top Mode LED (Normal Mode), and KIT button LED must be lit in order to
cycle through available Kits.
U
sing the Click: You can turn the click track (metronome) on or o by pressing the
C
lick button. Adjust its tempo by pressing Tempo and using the – and + buttons to
set the new BPM (beats per minute). See (
4.2) Adjusting the Metronome for more
information about metronome features.