Chapter 4 - Record and Playback Basics
ADAT LX20 Reference Manual 33
CHAPTER 4
RECORD AND PLAYBACK
BASICS
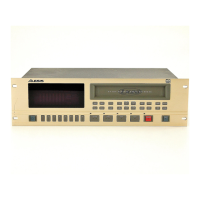
UNDERSTANDING THE TIME COUNTER
Before recording, familiarize yourself with the TIME counter in the display’s top
left corner. This counter shows the time reference “stamped” on a formatted tape as
hours:minutes: seconds.hundredths-of-a-second.
ABS
0H 15M 48S 21
CHANGE DISPLAY FORMAT
You can change the display’s last two digits to show Frames Per Second (FPS; one
frame is 1/30th of a second) instead of 100ths of a second. This is useful for matching
the display on the Alesis BRC.
To change the display format:
❿ Press and hold the SET LOCATE button.
❡ While holding the SET LOCATE button, press the Track 4 RECORD ENABLE
button.
① Each press of the Track 4 RECORD ENABLE button toggles between the display
showing dISP FPS (for frames per second) or dISP rEg. When set to FPS, a small
F lights to the right of the time display.
SET THE INPUT MODE FOR ANALOG AUDIO
The LX20 lets you choose one of three Input Modes for the analog audio inputs:
2-Input Mode Input 1 feeds Tracks 1, 3, 5 and 7.
Input 2 feeds Tracks 2, 4 , 6 and 8.
4-Input Mode Input 1 feeds Tracks 1 and 5.
Input 2 feeds Tracks 2 and 6.
Input 3 feeds tracks 3 and 7.
Input 4 feeds tracks 4 and 8.
8-Input Mode Each Input feeds its own track.

 Loading...