21
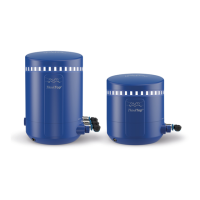
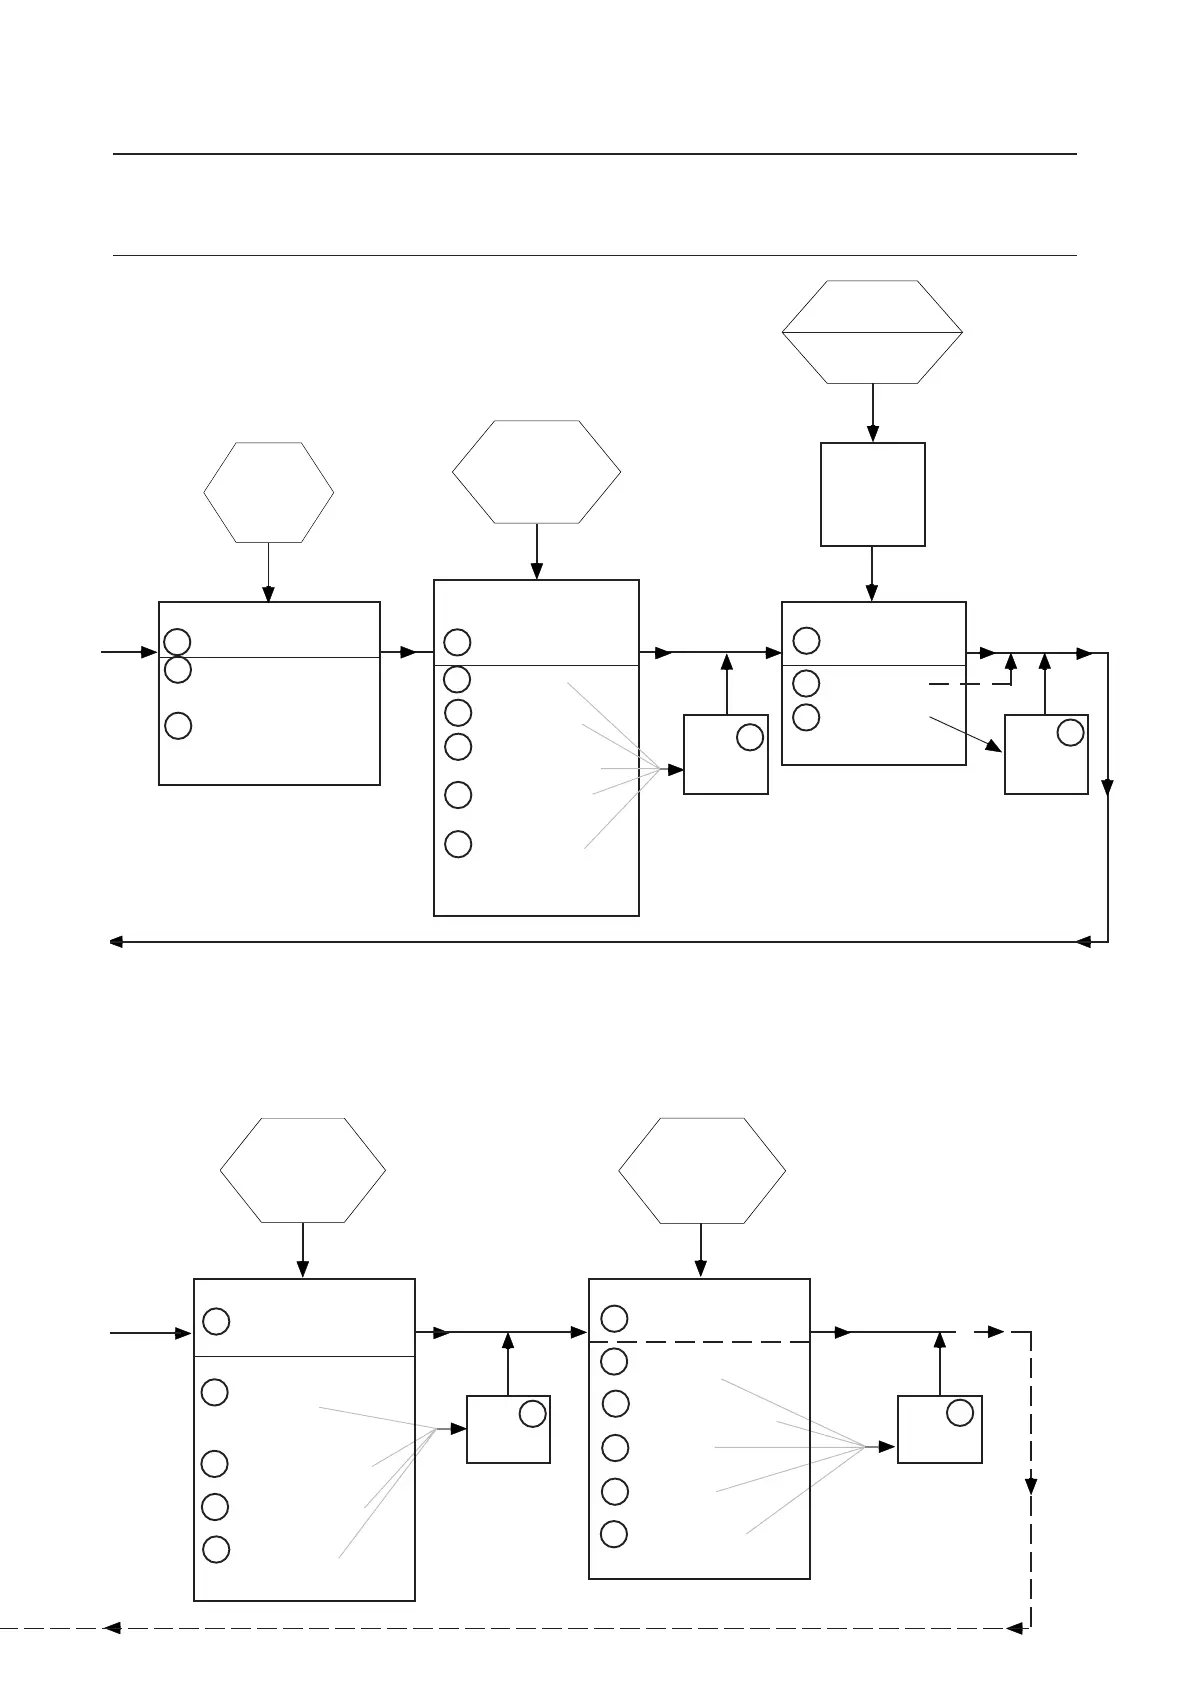
5. Setup diagram 5.2 ThinkTop
®
setup utilising local ‘I’ and’II’ keys
Press IPress I
Press IPress I
Press I
to acceptto accept
to acceptto accept
to accept
selectionselection
selectionselection
selection
Actuate the valveActuate the valve
Actuate the valveActuate the valve
Actuate the valve
toto
toto
to
closed positionclosed position
closed positionclosed position
closed position
Accept SettingsAccept Settings
Accept SettingsAccept Settings
Accept Settings
II
II
I
Restart set-up sequenceRestart set-up sequence
Restart set-up sequenceRestart set-up sequence
Restart set-up sequence
IIII
IIII
II
Save & ExitSave & Exit
Save & ExitSave & Exit
Save & Exit
changes acceptedchanges accepted
changes acceptedchanges accepted
changes accepted
(Set Up/Fault steady, briefly)
IIII
IIII
II
ExitExit
ExitExit
Exit
no changes acceptedno changes accepted
no changes acceptedno changes accepted
no changes accepted
""""
""""
""Hold
for 5 s.
Set V Set V
Set V Set V
Set V
alve Talve T
alve Talve T
alve T
ypeype
ypeype
ype
II
II
I
BypassBypass
BypassBypass
Bypass
Move to next step
IIII
IIII
II
SRC/ARC, Series 700SRC/ARC, Series 700
SRC/ARC, Series 700SRC/ARC, Series 700
SRC/ARC, Series 700
(LED C steady)
II*II*
II*II*
II*
LKB (LKLA-T)LKB (LKLA-T)
LKB (LKLA-T)LKB (LKLA-T)
LKB (LKLA-T)
(LED C, E steady)
II*II*
II*II*
II* Unique
, AMP, AMP
, AMP, AMP
, AMP
, SRC-PV, SRC-PV
, SRC-PV, SRC-PV
, SRC-PV
SMP-SC Spillage-FreeSMP-SC Spillage-Free
SMP-SC Spillage-FreeSMP-SC Spillage-Free
SMP-SC Spillage-Free
(LED C, E, F steady)
II*II*
II*II*
II*
SMP-SC, SMP-TO,SMP-SC, SMP-TO,
SMP-SC, SMP-TO,SMP-SC, SMP-TO,
SMP-SC, SMP-TO,
SMP-BC, SMP-BCA, SBVSMP-BC, SMP-BCA, SBV
SMP-BC, SMP-BCA, SBVSMP-BC, SMP-BCA, SBV
SMP-BC, SMP-BCA, SBV
(LED C, E, F, A steady)
IIII
IIII
II
Disable functionDisable function
Disable functionDisable function
Disable function
(LED C flashing)
All Parameters SetAll Parameters Set
All Parameters SetAll Parameters Set
All Parameters Set
TT
TT
T
o Defaulto Default
o Defaulto Default
o Default
or MH valve,or MH valve,
or MH valve,or MH valve,
or MH valve,
SMP-EC SMP-EC
SMP-EC SMP-EC
SMP-EC
****
****
**
Set Closed PositionSet Closed Position
Set Closed PositionSet Closed Position
Set Closed Position
II
II
I
BypassBypass
BypassBypass
Bypass
Move to next step
IIII
IIII
II
Store PositionStore Position
Store PositionStore Position
Store Position
IIII
IIII
II
Disable functionDisable function
Disable functionDisable function
Disable function
(LED A flashing)
Press IPress I
Press IPress I
Press I
to bypassto bypass
to bypassto bypass
to bypass
move tomove to
move tomove to
move to
next stepnext step
next stepnext step
next step
Set Self AdjustSet Self Adjust
Set Self AdjustSet Self Adjust
Set Self Adjust
I I
I I
I
BypassBypass
BypassBypass
Bypass
Move to next step
SRC/ARC Valves OnlySRC/ARC Valves Only
SRC/ARC Valves OnlySRC/ARC Valves Only
SRC/ARC Valves Only
IIII
IIII
II Associated with closed/
open position
Recommended!Recommended!
Recommended!Recommended!
Recommended!
(LED E, A, B steady)
IIII
IIII
II
Associated with closedAssociated with closed
Associated with closedAssociated with closed
Associated with closed
positionposition
positionposition
position
IIII
IIII
II
Associated with openAssociated with open
Associated with openAssociated with open
Associated with open
positionposition
positionposition
position
IIII
IIII
II
Disable functionDisable function
Disable functionDisable function
Disable function
(LED E flashing)
Press IPress I
Press IPress I
Press I
to acceptto accept
to acceptto accept
to accept
selectionselection
selectionselection
selection
Set-up MaintenanceSet-up Maintenance
Set-up MaintenanceSet-up Maintenance
Set-up Maintenance
I I
I I
I
BypassBypass
BypassBypass
Bypass
Move to next step
IIII
IIII
II
90 days90 days
90 days90 days
90 days
(LED F steady)
II*II*
II*II*
II*
180 days180 days
180 days180 days
180 days
(LED F steady, C flashing)
II*II*
II*II*
II*
270 days270 days
270 days270 days
270 days
(LED F steady, C, E flashing)
II*II*
II*II*
II*
360 days360 days
360 days360 days
360 days
(LED F steady, C, E, A flashing)
IIII
IIII
II
Disable functionDisable function
Disable functionDisable function
Disable function
(LED F flashing)
Set Up/Fault steadySet Up/Fault steady
Set Up/Fault steadySet Up/Fault steady
Set Up/Fault steady
,,
,,
,
Maintenance flashingMaintenance flashing
Maintenance flashingMaintenance flashing
Maintenance flashing
if
maintenance
disabled
Press IPress I
Press IPress I
Press I
to acceptto accept
to acceptto accept
to accept
selectionselection
selectionselection
selection
(LED D flashing)
(Make sure to hold "II" for
at least 5 sec., all LED will
shortly flash)
""""
""""
""Hold
for 5 s.
LED D, A steadyLED D, A steady
LED D, A steadyLED D, A steady
LED D, A steady
if
closed position
enabled
LED D steadyLED D steady
LED D steadyLED D steady
LED D steady,
A flashingA flashing
A flashingA flashing
A flashing
if
closed position
disabled
""""
""""
""Hold
for 5 s.
""""
""""
""Hold
for 5 s.
LED D steadyLED D steady
LED D steadyLED D steady
LED D steady
, E flashing, E flashing
, E flashing, E flashing
, E flashing
if
self adjust
disabled
""""
""""
""Hold
for 5 s.
LED D steadyLED D steady
LED D steadyLED D steady
LED D steady
,,
,,
,
C flashingC flashing
C flashingC flashing
C flashing
if valve type disabled
* Press "II" again for next
valve type (Note LED's)
** seat-lift indication not possible.** seat-lift indication not possible.
** seat-lift indication not possible.** seat-lift indication not possible.
** seat-lift indication not possible.
""""
""""
""Hold
for 5 s.
Step 1Step 1
Step 1Step 1
Step 1
Step 2Step 2
Step 2Step 2
Step 2
Step 3Step 3
Step 3Step 3
Step 3
Step 7Step 7
Step 7Step 7
Step 7
Step 8Step 8
Step 8Step 8
Step 8
See oppositeSee opposite
See oppositeSee opposite
See opposite
pagepage
pagepage
page
See opposite pageSee opposite page
See opposite pageSee opposite page
See opposite page
See oppositeSee opposite
See oppositeSee opposite
See opposite
pagepage
pagepage
page
See opposite pageSee opposite page
See opposite pageSee opposite page
See opposite page
* Press "II" again for next
maintenance interval
(Note LED's) in steps of 3
months, max. up to 18 years.
 Loading...