22 Rockwell Automation Publication 1756-UM001M-EN-P - February 2012
Chapter 1 Install the 1756-L7x Controller
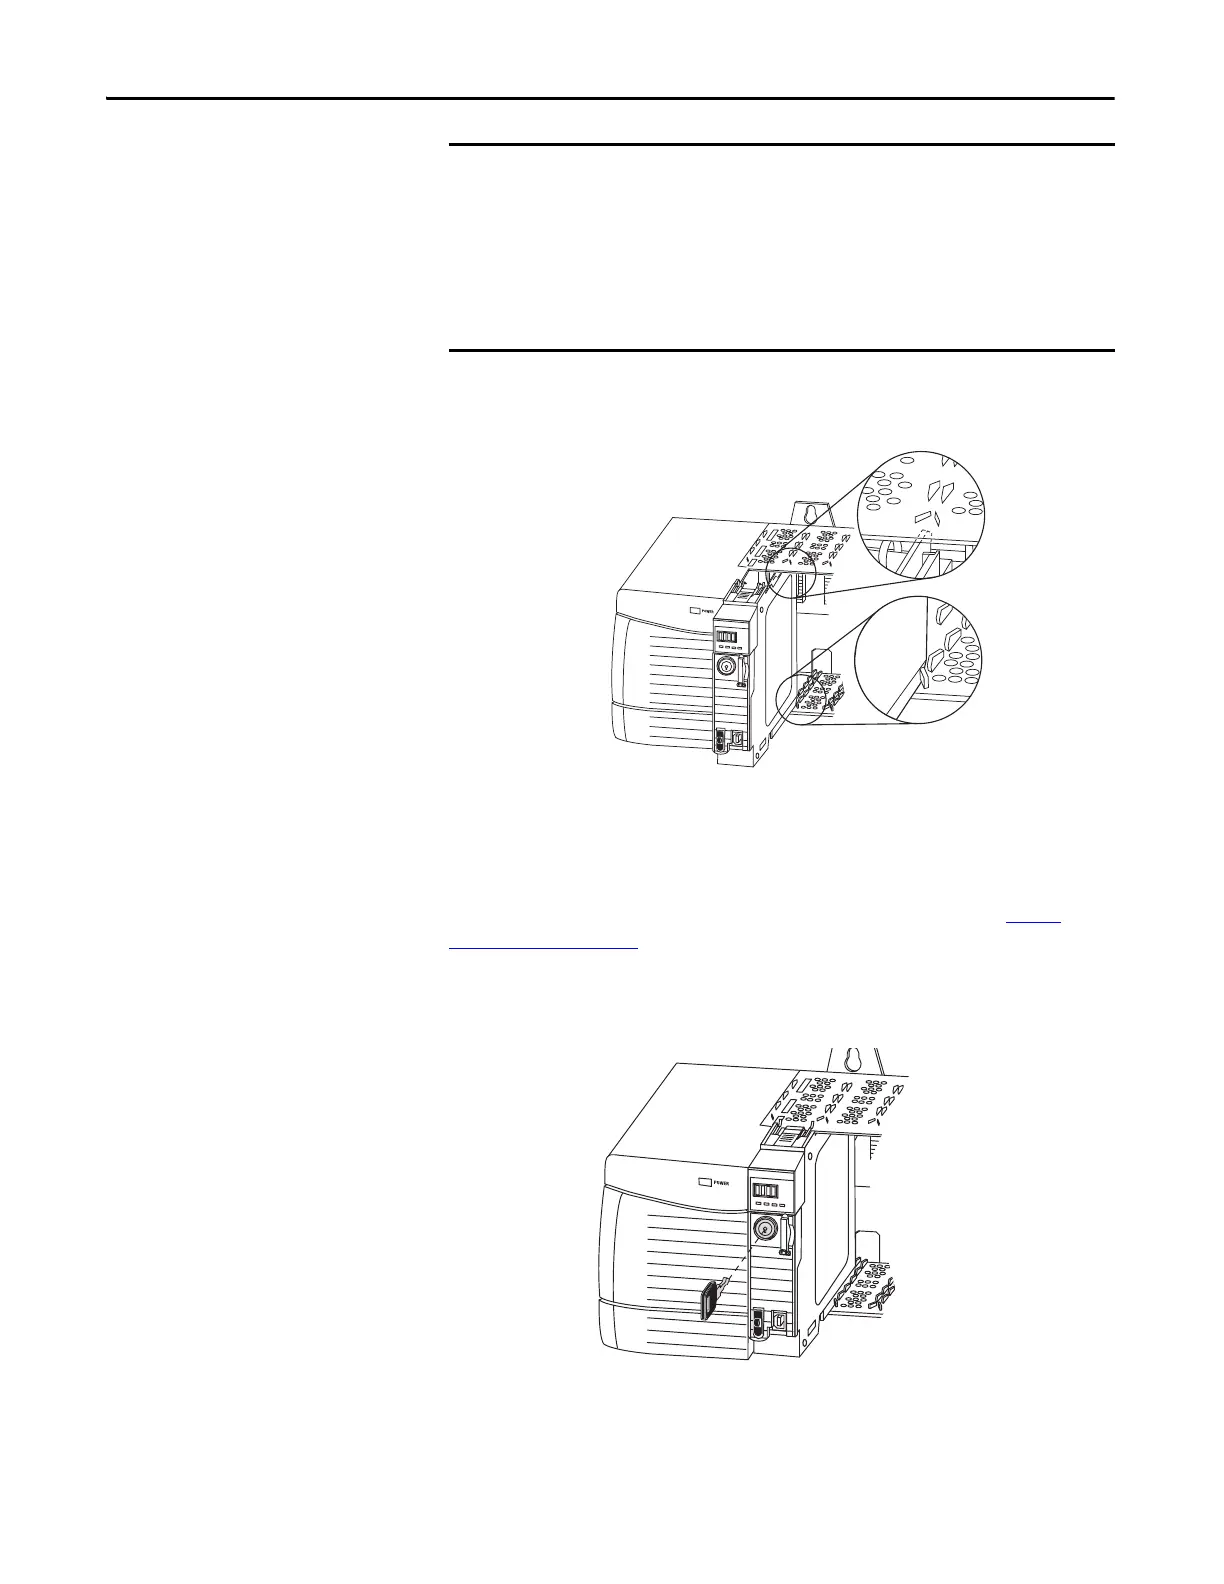
1. Align the circuit board with the top and bottom guides in the chassis.
2. Slide the module into the chassis until it snaps into place.
3. Verify that the controller is flush with the power supply or other installed
modules.
After you have inserted the controller into the chassis, reference the Status
Indicators on page 199 for information about interpreting the status indicators.
Insert the Key
After the controller is installed, insert the key.
The ESM begins charging when one of these actions occurs:
• The controller and ESM are installed into a powered chassis.
• Power is applied to the chassis that contains a controller with the ESM
installed.
• An ESM is installed into a powered controller.
After power is applied, the ESM charges for up to two minutes as indicated by
CHRG or ESM Charging on the status display.
Top Circuit Board
Aligned
Bottom Circuit Board
Aligned
31997-M
 Loading...