M411433 29
Section 5 Service Procedures
To reduce the risk of electric shock, fire, explosion, serious injury or death:
• Disconnect electric power to the tumbler before servicing.
• Close gas shut-off valve to gas tumbler before servicing.
• Close steam valve to steam tumbler before servicing.
• Never start the tumbler with any guards/panels removed.
• Whenever ground wires are removed during servicing, these ground wires must be
reconnected to ensure that the tumbler is properly grounded.
W002
WARNING
© Copyright, Alliance Laundry Systems LLC – DO NOT COPY or TRANSMIT
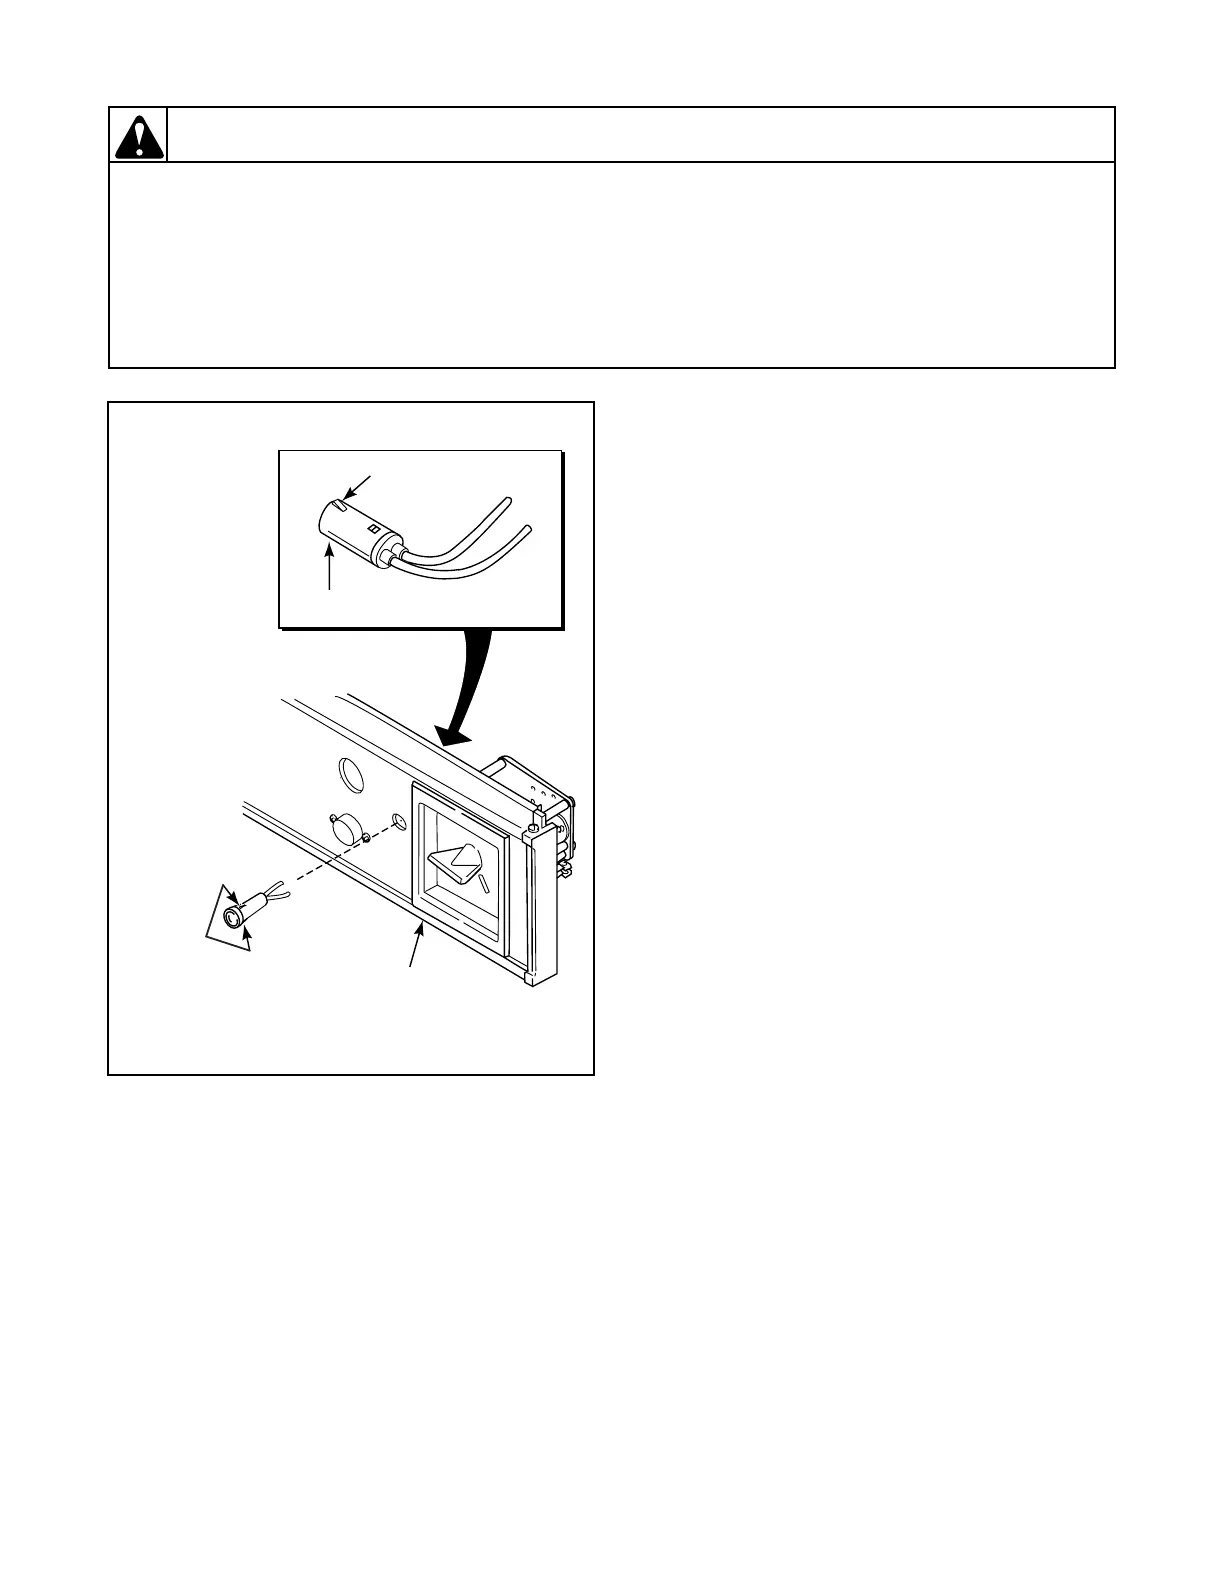
27. RELAY (MANUAL TIMERS MODELS)
a. Remove control panel.
b. Remove two screws holding relay to mounting
bracket. Refer to Figure 3.
c. Disconnect wires from relay.
NOTE: Refer to wiring diagram when rewiring
relay.
28. RESISTOR 208 or 240 Volt/60 Hertz
(Models with Control Circuit)
a. Remove control panel.
b. Disconnect resistor leads. Refer to Figure 3.
NOTE: Refer to wiring diagram when rewiring
resistor.
29. COOLING OR DRYING TIMER
(New Style)
a. Remove control panel.
b. Pull timer knob off timer shaft. Refer to
Figure 3.
c. Remove three screws holding timer to control
panel or mounting bracket.
d. Remove wires from timer terminal board, and
timer motor lead from terminal block.
IMPORTANT: Be sure barrier is installed in proper
position when reinstalling drying timer. Refer to
Figure 3.
NOTE: Refer to wiring diagram when rewiring
timer.
Figure 2
TAB
TAB
CONTROL
PANEL
LOCKING
TAB
RUN LIGHT
T005SE1C
COIN DROP
MODEL