Chapter 2: Installation
30
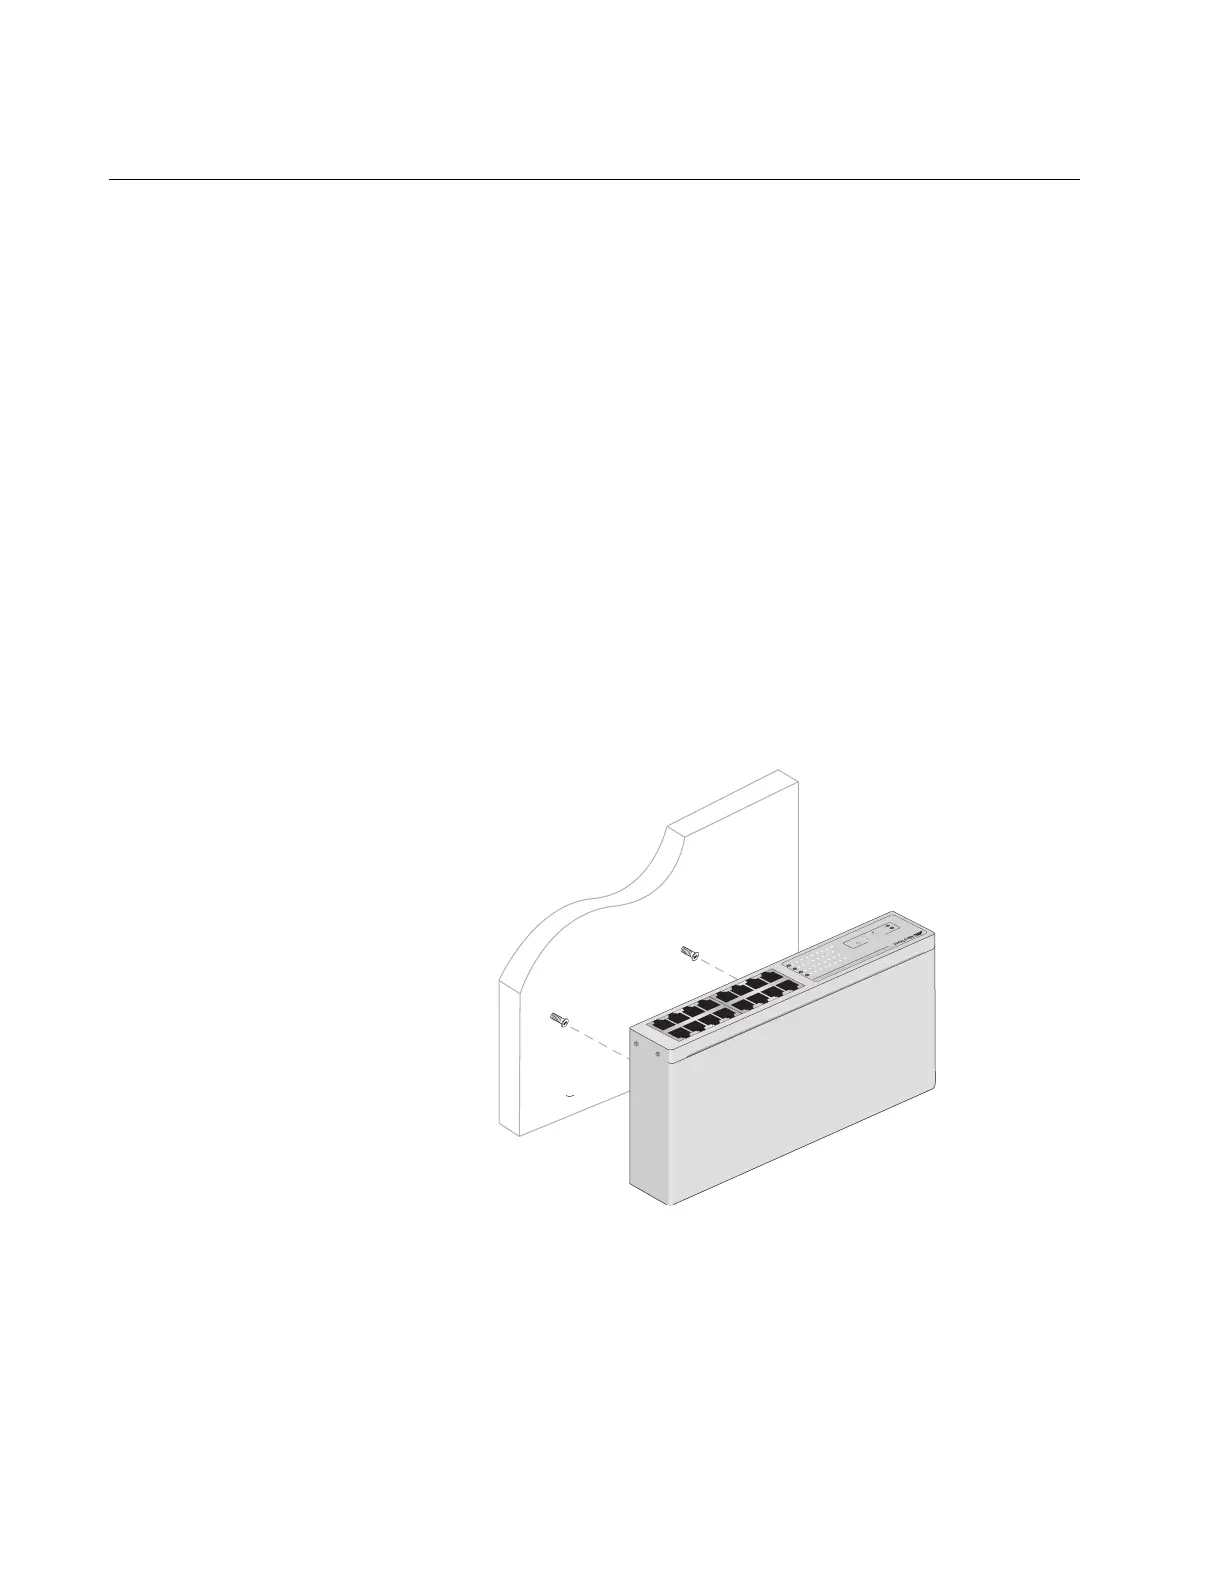
Wall-Mounting the Switch
The switch can be mounted horizontally on a wall using the two keyhole
slots in the bottom of the switch.
To mount an AT-FS716L switch onto a wall, perform the following
procedure:
1. Remove all equipment from the package and store the packaging
material in a safe place.
2. If attached, remove the rubber feet, data cables, and power cord from
the switch.
3. Select a wall location for the switch.
4. Mark two hole locations on the wall.
5. At the marked locations for the holes, pre-drill for the drywall anchors
and drive the screws through the holes.
6. Align the switch horizontally, as illustrated in Figure 8..
Figure 8. Aligning an AT-FS716L for Wallmount Installation
1017
1
3
5
7
9
1
1
1
3
1
5
2
4
6
8
1
0
1
2
1
4
1
6
AT-F S71
6L
16 P
o
rt 1
0/100 M
b
ps F
as
t E
th
ern
et
S
witch
1
0
L
I
N
K
A
C
T
1
0
0
L
IN
K
A
CT
F
D
X
H
D
X
P
O
R
T
A
C
T
I
V
I
T
Y
COL
P
O
W
E
R
1
3
5
7 9
1
1
1
3
15
2
4 6
8 10 12
1
4
1
6
 Loading...