AT-FS716L Fast Ethernet Switch Installation Guide
29
Installing the Switch in a Rack
Perform the following procedure to install the switch in a standard 19-inch
rack.
1. If attached, remove the rubber feet, data cables, and power cord from
the switch.
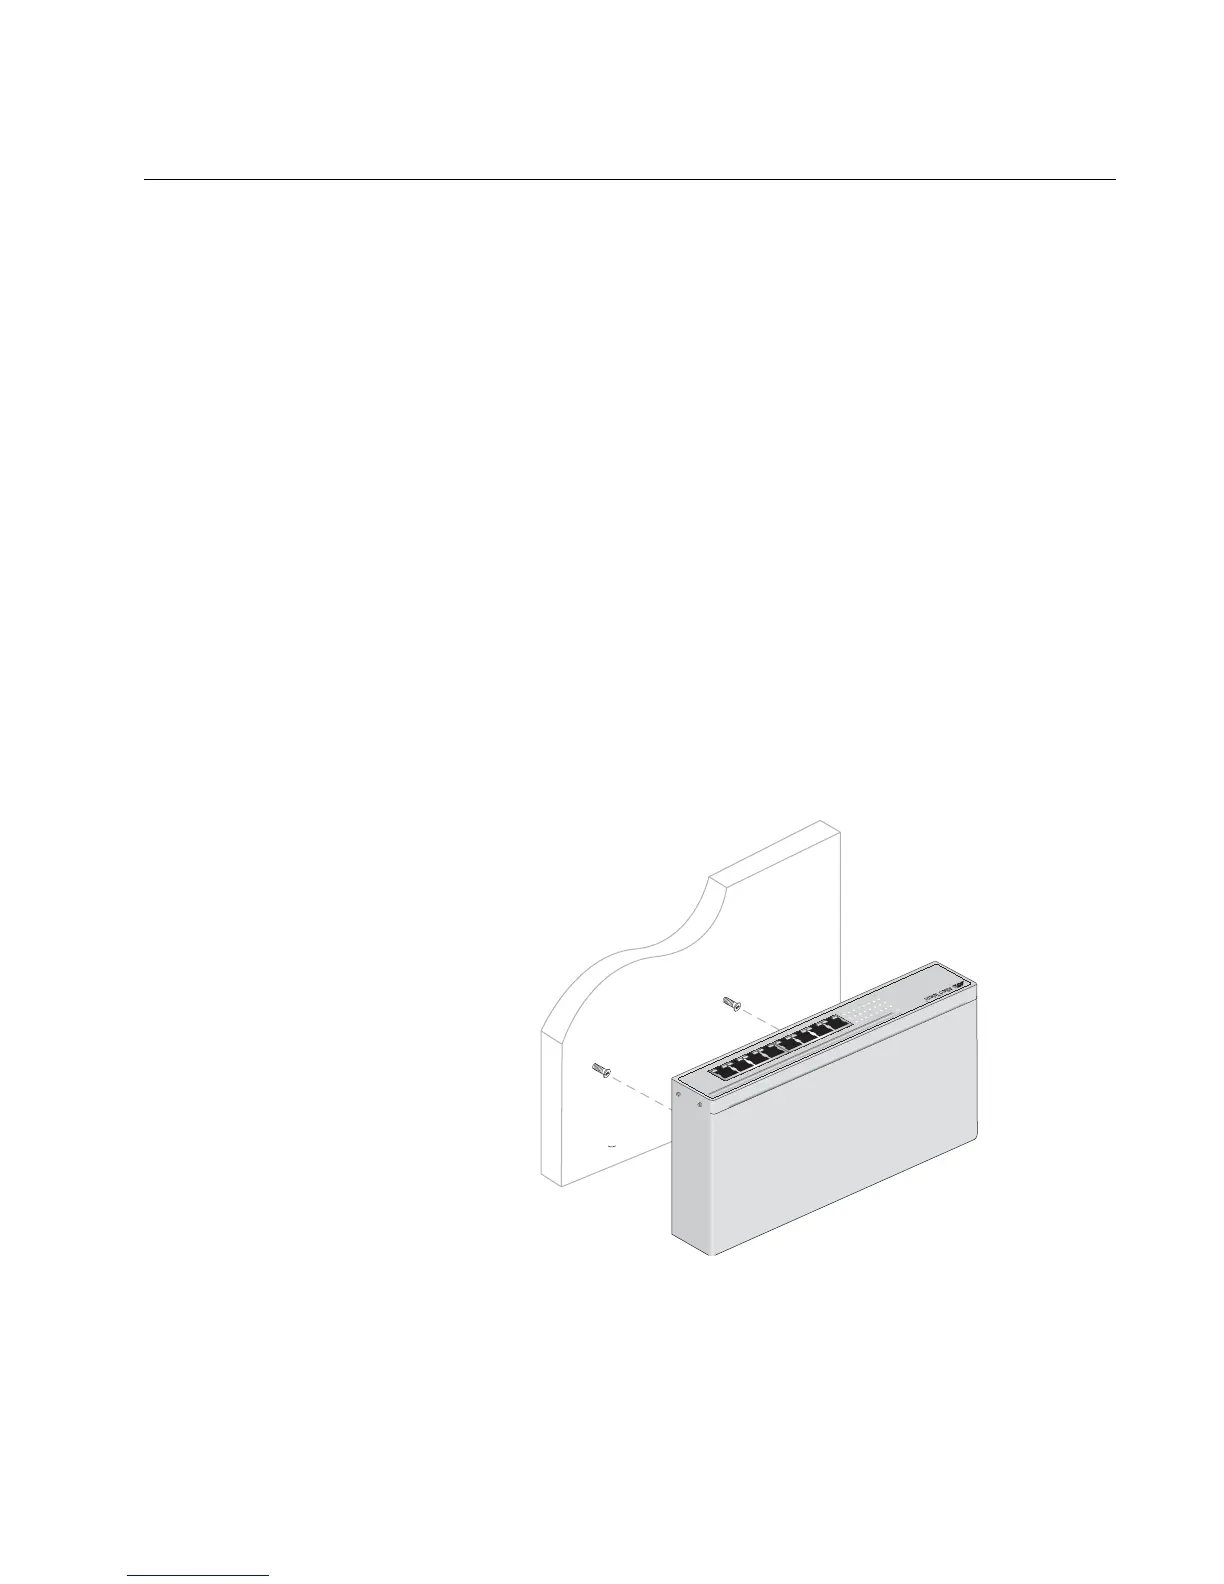
2. Attach the two mounting brackets (provided) to the sides of the switch
using the bracketmounting screws (provided), as shown in Figure 6.
Figure 6. Attaching Brackets for Rackmounting
3. Mount the switch in a 19-inch rack using rackmounting screws (not
provided), as shown in Figure 7.
Figure 7. Rackmounting the Switch
The switch is now ready for cabling and powering up.
1
35
79111
3
1
5
2
4681
0
1
21
4
1
6
AT-FS716L
1
6
P
or
t 10/100
M
b
ps
F
a
st Eth
e
rn
e
t S
w
itch
10 LIN
K
A
CT
100 LINK
ACT
F
D
X
H
D
X
PO
RT ACTIVI
TY
C
O
L
P
O
W
E
R
1 3 5 7
9 11
13 15
2 4 6 81
0
12 14 16
1014
1
35
791
11
3
1
5
2
4681
0
1
2
1
41
6
AT-FS716L
16 Por
t 10/100 Mbps
Fast Ethe
rnet Switch
10 LINK
A
CT
100 LINK
ACT
FDX
HDX
P
O
R
T
A
C
T
IV
I
T
Y
COL
P
O
W
E
R
1 3 5 7 9 11 13 15
2 4 6 8
10
12
14
16
1015
 Loading...