16 x530 Series Quick Installation Guide
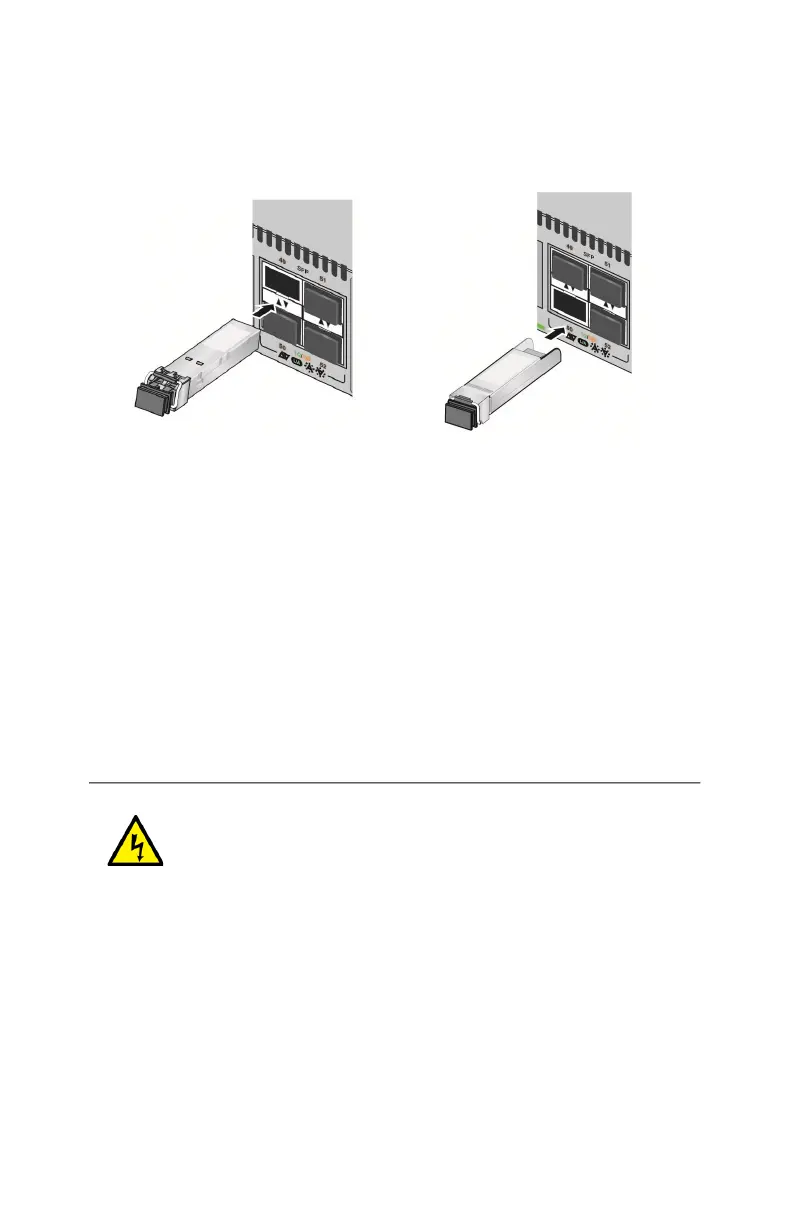
To install SFP+ transceivers, perform the following procedure:
1. To install a transceiver in a top port, position it with the Allied
Telesis label facing up. To install it in a bottom port, position it
with the label facing down.
2. Slide the transceiver into the port until it clicks into place.
To attach the fiber optic cable to the transceiver, continue with the
next step. Otherwise, repeat steps 1 and 2 to install the remaining
transceivers in the switch.
3. Remove the dust cover from the transceiver.
4. Connect the fiber optic cable to the transceiver. The connector
should fit snugly into the port, and the tab should lock the
connector into place.
5. Repeat this procedure to install additional transceivers.
6. Go to “Powering On the Switch” on page 16.
Powering On the Switch
1. Install the power cord retaining clip on the AC power connector
on the rear panel of the switch, and raise the clip.
Warning: Power cord is used as a disconnection device.
To de-energize equipment, disconnect the power cord.
E3
 Loading...