Uniball M2
Socket Head Cap
Screw M2.5x6mm
ALZRC Servo Arm
( Option)
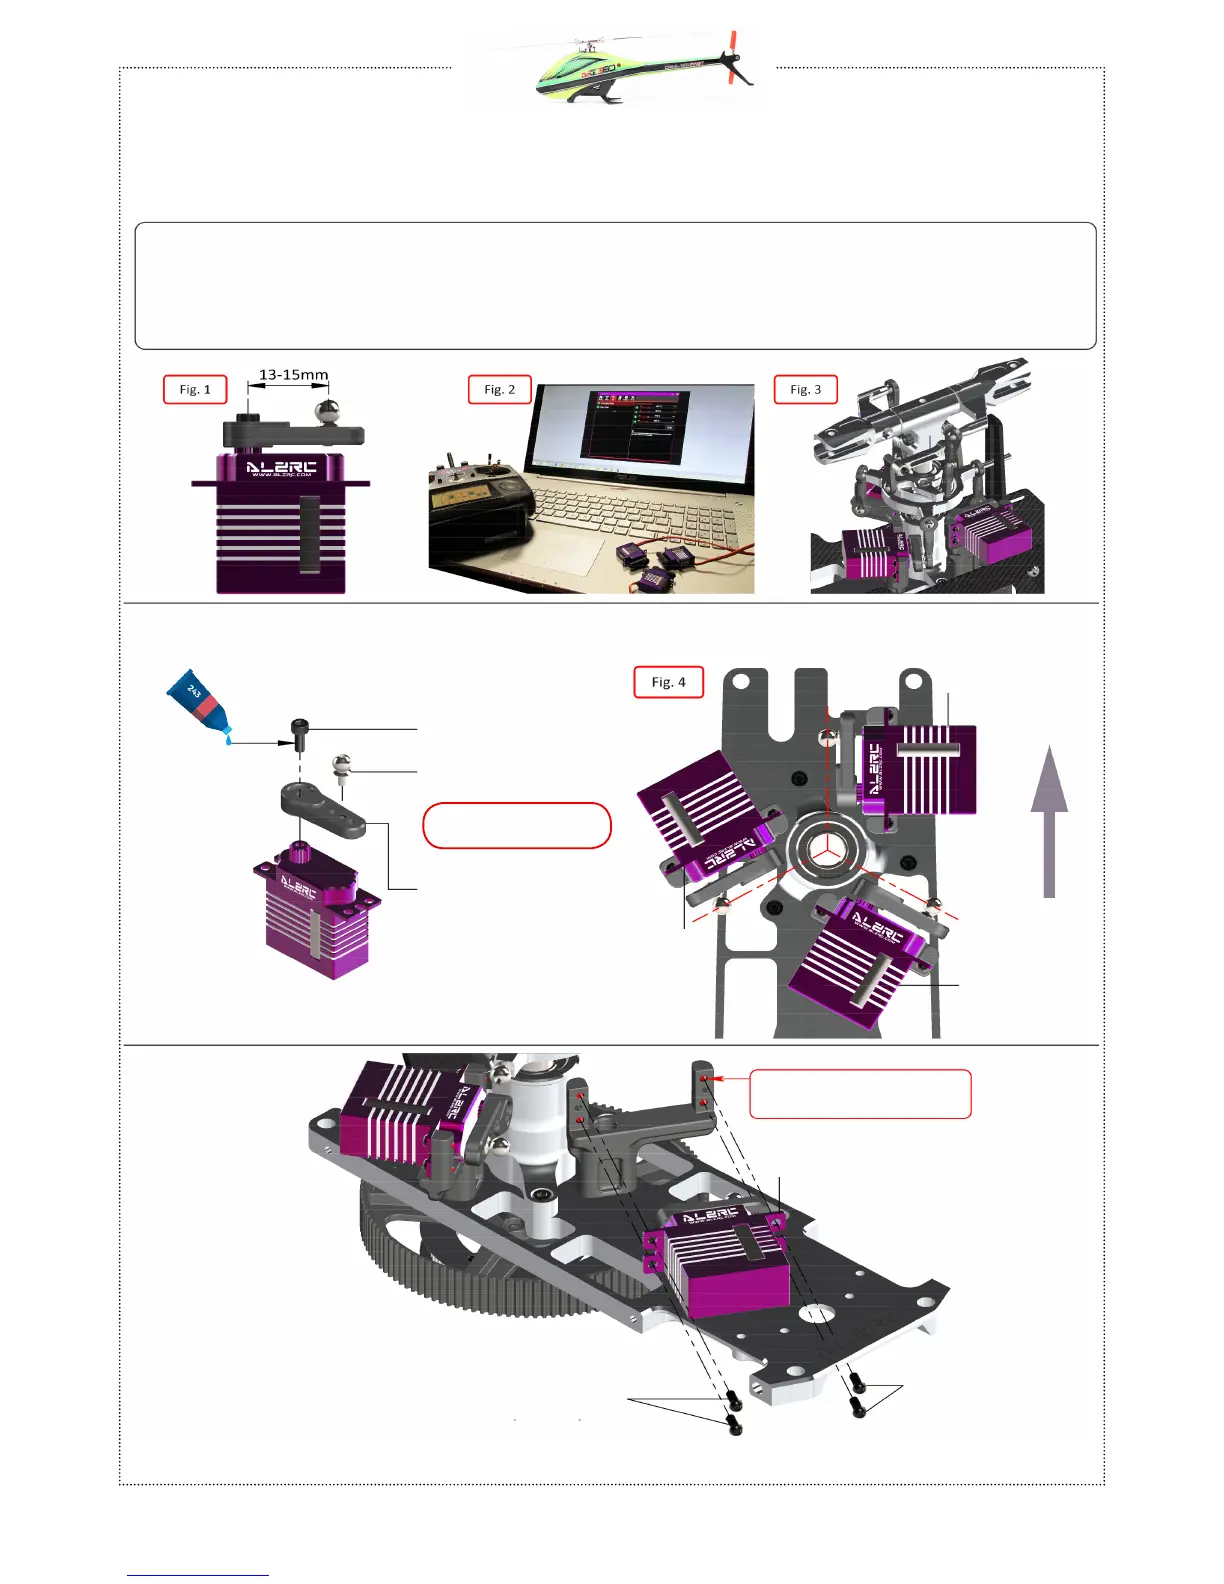
INSTALLATION OF SWASHPLATE SERVOS
The linkage ball must be positioned approximately 13-15 mm out on the servo arm (figure 1), it is recommended to use the ALZRC / KST servo arm p/n [HA052]. Because of the
120° placement of the servos in the Devil380, the arms are difficult to access. For this reason it is advisable to ensure alignment of the servo arms (and sub trim) before installa-
tion of the servos in the model (figure 2). Proceed with installation following the instructions below. Figure 3 shows a completed installation.
The rods going from the servos to the swash plate must be as vertical as possible. (Red line in Figure 4). Not all servos are equal, so for proper alignment you can choose to use the
supplied spacer H0566 under the uniball H0538.
Servo 1
NOTE
: Do not over tighten,
be careful to not strip plastic.
Servo 2
Servo 3
NOTE
: Do not over tighten,
be careful to not strip plastic.
Button Head Cap
Screw M2x5mm
Button Head Cap
Screw M2x5mm