Version 1.10 ©Copyright 2013, Ambient LLC. All Rights Reserved. Page 2
12 Warranty Information ............................................................................................................... 18
13 Appendix .................................................................................................................................. 19
13.1 Quick Set Mode .................................................................................................................... 19
13.2 Set Mode ................................................................................................................................... 20
1 Introduction
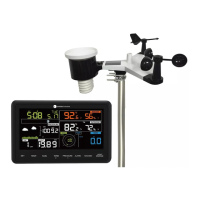
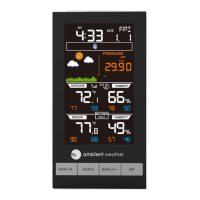
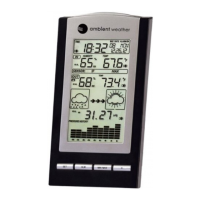
Thank you for your purchase of the Ambient Weather WS-1171A Advanced Weather Station with
Temperature, Humidity, Barometer and Advanced Forecasting. The following user guide provides step
by step instructions for installation, operation and troubleshooting. To download the latest manual and
additional troubleshooting tips, please visit:
http://ambientweather.wikispaces.com/ws1170
2 Getting Started
Note: The power up sequence must be performed in the order shown in this section (remote
transmitter first, Display Console second).
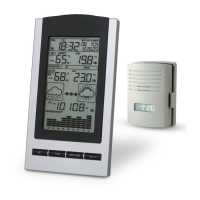
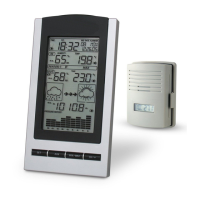
The WS-1171A weather station consists of a display console (receiver), and a thermo-hygrometer
(remote transmitter).
2.1 Parts List
Display Console
Frame Dimensions (LxWxH): 7.25 x 4 x 1.25 in
LCD Dimensions (LxW): 4.25 x 2.50”
Thermo-hygrometer transmitter (WH2B) with mounting bracket
Dimensions (LxWxH): 3.5” x 2.5” x 0.9”
2.2 Recommend Tools
Philips precision screwdriver
Drill for mounting bracket
2.3 Thermo-Hygrometer Sensor Set Up
Note: To avoid permanent damage, please take note of the battery polarity before inserting the
batteries.
Remove the battery door on the back of the sensor with a Philips screwdriver (there is only one screw,
at the bottom of the unit). Insert two AAA batteries as shown in Figure 1 (we recommend lithium
batteries for cold weather climates, but alkaline batteries are sufficient for most climates).
Replace the battery door and set screw. Note that the temperature and humidity will be displayed on
the LCD display. Looking at the back of the unit from left to right, the polarity is (-) (+) for the top
battery and (+) (-) for the bottom battery.
 Loading...