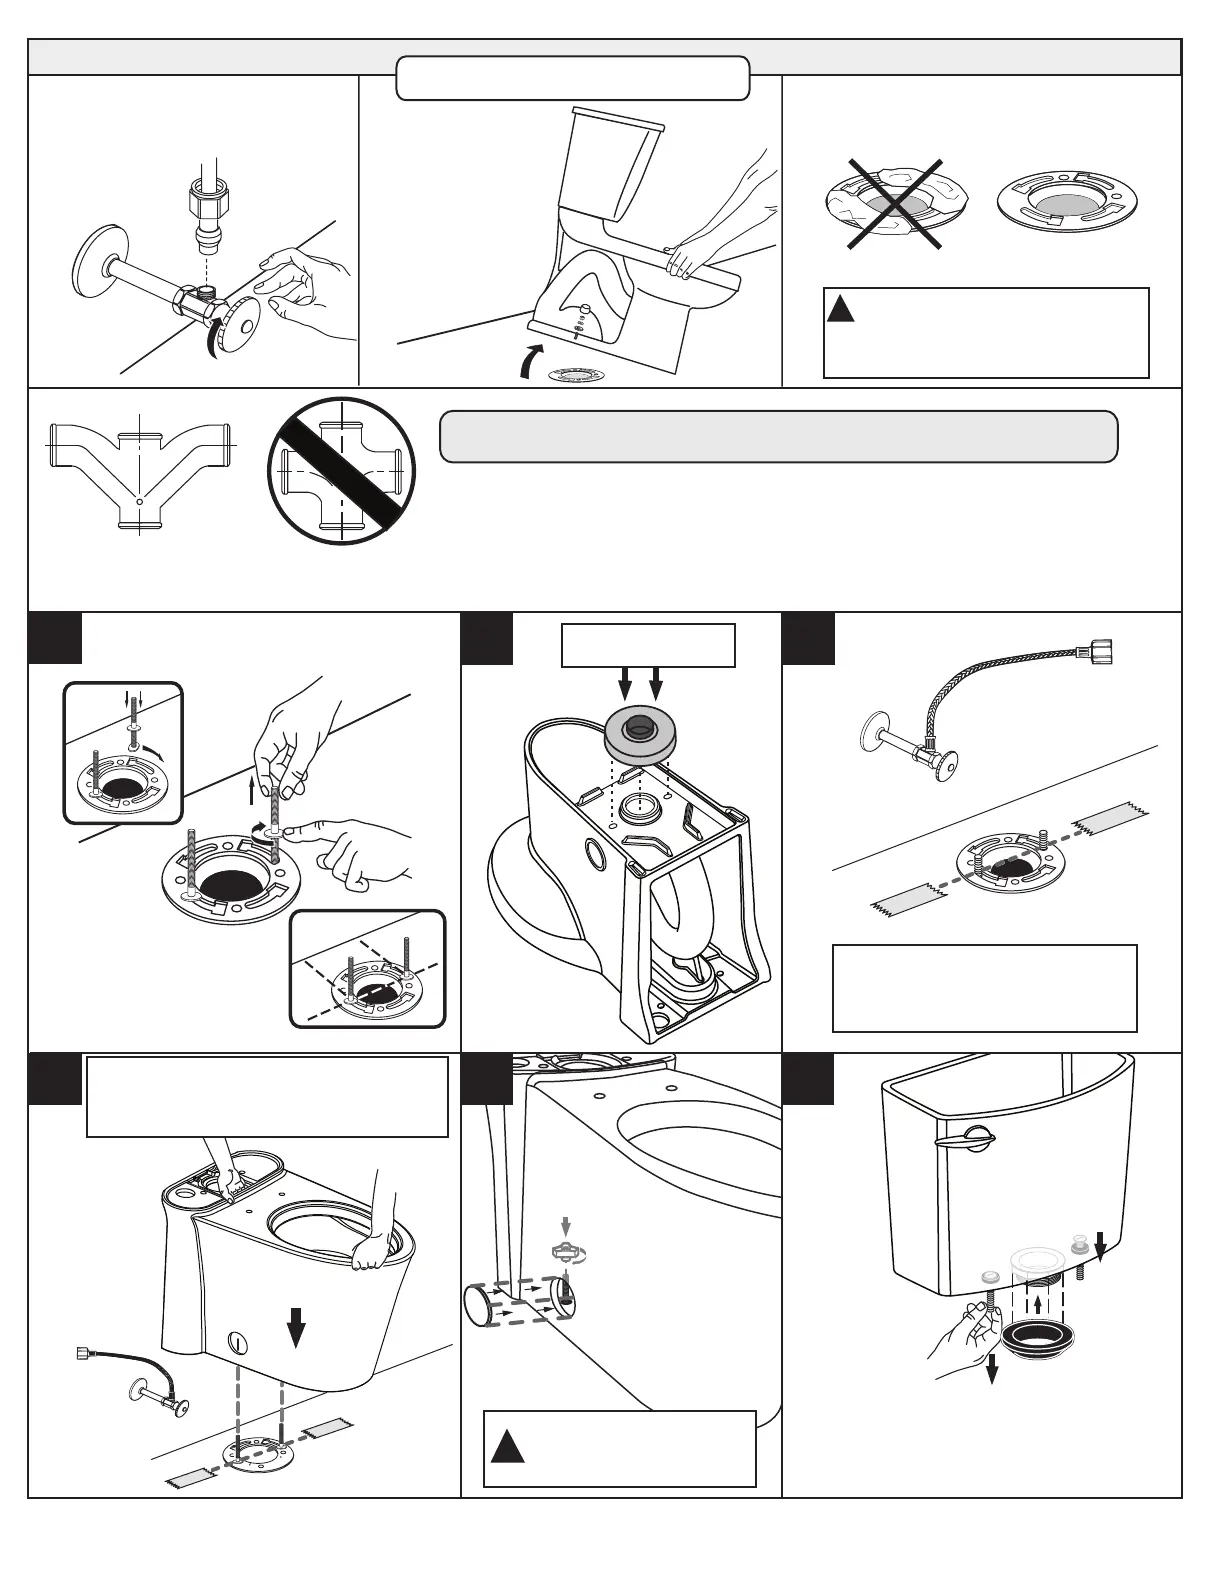
Hand Tighten Only.
Do Not Overtighten.
!
7301555-100 Rev. 4 2/22
- 2 -
Turn Off Water Supply
Flush to remove
water from tank;
sponge remaining
water from
bowl before
removing toilet.
Clean Flange
!
Caution: If leaving floor flange
open for more than 1-2 hours,
cover flange to prevent escaping
sewer gases.
BACK-TO-BACK INSTALLATION
Recommended fitting type for
back-to-back installations.
Depending upon your plumbing and venting conditions, the flow from the toilet in a back-to-back
installation may create a vacuum on the system and draw water from the opposing bowl. The
National Standards Plumbing Code prohibits the use of a cross fitting for drainage as throw over
is possible. The code does approve a directional "Y" style fitting with proper venting to direct the
water downward and away from the other toilet.
4 5 6
TIP: Place 2 pieces of masking
tape on floor (as shown) to help
with alignment in step 4.
2 3
Before You Start:
If Removing An Existing Toilet
Apply weight evenly. Do not move after
placement. Water tight seal may break.
Tank-to-Bowl Gasket
Place the tank gasket over the tank nut
ensuring there are not gaps between the
gasket and the chinaware.
1
Press firmly.