Service & Parts | 7-9
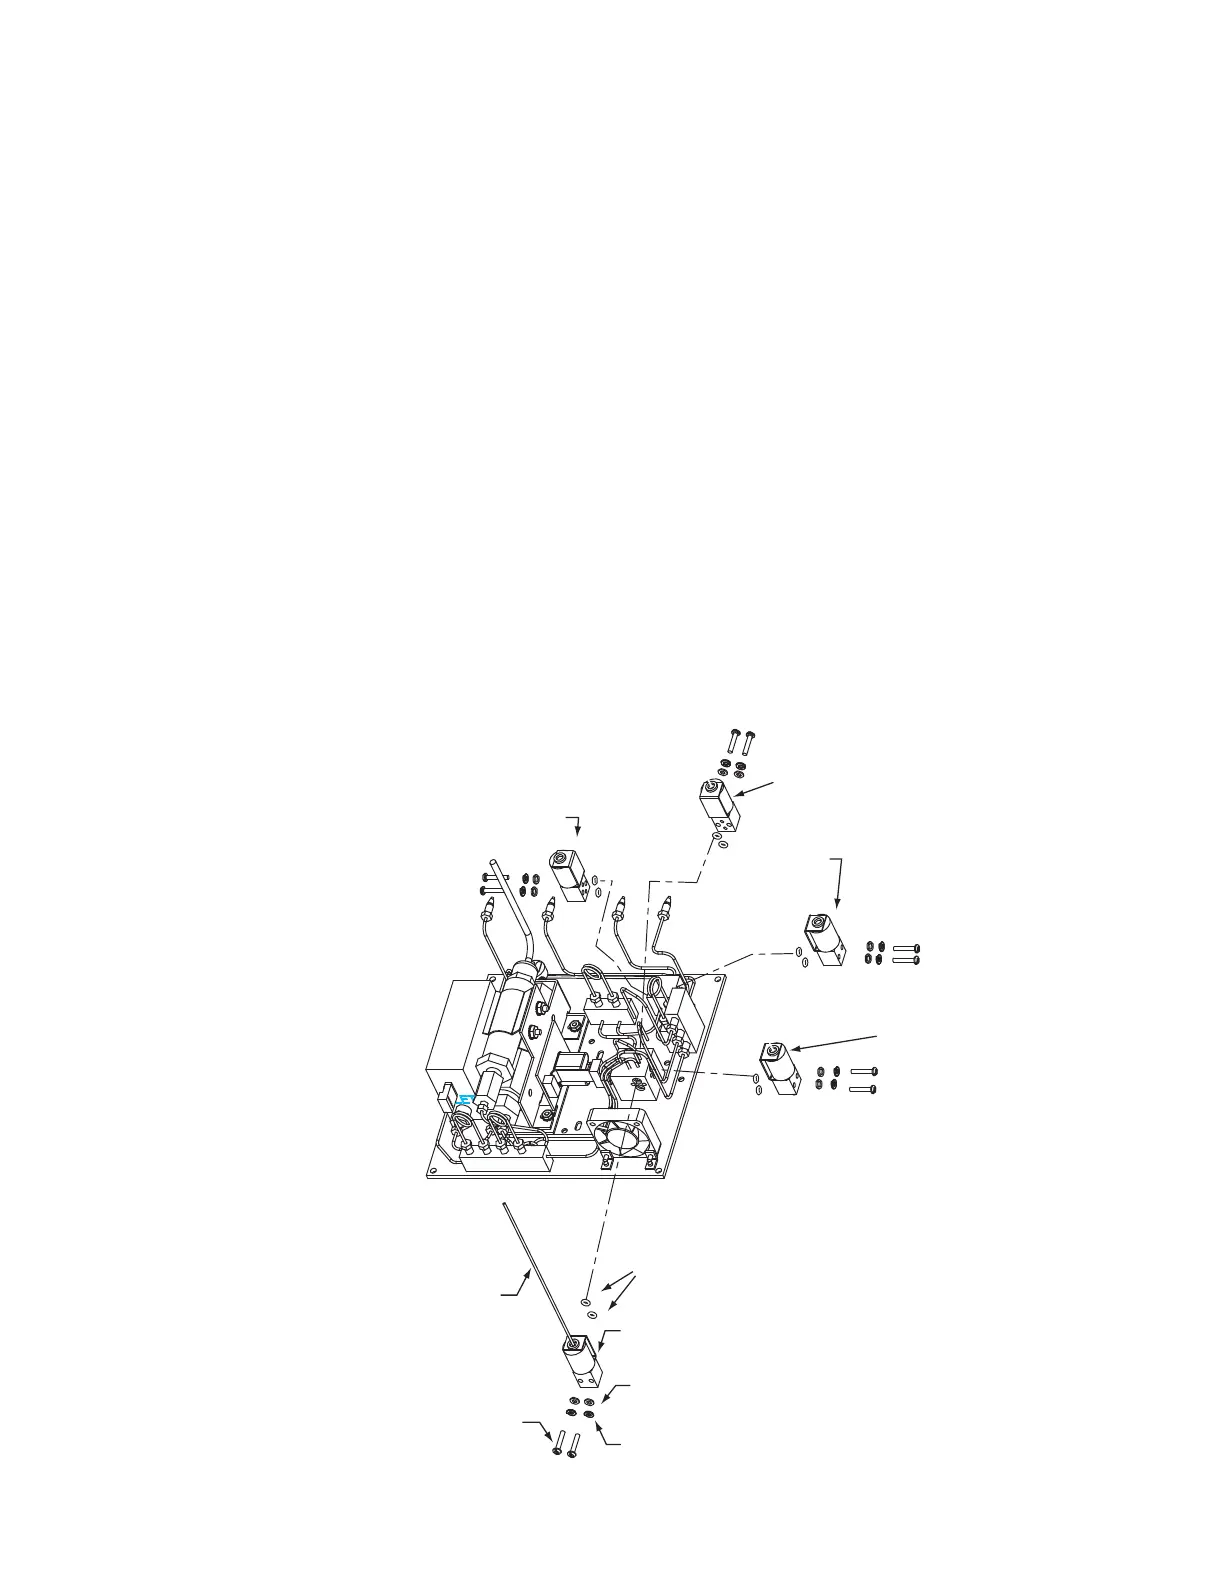
6. Using a flat-head screwdriver, remove the screws that hold the valve
body to the manifold; set the screws aside. Lift-off the solenoid valve
and reserve the O-rings for the replacement solenoid.
Installing the new solenoid
1. Carefully, mount the new solenoid valve on the valve manifold using
the two flat-head screws. Ensure that both O-ring seals are properly
seated.
2. If you are replacing one of the three-way valves, reconnect the 1/16
inch fitting to the appropriate port on the exhaust manifold.
3. Place the sample manifold plate back in the oven and secure with the
four mounting screws.
4. Reconnect all four 1/16 fittings on the bracket in the center of the oven
(Figure 7-2).
5. Replace the oven lid and secure it with the two nuts (Figure 7-1).
6. Replace the analyzer cover and secure it with the mounting screws.
Figure 7-7b.
Model 5830 solenoid
replacement.
3-Way
Solenoid Val
3-Way
Solenoid Valve
2-Way
Solenoid Valve
Proportional
Solenoid Valve
3-Way
Solenoid Valve
Flat Washer (2)
Lock Washer (2)
6/32 Flat Head
Screw (2)
O-Ring Seal (2)
Electrical
Connection


 To Next Page