Tare
Using the Tare function improves your dierential measurement uncertainty signicantly if used properly. The Tare function equalizes (normalizes) the nVi-
sion’s two modules at a non-ambient datum. The Tare reading displays the same units as the main ΔP or ΔT reading.
If y
ou apply the same static line pressure, temperature, or resistance signal to both sensors simultaneously, you should have a dierential reading of zero. Due
to the allowable error tolerance for each module, the reading may not be zero. The Tare function allows you to normalize both readings so that the dierential
reading is zero. This gives you a more accurate dierential reading than if this process were not completed.
Note: Tare should be reestablished every time your measurement conditions change, including vent condition. For instance if your ΔP reading has 8 inH20 of
Tare at 1500 psi static, when you return to vent condition this 8 inH20 of Tare will remain in place on your ΔP reading until cleared with the Tare button.
To Tare:
1 Use the (next) button to select the Dierential Mode Numerical Screen.
2 Press the
(zero) button until the display ashes dashed lines (- - - - -).
3 To clear the Tare value in the Dierential Mode, hold the button for 3 seconds until the main display readings change from (- - - - -) to (- - -).
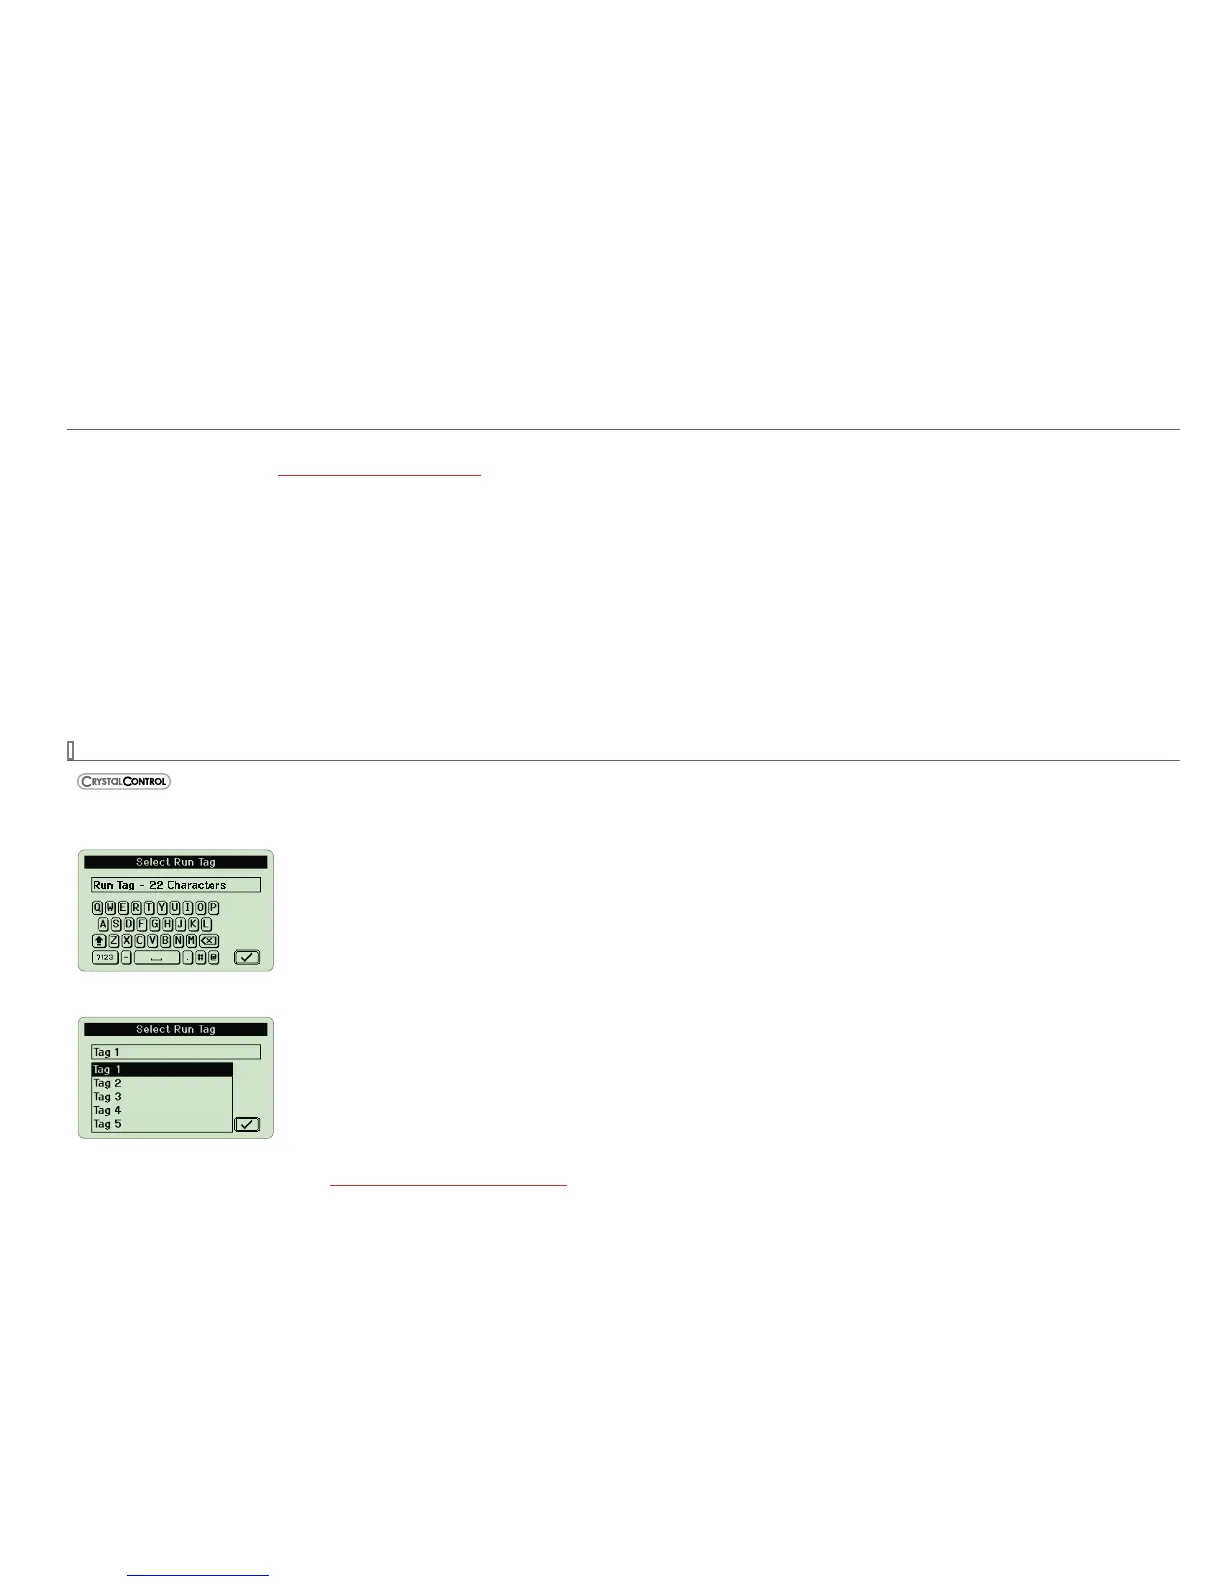
RUN TAGS
Run Tags are 22 character identiers you can enter to name each data run. They are enabled by selecting the Enable Run Tags checkbox.
The Run Tags you choose will display in CrystalControl's DataViewer and your downloaded data.
To use Run Tags:
1 Press (record) from any screen. A QWERTY keyboard will appear, giving you the option to add your Run Tag.
2 Use the
() , () , () , and ( ) arrows and the (select) button to edit your Run Tag on the QWERTY keyboard.
3 Press the
(next) button, or move to the onscreen checkbox and press the (select) button.
Your recording will begin immediately.
You can also enter up to ve predened Run Tags when the Predened Run Tags box is checked.
1 Press
(record) from any screen.
2 Use the
() , () arrows and the (select) button to choose a Run Tag from the list.
3 Use the
() , () , () , and ( ) arrows and the (select) button to edit your Run Tag on the QWERTY keyboard.
4 Press the
(next) button, or move to the onscreen checkbox and press the (select) button.
Your recording will begin immediately.
Note: If you enable Run Tags in CrystalControl, you will be prompted to select a Run Tag prior to every recording. You can also see your Run Tag info through
the setup button during a recording. See View the current Run Tag during a recording for instructions.
 Loading...