SENSOR INSTALLATION
Do not use a sensor that is leaking. The sensor contains either an acidic or alkaline electrolyte, depending
on sensor selection. If the sensor is leaking, use protective gloves to properly dispose it according to local
regulatory guidelines. If the electrolyte comes into contact with your skin, immediately flush the affected
area for a minimum of 15 minutes and refer to the Material Safety Data Sheet.
3. Open the bag containing the new oxygen sensor. (Note: do not remove the stainless steel
shorting clip yet)
4. Using the plastic handle on the sensor, quickly install the sensor into the sensor pocket and
carefully push it all the way to the back.
INITIAL SENSOR INSTALLATION
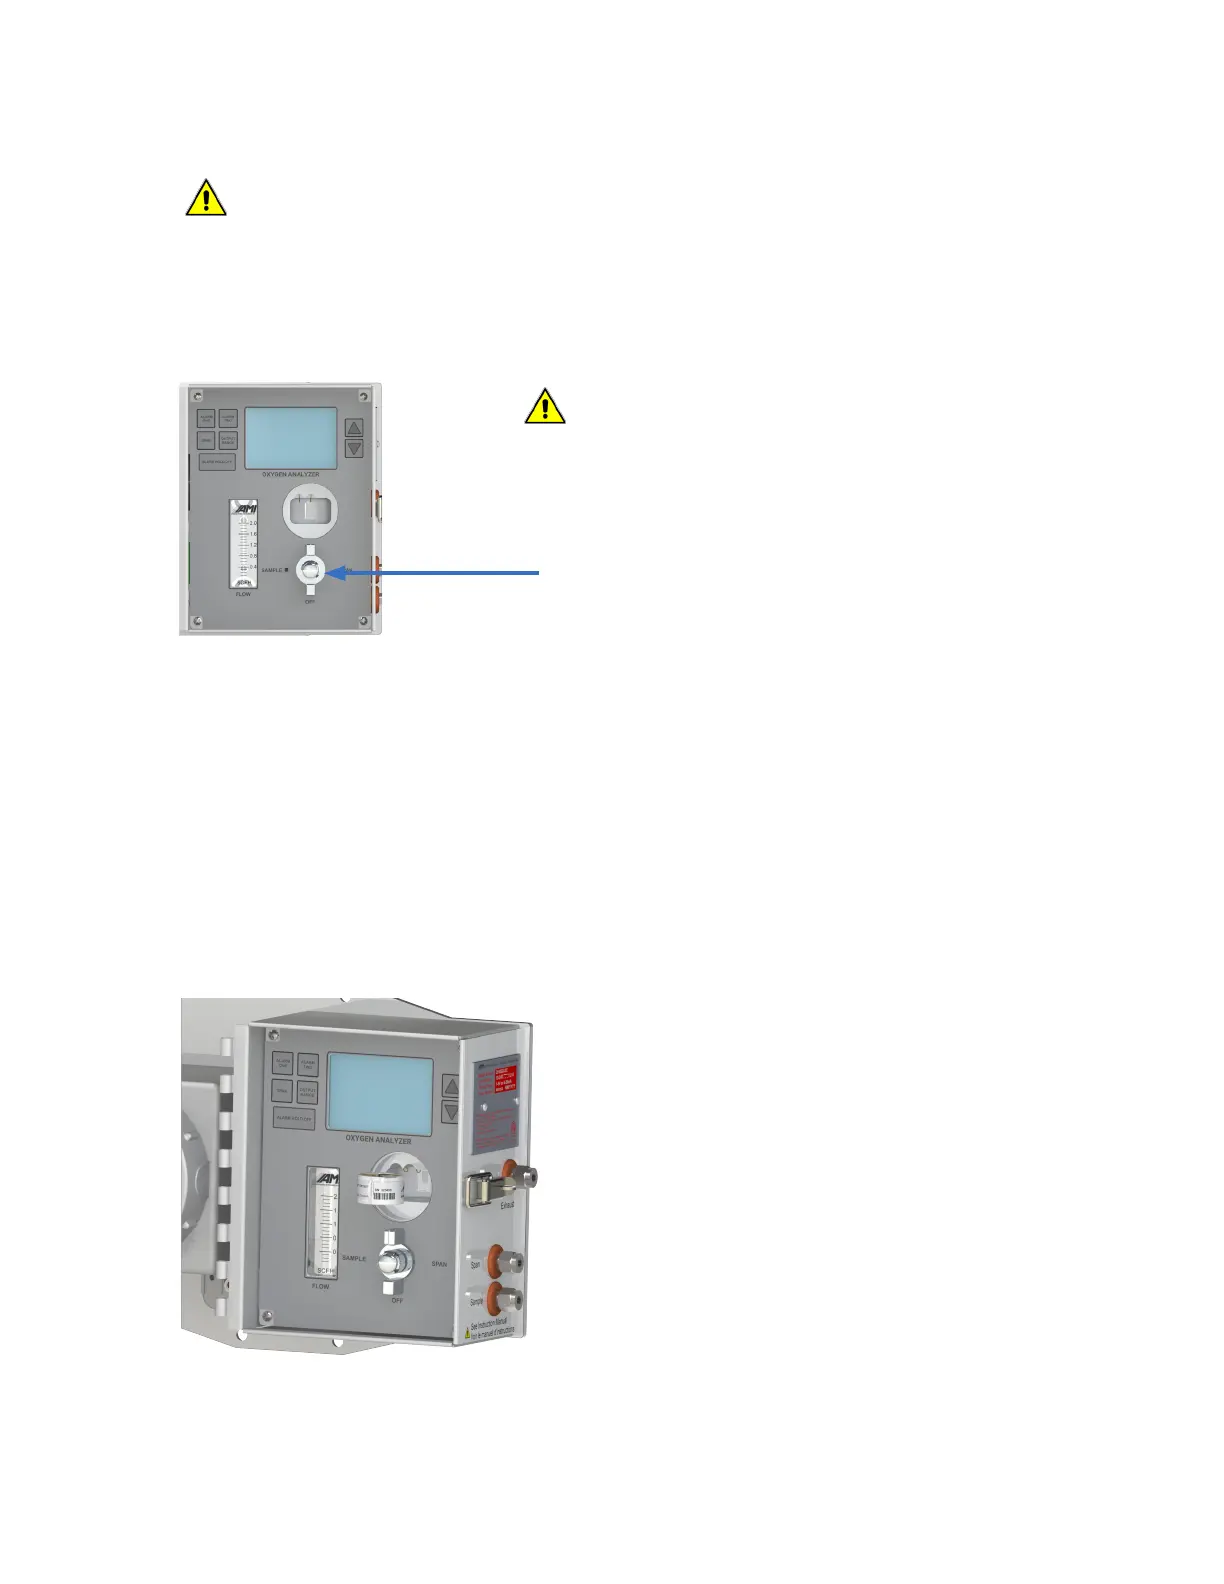
1. Turn the 3-WAY SELECTOR Valve to the OFF position.
2. Remove the CELL CAP by turning it counterclockwise.
5. While holding the sensor in place, pull out the
stainless steel shorting clip.
6. Allow the measurement reading to stabilize
for 30 seconds.
7. Press the SPAN button and release. The
SPAN flag will begin to blink on the LCD
screen and, within 3 seconds, use either the
UP or DOWN Buttons until the LCD display
reads 20.9% oxygen.
8. Replace and tighten the CELL CAP by turning
clockwise until 'hand-tight'.
9. Rotate the 3-WAY SELECTOR VALVE to the
SAMPLE position and allow sample gas to
flow.
10. Adjust the flow rate to ~ 1.0 SCFH.
3-way Selector Valve
in the OFF Position
WARNING
Only use AMI oxygen sensors with AMI Analyzers. Sensors from
other manufacturers will degrade analyzer performance, result in
accuracy errors and void the warranty.
CAUTION
20