STEPS
1. Determine a convenient location to place the Analyzer. The location should ideally
be eye-level.
2. Mount the Analyzer to a wall or bulkhead using the 4 mounting holes or to a 2-inch (5 cm)
pipe using¼" x 2" U-brackets with ¼ nuts.
Note: Equipment shall only be installed and operated in the upright orientation with the mounting
plate vertical.
ANALYZER INSTALLATION
Part I: Mounting the Analyzer
Key Points
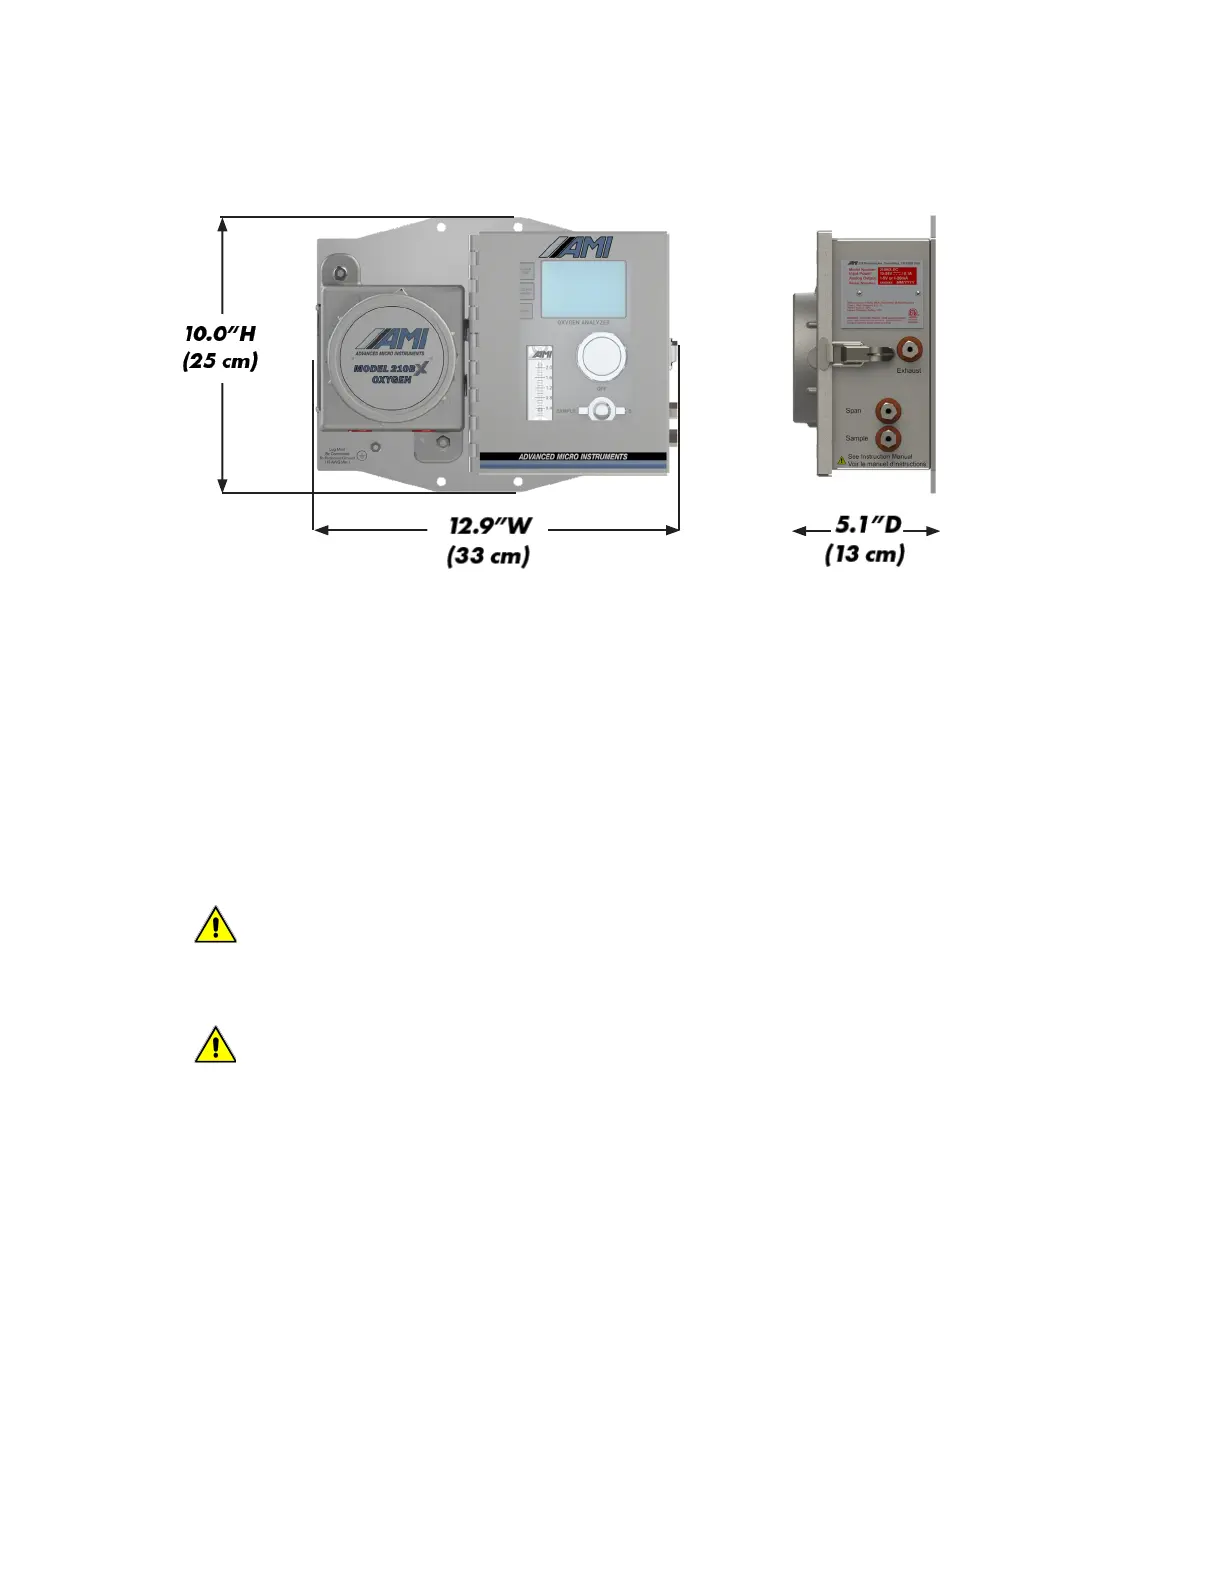
note: Analyzer weighs 16.0 lbs (7.26 kg)
• The Analyzer can be mounted either indoors or outdoors, where the ambient temperature
remains between 25°F (-3.9°C) and 115°F (46°C)
• For installation, where temperature drops down to -20°F (-29°C), order a MODEL 210BX
with the factory-installed heater option
• For installation, where temperature drops down to -40°F (-40°C), order a MODEL 210BX
with the factory-installed EXTREME WEATHER ENCLOSURE and heater option
• When using a solar panel to power the Analyzer, we recommend mounting the solar panel just
above the Analyzer, using the same mast, to serve as a sunshield
WARNING:
For DC models, do not use above 5,500 m (18,000 ft).
For AC models, do not use above 2,500 m (8,200 ft).
WARNING:
The Analyzer weighs 16.0 lbs (7.26 kg) and can pose a risk to the user if dropped.
8