16
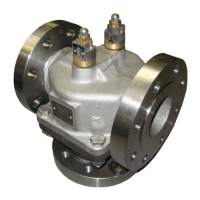
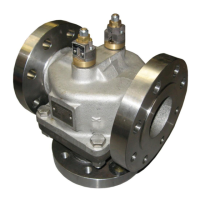
Valve Body
Rev 4 – MAY 2019 OMMGGE00217
4 Remove the actuator from the valve body in accordance with Sect 4.9.1
(page 40).
5 Knock out the coupling pin Fig 14 (see page 41, (6)) and remove the
coupling.
6 Back to Fig 4 (Page 15): remove screws and washers (2), remove
retaining plate (5) and discard O Ring (6).
7 Mark adjacent points on the valve body and cover (3) to aid reassembly.
8 Remove the bolts (7) securing the valve cover (3).
9 Taking care that the rotor is not lifted off, carefully lift off the cover.
10 Remove and discard the cover O ring (1).
11 Remove the rotor assembly (4) from the valve body.
12 Remove and discard the upper and lower shaft O Rings (8 & 9)
13 Inspect the valve internals for wear, damage and cleanliness. Clean and
replace if necessary.
Reassemble Valve (refer to Fig 4, page 15)
14 Apply Molykote
®
55 O-Ring grease or similar to new upper and lower
shaft O Rings (8 & 9) and fit to the rotor shaft.
15 Carefully insert the rotor assembly (4) into the valve body with the rotor
in the low temperature position.
16 Apply Molykote
®
55 O-Ring grease or similar to a new cover O ring (1)
and fit to the cover (3).
17 Carefully position the cover (3) on the valve, aligning the marks made
during disassembly.
18 Fit the nuts (7) and washers and tighten to:
# M16 – 245 Nm
19 Apply Molykote
®
55 O-Ring grease or similar to new O Ring (6), fit into
groove and position retainer plate (5). Fasten in place with screws and
washers (2).
20 Install the actuator onto the valve body in accordance with para. 4.9.1
(page40).
 Loading...