EVAL-AD9081/EVAL-AD9082/EVAL-AD9986/EVAL-AD9988 User Guide UG-1829
Rev. 0 | Page 5 of 26
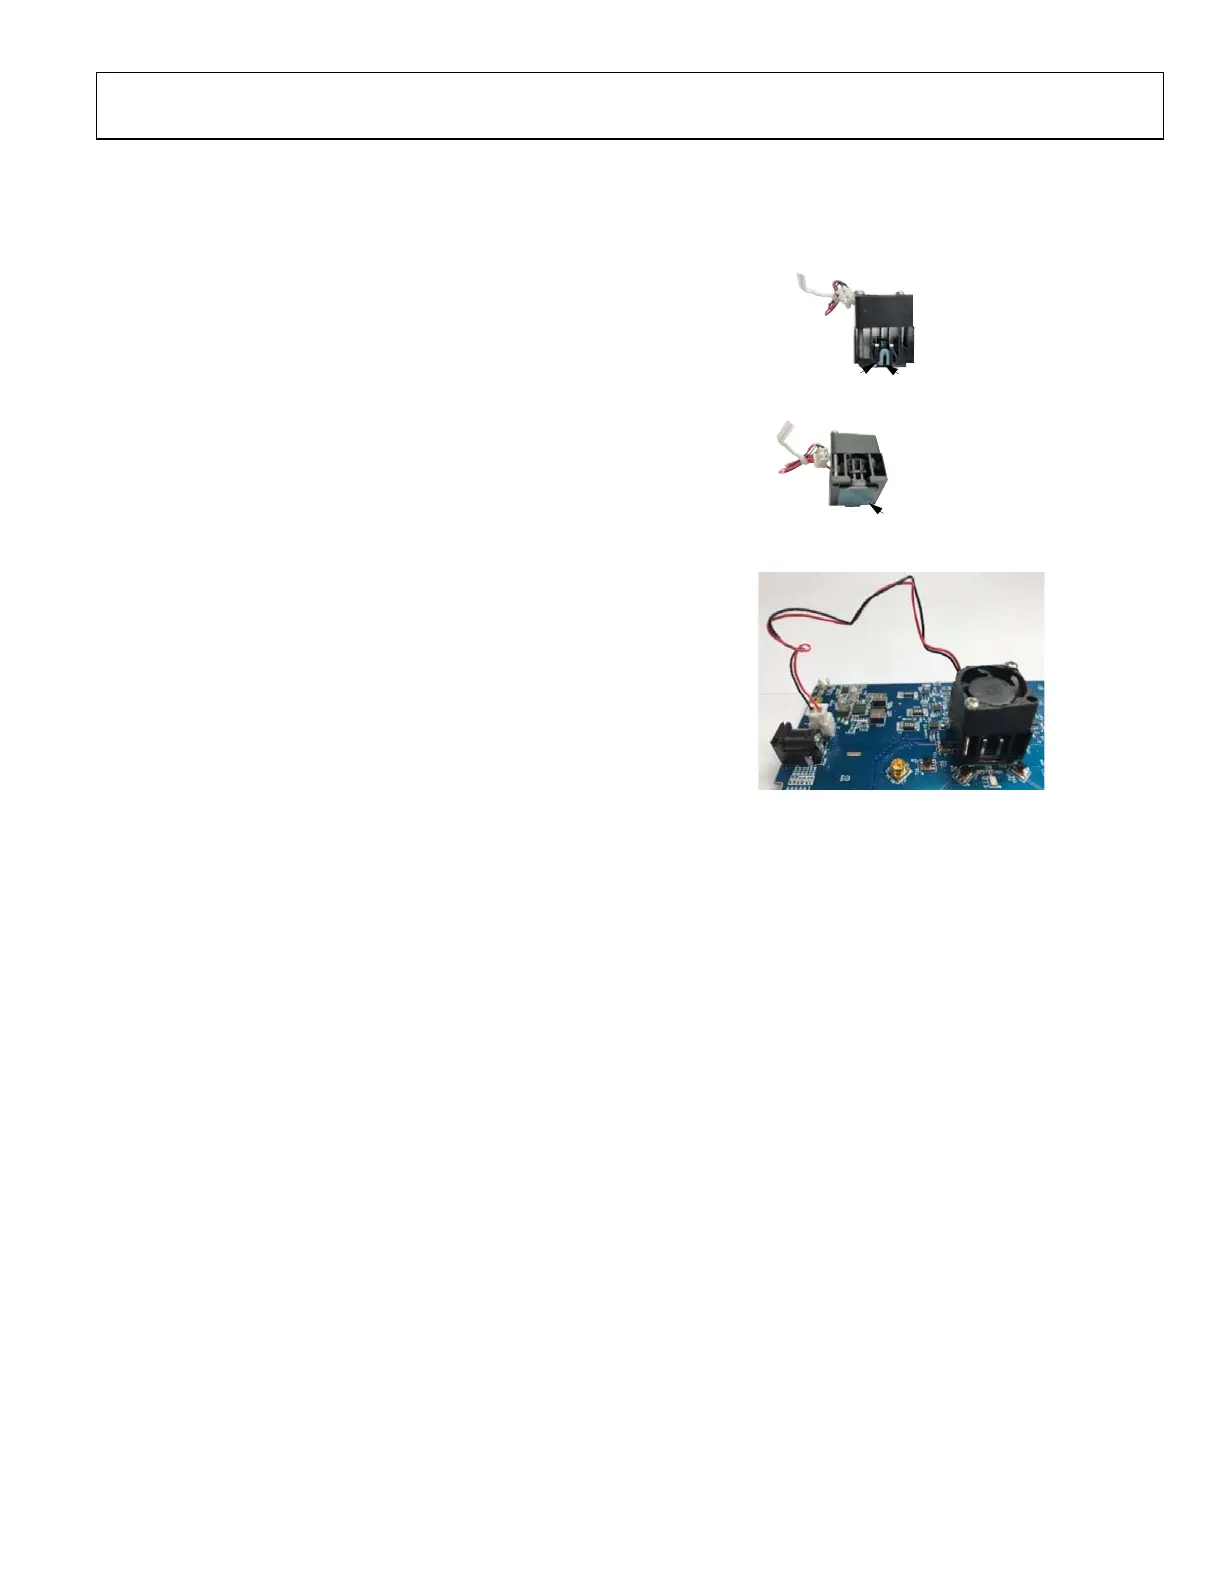
INSTALLATION OF HEAT SINK WITH INTEGRATED FAN
A heat sink (with integrated fan) is shipped with each
evaluation board for active cooling of the IC. Note that the
power consumption of the IC is dependent on its operation
mode with some configurations consuming up to 13 W, where
the IC die temperature can approach or exceed its maximum
specified operating range of 120°C. Therefore, it is recommended
to install the heat sink shown in Figure 6 through Figure 8
before the evaluation process begins.
The heat sink installation steps are as follows:
1. Remove the blue frame clip that is attached to assembly by
lifting the metal tab free from this frame clip by using a
small tweezer or a metal pick (see Figure 6). This frame
clip is not essential for attachment of the heat sink to the
IC (while noting that the AD998x-FMCB-EBZ variant does
accept this frame clip due to passive components within its
keep out region).
2. Remove the thin plastic tape to expose the adhesive surface
(see Figure 7).
3. Carefully position and center the heat sink on top of the IC
package such that it also remains clear of the RF baluns
(see Figure 8).
4. Once positioned correctly, press down on the top side of
the heat sink for 10 seconds to secure it to the IC package
(see Figure 8).
5. Connect the power supply cable (see Figure 8).
Once power is applied to the evaluation board, the fan starts
spinning. In the unlikely event that the fan does not spin, the
two screws used to secure the fan to the heat sink may be too
tight, which has resulted in the fan blades not spinning freely.
Note that loosening the screws often releases the fan blade
allowing it to spin freely.
Additional information on the Advanced Thermal Solutions
fanSink™ product can be found on the website of the company.
24165-206
BLUE FRAME CLIP
ETAL TAB
Figure 6. Heat Sink Installation Step 1
24165-207
REMOVE THIN PLASTIC
TAPE FROM ADHESIVE
Figure 7. Heat Sink Installation Step 2
24165-208
Figure 8. Heat Sink Installation Step 3 and Step 5