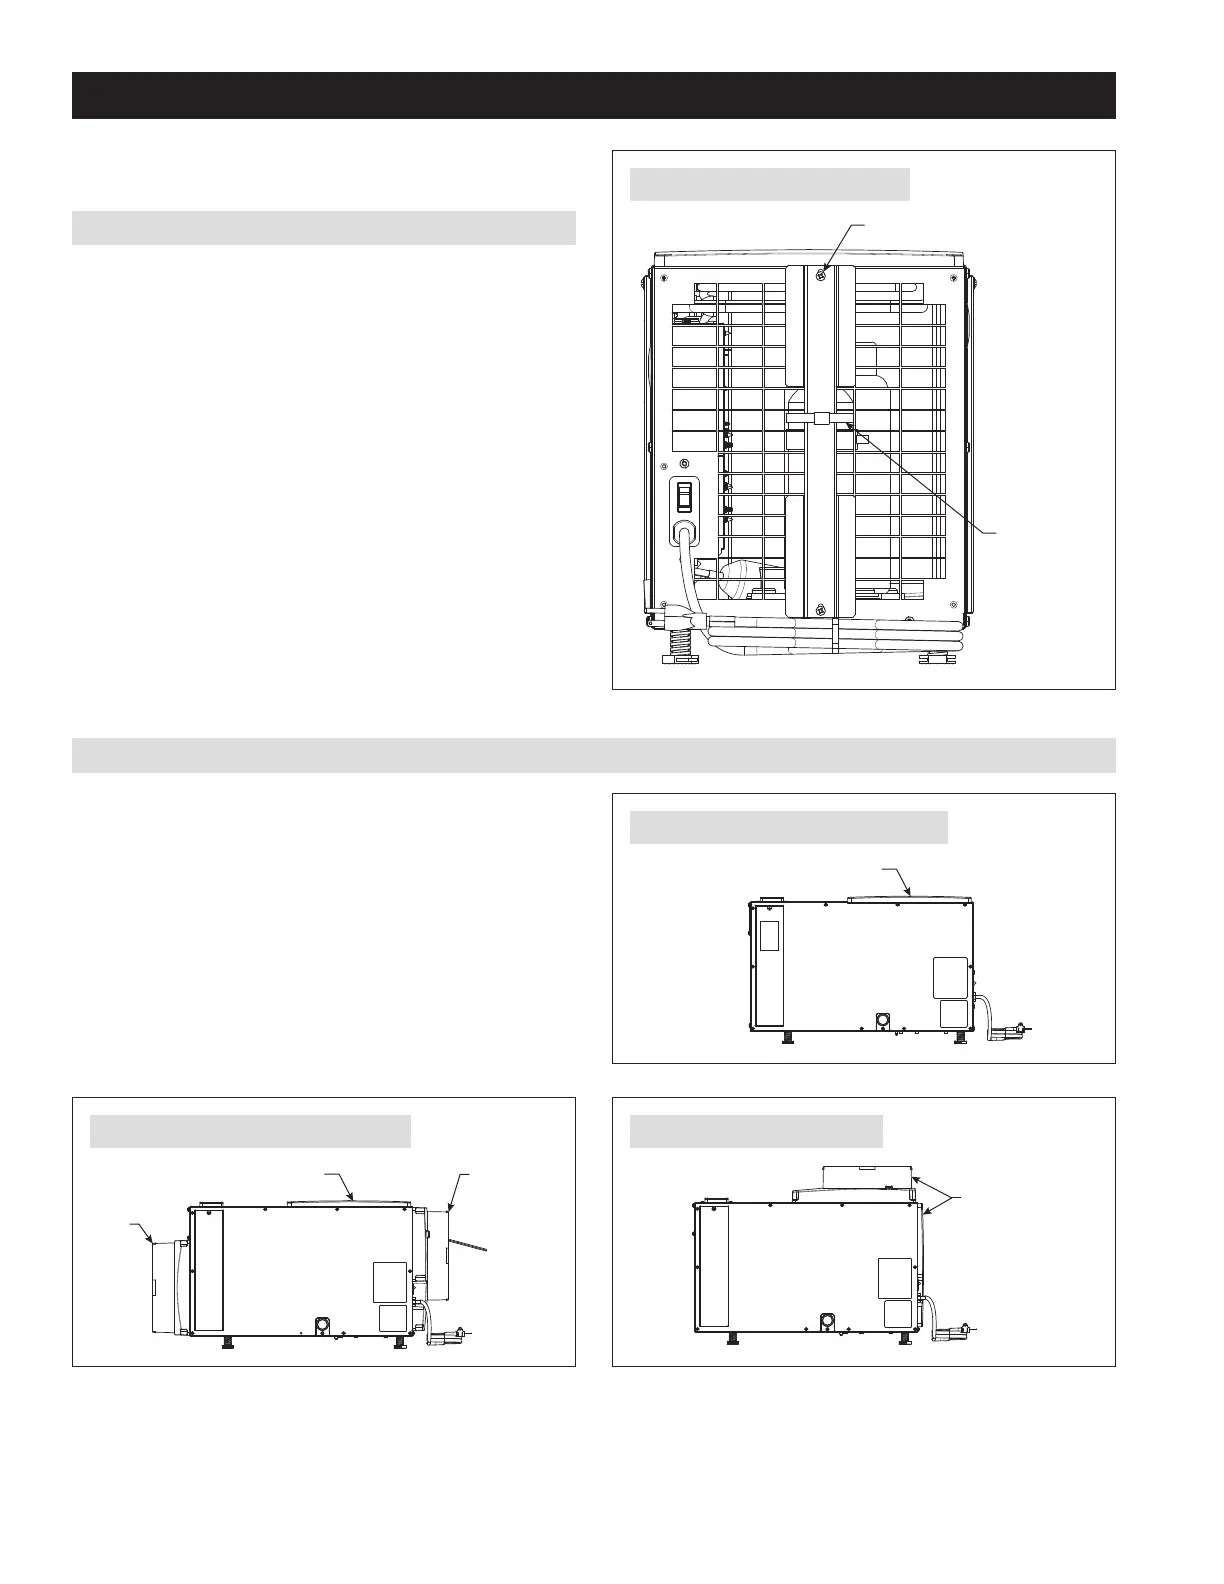
SET UP DEHUMIDIFIER FOR INSTALLATION
IMPORTANT: Cut the strap securing the compressor shipping support
bracket and remove the strap and shipping bracket. See FIGURE 1.
PACKAGING CONTENT
1. Dehumidifier
2. 10" Inlet/Outlet Collars
3. Installation and Operating Instructions
4. Parts Bag
a. #10 x 1/2 Screws (9)
b. Threaded Barbed Fitting for Drain Connections
c. Torx Bit
5. 10 Foot, 3/4" Drain Tube
DUCT COLLARS
If suspending the unit over the canopy but not ducting the unit, no
duct collars are needed (see FIGURE 2). If ductwork will be installed to
a suspended unit, attach the inlet and outlet duct collars as shown in
FIGURE 3; the outlet cover does not need to be moved. If placing the
unit on the floor, remove the outlet cover and install the outlet collar to
the top of the unit, and relocate the cover to the end of the unit (see
FIGURE 4).
CLIP OFF
PLASTIC STRAP
REMOVE SHIPPING BRACKET
OUTLET COVER
OUTLET COVER OUTLET DUCT
COLLAR WITH
BACK DRAFT
DAMPER
INLET
DUCT
COLLAR
MOVE OUTLET
COVER AND
INSTALL OUTLET
DUCT COLLAR TO
TOP DISCHARGE
LOCATION
90-1908
90-1911
90-1909 90-1909
FIGURE 1 – REMOVE SHIPPING BRACKET
FIGURE 2 – HANGING INSTALL – NO DUCTING
FIGURE 3 – HANGING INSTALL WITH DUCTING FIGURE 4 – FLOOR MOUNT INSTALL
4