UNISTRUT
1/4"–20 UNC THREADED ROD
1/4"–20 UNC EYE BOLT
1/4"-20 EYE BOLT
OR 1/4"-20
THREADED ROD
RIVNUT
MOUNTING
FOOT BRACKET
FLAT WASHER
1/4"-20 NUT
WITH INTEGRAL
WASHER
90-233590-2335 90-2339
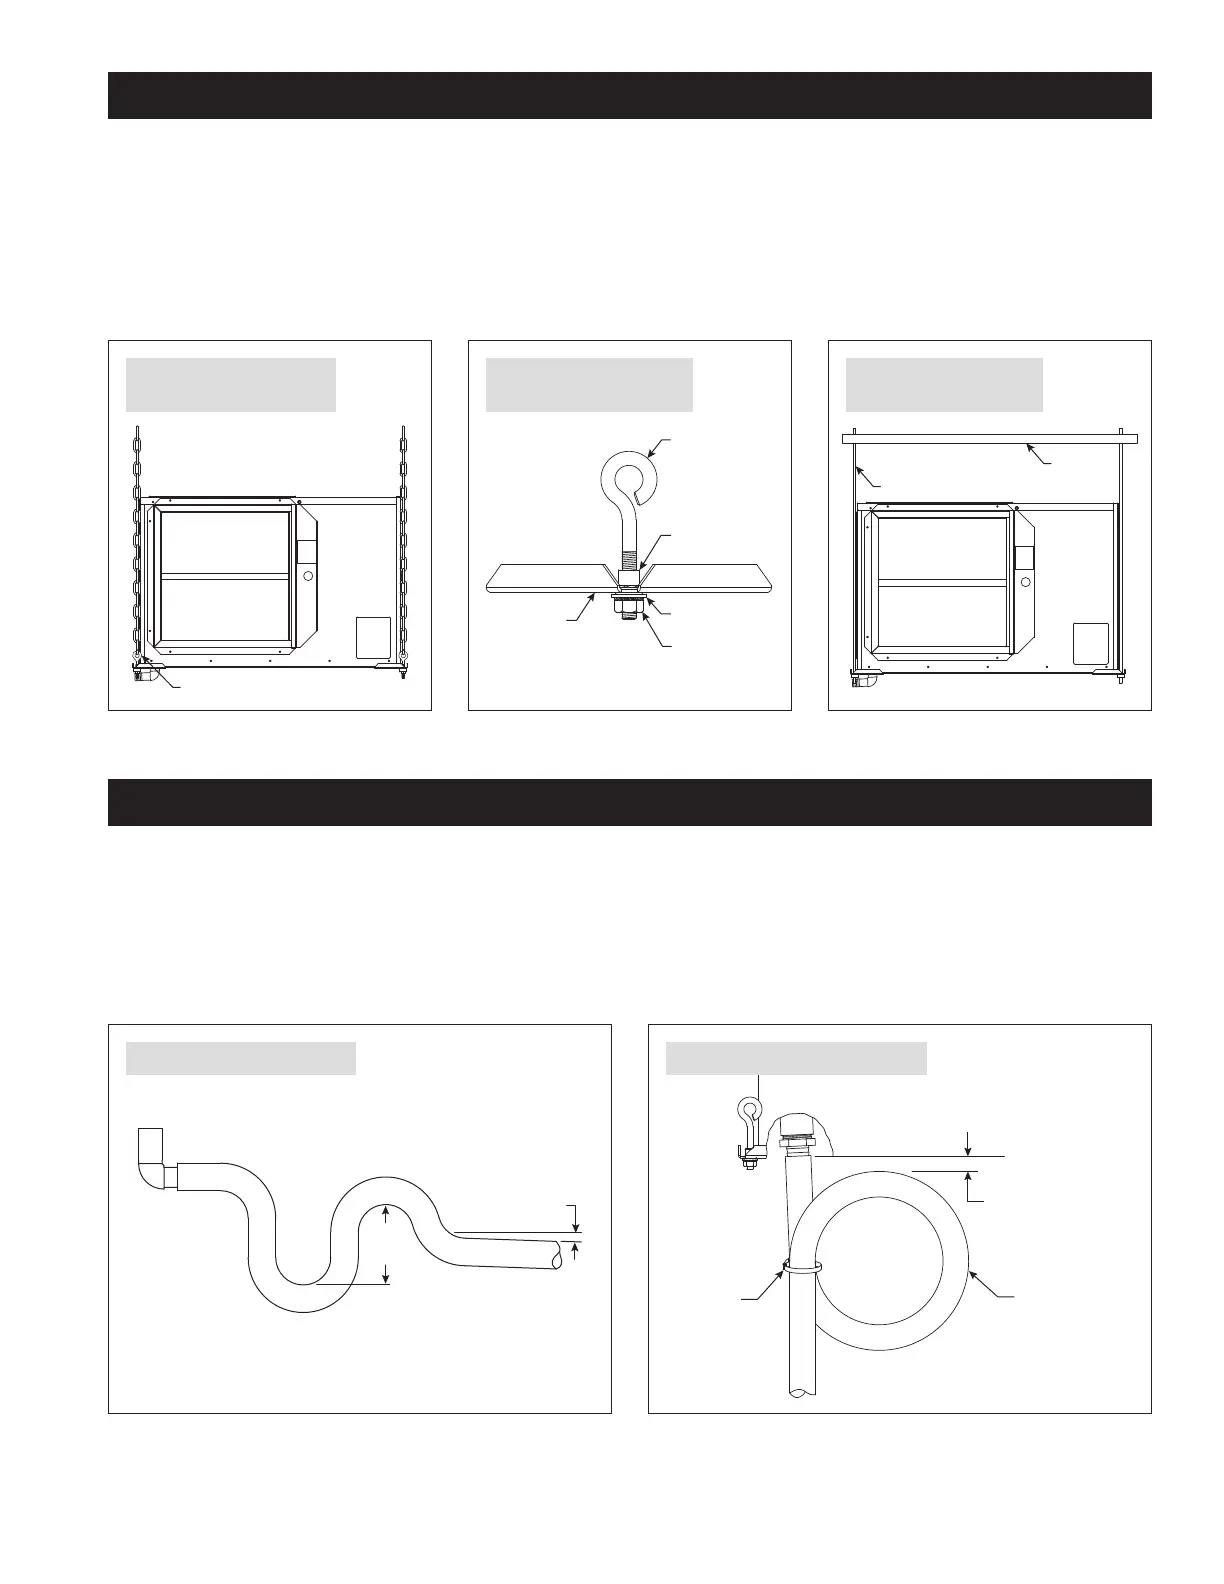
FIGURE 9 – HANGING UNIT
WITH THREADED ROD
FIGURE 7 – HANGING UNIT
WITH CHAIN AND EYE BOLTS
FIGURE 8 – HARDWARE FOR
SUSPENDING DEHUMIDIFIER
HANGING
The recommended method for hanging the dehumidifier is to use the eye bolts and hardware included in the parts bag. See FIGURE 7. Assemble the
four eye bolts to the mounting foot brackets as shown in FIGURE 8, and suspend using cable, chain, strapping or other support methods. NOTE: The
chain, cable or strapping must have a 200 lb. working load minimum, and each eye bolt must be used to suspend the dehumidifier.
The dehumidifier can be suspended using 1/4"-20 threaded rod as shown in FIGURE 9. IMPORTANT: Place the provided nuts and washers in the
same location as shown in Figure 8 when suspending with threaded rod.
The dehumidifier must be level for proper draining. Adjust the length of the chain, cable, threaded rod, etc., to level in all directions.
CABLE TIE
FLEXIBLE 3/4"
DRAIN TUBING
KEEP TOP OF LOOP
BELOW THE BOTTOM
OF THE DEHUMIDIFIER
2"
MIN
1/8" PER FT
90-233190-2331
FIGURE 11 – FLEXIBLE DRAIN TUBINGFIGURE 10 – PVC DRAIN TUBING
DRAIN INSTALLATION
The blower draws air through the dehumidifier putting the cabinet under negative pressure. As a result a P-trap is required for proper draining.
The drain outlet on the dehumidifier can be hard piped using a 3/4" PVC Slip x 1" MNPT right angle fitting and 3/4" nominal drain tubing. If flexible,
clear PVC tubing is preferred, the provided drain fitting with a right angle bend to a 3/4" hose barb fitting can be installed. NOTE: PTFE thread seal
tape is recommended for threaded connections and hand tighten only. If hard pipe is used, PVC primer and cement is recommended for the slip
fit connections. After installing the drain, pour enough water (about 2 pints) into the dehumidifier to prime the traps. Remove the air filter from the
dehumidifier to access the drain pan.
5

 Loading...