Step 3
Step 4
Installation Procedures
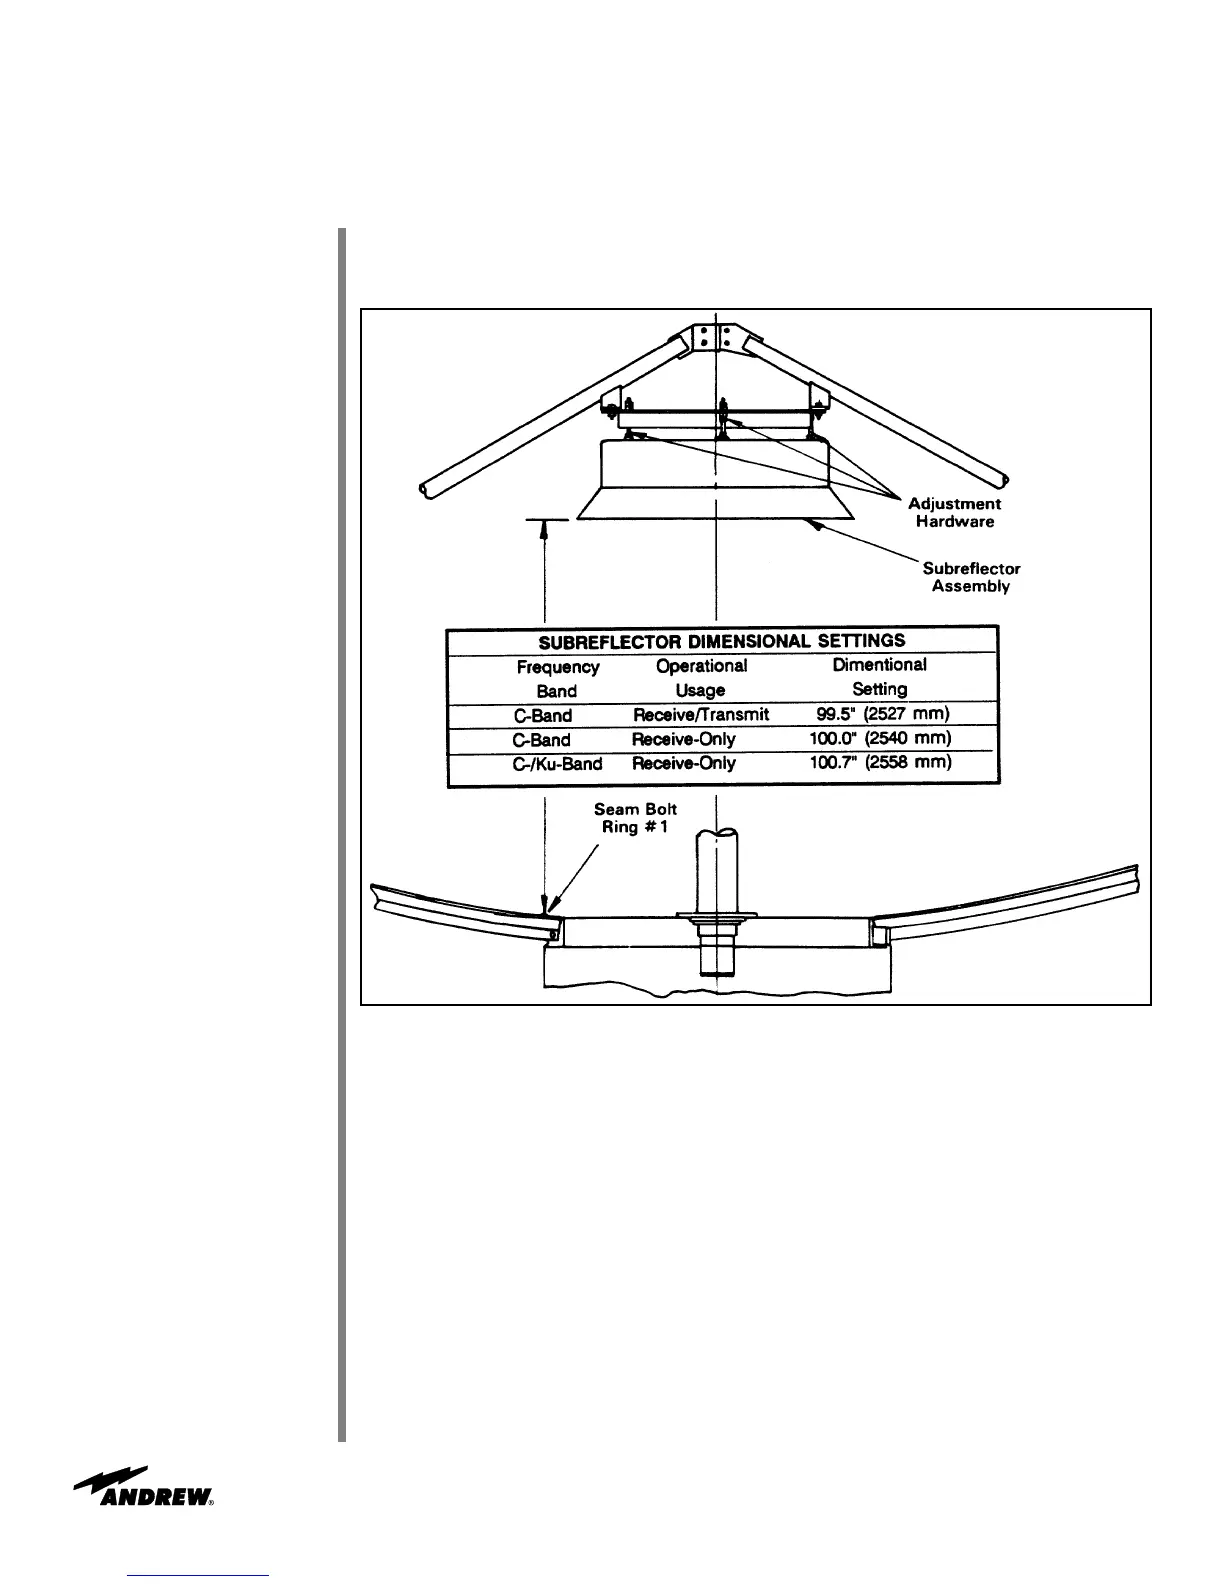
Figure 67
Repeat the adjustment procedure performed in Step 2, until all areas of the subreflector
are uniform. Adjust the jam nuts, and securely tighten the adjustment hardware.
Adjust subreflector hardware to obtain appropriate setting from surface of reflector at
seam bolt ring #1 to bottom of subreflector rim in a radial plane as shown in Figure 67.
Securely tighten adjustment hardware.
51
 Loading...