English
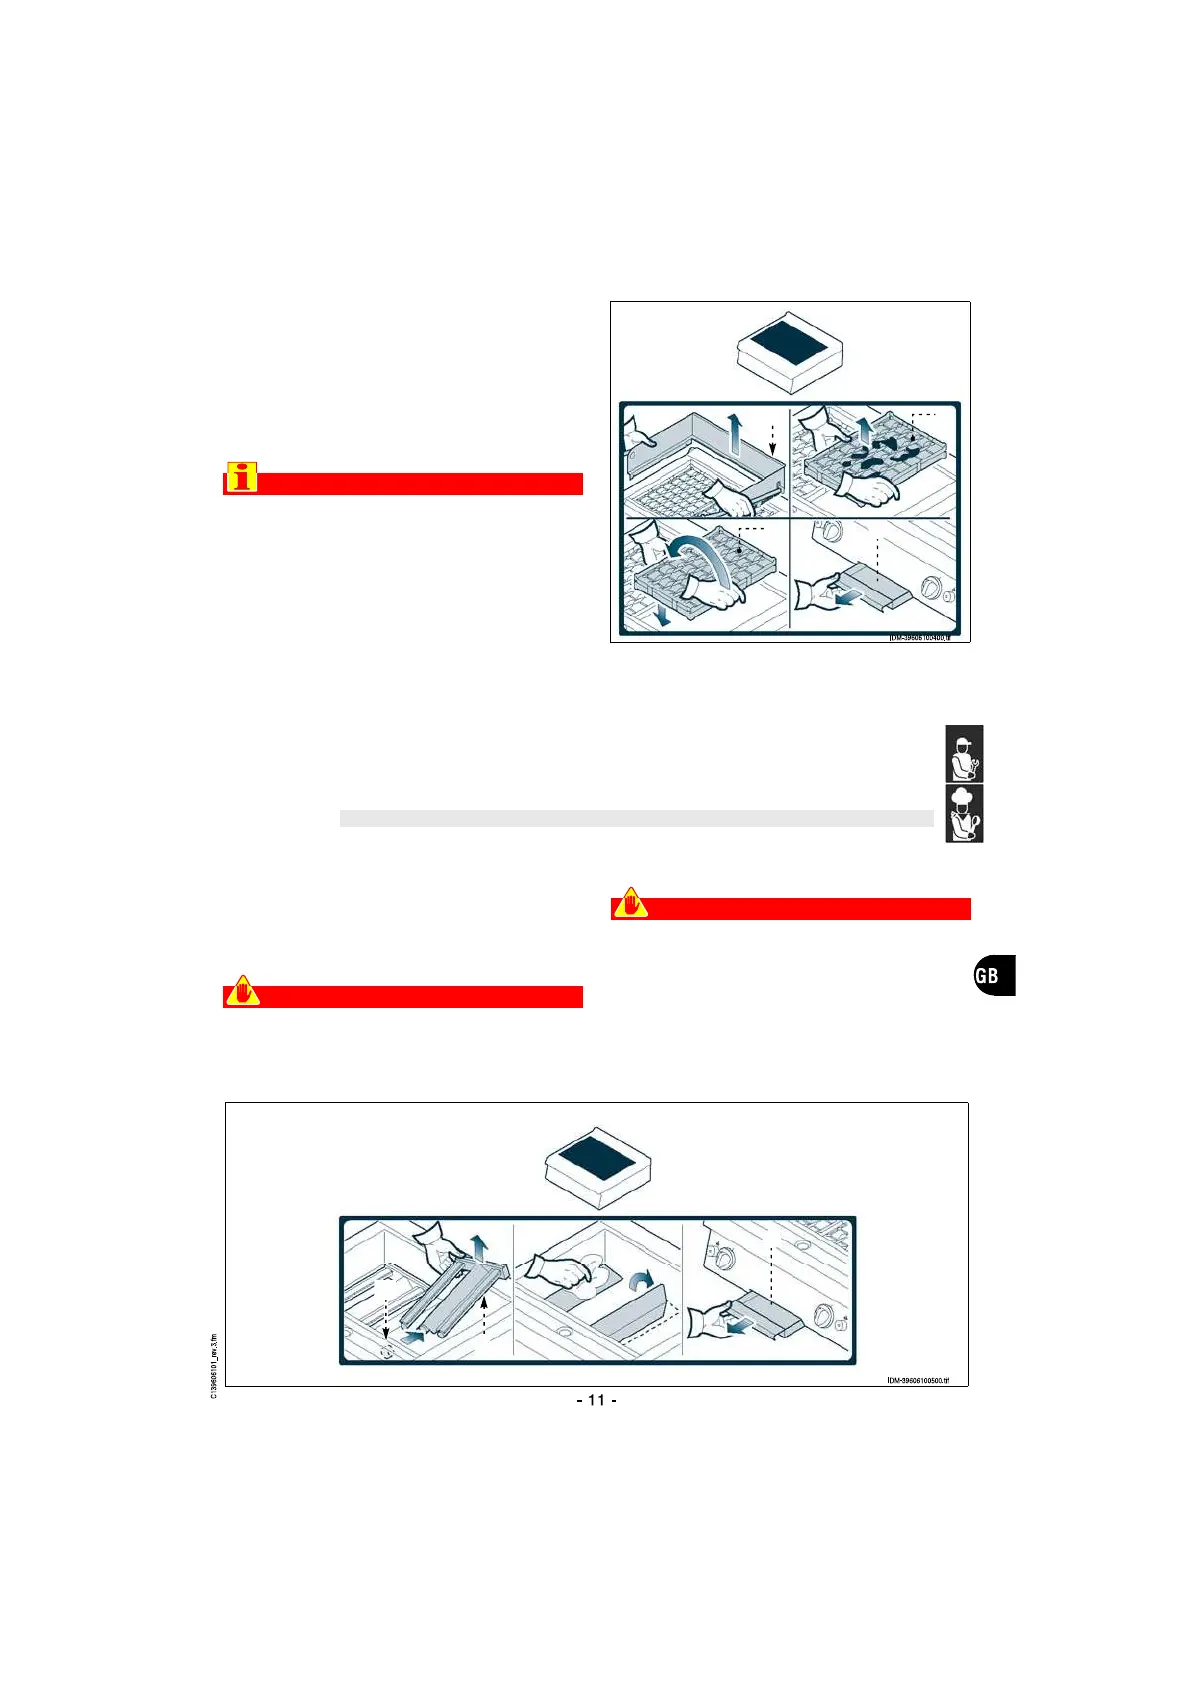
6 - Remove the splash guard frame (C) and clean
it.
7 - Lift and turn over the grid clearance reduction
(D).
Do this every day to allow residue to be burnt off
the ceramic bricks.
8 - Remove the drip tray (E), drain it and clean it.
Important
Do not dump the contents of the drip tray in
the environment; dispose of it in accord-
ance with the laws in force in the country of
use.
9 - Restore the initial conditions after completing
the operation.
To carry out this operation, proceed as follows.
1 - Remove the plate, the splashguard frame and
the grid clearance reduction (see page 10).
2 - Lift and remove the burner (A).
3 - Clean the burner (A) and check that its holes
are not blocked.
Caution - warning
Take care never to pour water or allow dirt to
fall into the burner as this will cause the burn-
er to malfunction.
4 - Clean the interior of the device and drain
all residue into the drip tray (B).
Caution - warning
Check that the burner (A) bushing (C) is not
blocked.
5 - Remove the drip tray (B), drain it and clean it.
6 - Restore the initial conditions after completing
the operation.
CLEANING THE BURNER
C D
D E
A
B
C
 Loading...