English
Natural gas
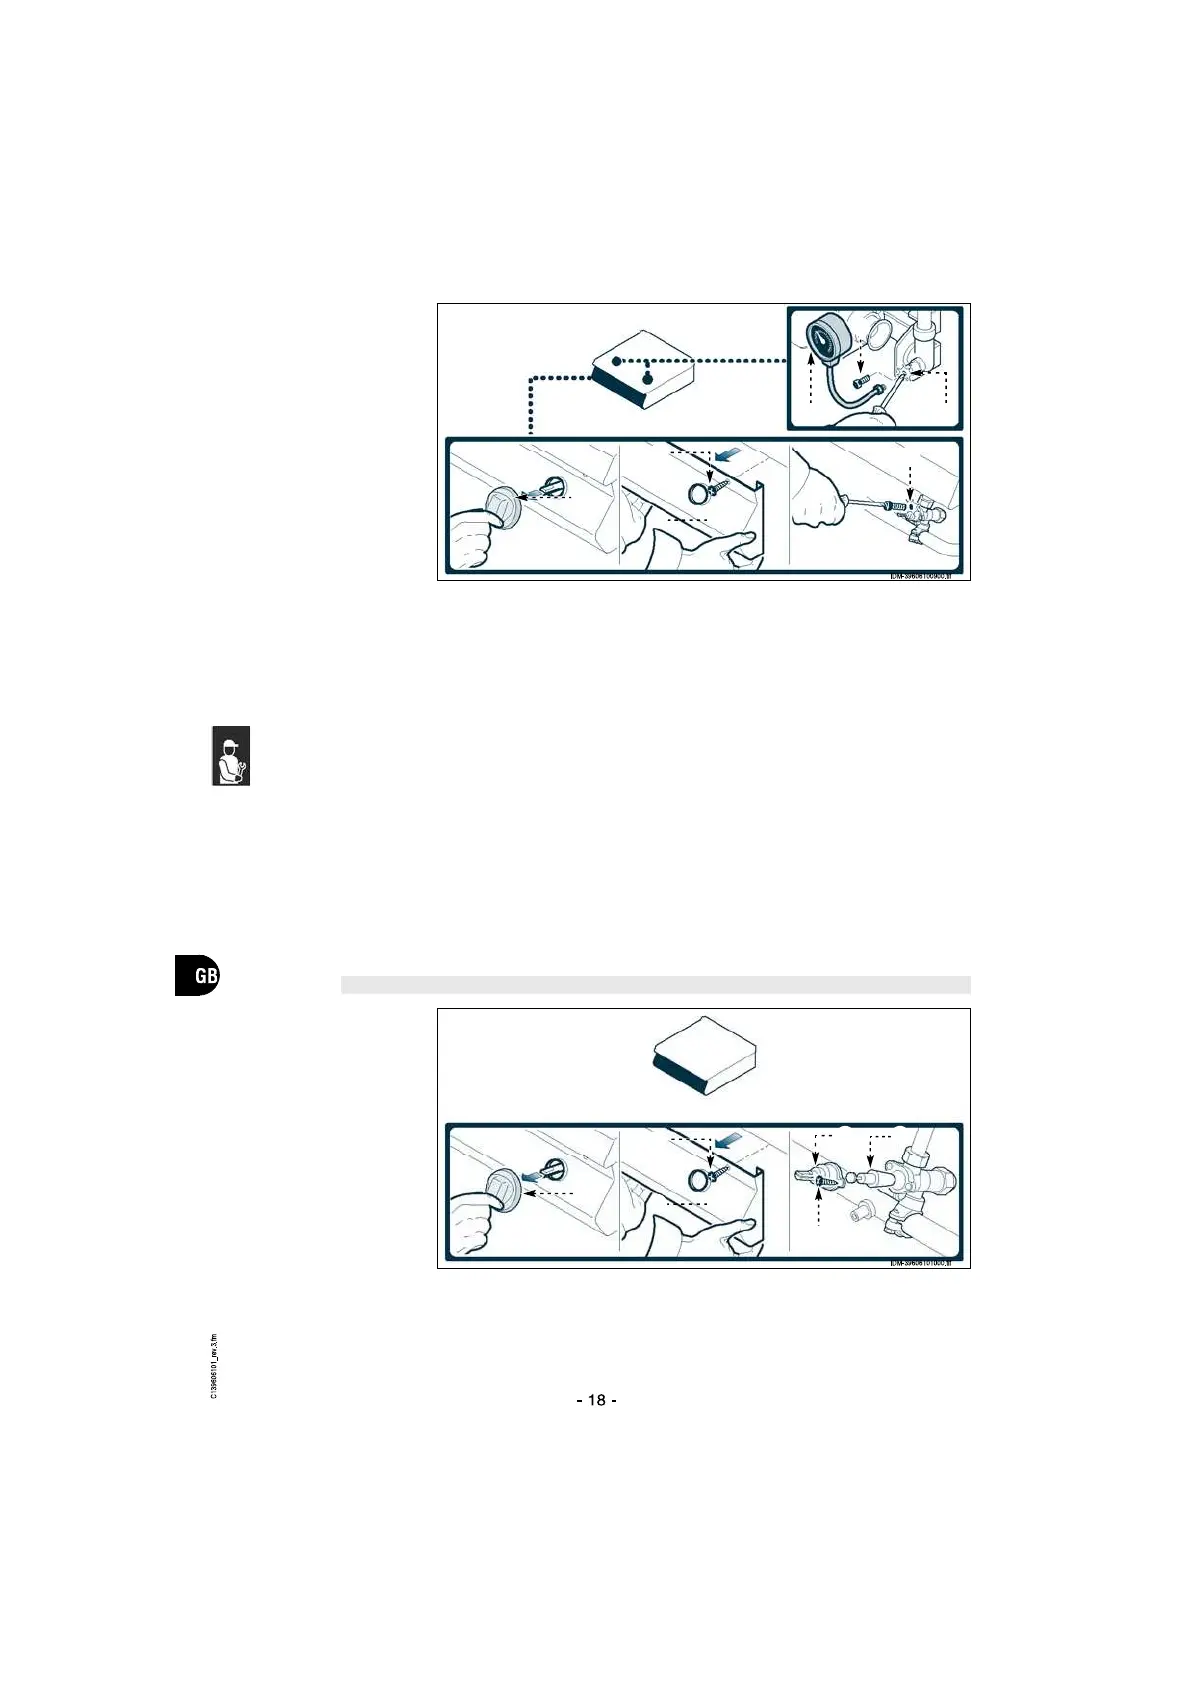
Proceed as follows.
1 - Turn off the gas supply
tap.
2 - Pull off the knob (A).
3 - Undo the screws (B) and
remove the control panel
(C).
4 - Undo the screw (D) of
the pressure connection.
5 - Connect the pressure
gauge (E) to the pres-
sure test point (F).
6 - Turn the gas supply tap
back on.
7 - Light the burner and turn the knob to the mini-
mum flame setting.
8 - Remove the minimum flame injector (G) and re-
place it with the one suitable for the type of gas
in use (see table at back of manual),
screwing it fully down.
9 - Slowly unscrew the injector (G) until the
pressure reading complies with the values
in the table (see back of manual).
10- Check the stability of the flame.
11 - After making the setting, seal the screw with paint.
12- Switch off the burner, turn off the gas supply tap
and disconnect the pressure gauge.
13- Replace the control panel (C) and the knobs (A)
on completion of the operation.
Liquid gas
To carry out this operation, proceed as follows.
1 - Turn off the gas supply tap.
2 - Pull off the knob (A).
3 - Undo the screws (B) and remove the control
panel (C).
4 - Remove the minimum flame injector (G) and re-
place it with the one suitable for the type of gas
in use (see table at back of manual), screwing
it fully down.
5 - After making the setting, seal the screw with
paint.
6 - Replace the control panel (C) and the knobs (A)
on completion of the operation.
To carry out this operation,
proceed as follows.
1 - Turn off the gas supply
tap.
2 - Pull off the knob (A).
3 - Undo the screws (B) and
remove the control panel
(C).
4 - Undo the screws (D) and
extract the cap (E).
5 - Pull off the cone (F).
6 - Clean the cone (F) and
its seat.
7 - Coat the cone with grease (F), fit it in its seat
and turn it a few times.
8 - Pull off the cone (F) to remove the excess
grease.
9 - Replace the cone (F), the cap (E), the control
panel (C) and the knobs (A).
GREASING THE GAS TAP
A
E F
G
B
C
D
FE
D
A
B
C
 Loading...