This document describes the Anko Rechargeable Hand - Stick Vac, Model No.: EV-693-S296, designed for household use.
Function Description:
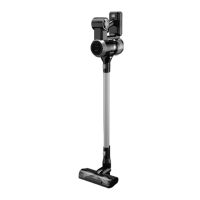
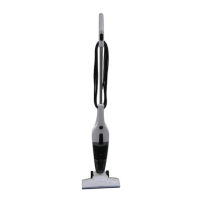
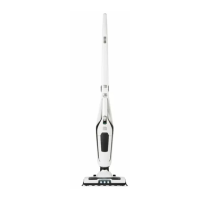
The Anko Rechargeable Hand - Stick Vac is a versatile vacuum cleaner that can be used as a full-size stick vacuum or a handheld unit. It is designed for dry vacuuming tasks within a household environment. The vacuum operates on a rechargeable battery, offering cordless convenience. It features a motorised floor head for effective cleaning and comes with a crevice/brush tool for cleaning furniture and corners. The vacuum cleaner has two speed settings: low power mode and high power mode, allowing users to adjust suction power based on their cleaning needs.
Important Technical Specifications:
- Model No.: EV-693-S296
- Battery Charger Model No.: ZD024D350050AU
- Battery Charger Input: 100–240V~ 50-60Hz 0.5A
- Battery Charger Output: 35.0V 500mA
- Battery Pack Specification: EV-693-S296-22
- Battery Type: Li-ion
- Battery Voltage: 29.6Vd.c.
- Battery Capacity: 2200mAh
- Run Time (High-Speed): Approximately 15 minutes of continuous use (with a fully charged battery).
- Run Time (Low-Speed): Approximately 55 minutes of continuous use (with a fully charged battery).
- Charging Time: At least 5 hours prior to first use.
Usage Features:
- Assembly: The vacuum cleaner comes with a Charging/Storage Stand that requires assembly. The stand post is inserted into the base, aligning a slot with a tab, and then the stand head unit (with the battery charger attached) is placed on top of the tube, again aligning a slot with a tab.
- Extension Tube: The extension tube can be easily assembled and removed by aligning a locking tab and pushing/pulling.
- Motorised Floor Head: The motorised floor head attaches directly to the extension tube or the vacuum cleaner body. It is attached and removed using a locking tab mechanism.
- Handheld Use: The vacuum can be used without the extension tube by attaching accessories or the motorised floor head directly to the main vacuum cleaner body, converting it into a handheld unit.
- Accessories: A Crevice/Brush Tool is included for cleaning furniture and tight spaces. This tool features a release button to slide the brush up or down for crevice or brush functionality. It can be fitted to the hand vac or the extension tube.
- Tool Storage: A tool holder is located on the front of the vacuum cleaner body for convenient storage of the accessory tool.
- Battery Installation and Removal: The rechargeable battery pack is inserted into the back of the vacuum cleaner body until it locks in place. It can only be inserted in one direction. To remove, a release button on top of the battery is pressed.
- Charging: The vacuum cleaner is charged by placing it onto its Charging Stand, ensuring it is properly seated. During charging, indicator light bars on the back of the battery illuminate in a rolling fashion. All bars become steady when fully charged.
- On/Off and Speed Control: The vacuum cleaner is switched on by pressing the top button on the handle once, starting in low power mode. Pressing the lower button on the handle switches to high power mode. Pressing the top button again turns the vacuum off. The vacuum cannot be started when on the charging stand.
- Indicator Lights: The battery has indicator lights (four bars) that show the charge status. As the battery depletes, the number of illuminated bars decreases. When only one light remains, it flashes, indicating the battery needs recharging. The vacuum automatically turns off when the battery is flat.
- Transporting: The vacuum cleaner should be unplugged and carried by its handle. It should not be pulled or carried by the charger cable or accessories.
Maintenance Features:
- Dust Canister Emptying: The dust canister should be emptied regularly for optimal performance. To empty, the dust canister is twisted clockwise and pulled down from the vacuum cleaner body. A trap door release button allows the contents to be emptied into a dustbin. The trap door manually clips shut.
- Filter Cleaning: Filters must be cleaned regularly to maintain suction performance and prevent overheating. The white filter should only be washed if very dirty; otherwise, tapping it on a hard surface to dislodge dust is sufficient.
- Disassembly: To access the filters, the dust canister is first removed. The filter assembly is then removed by grasping its handles and pulling up. The filters can be further disassembled by rotating anticlockwise to unlock and separate.
- Washing: Filters should be washed in warm, mild soapy water, rinsed in clean cold water, and allowed to dry completely.
- Important Notes: Do not scrub filters, place them in a dishwasher, or use a hair dryer to dry them. Never use the vacuum with a wet or damp filter, or without a filter fitted, as this can cause damage and void the warranty.
- Reassembly: When refitting the filter assembly, ensure it is in the correct orientation by aligning three tabs on the filter edge with three slots in the dust canister.
- Dust Canister Cleaning: The dust canister can be washed in warm, mild soapy water, rinsed in clean cold water, and allowed to dry completely. Do not scrub it, place it in a dishwasher, or use a hair dryer.
- Vacuum Cleaner Body and Tools Cleaning: The outside of the vacuum cleaner, components, and accessories should be cleaned with a moist cloth and mild detergent. After cleaning, wipe off moisture with a dry cloth. Do not use petrol, flammable liquids, solvents, or place accessories/components in a dishwasher.
- Motorised Floor Head Cleaning: The rotary brush in the floor head can be removed for cleaning hair and debris.
- Removal: Ensure the floor head is removed from the extension tube or vacuum cleaner. Turn it over. A small locking clip on the right side needs to be rotated ¼ turn anticlockwise (using a flat blade screwdriver or coin) to unlock. Then, grasp the floor head and rotate the end cap anticlockwise to unlatch and pull it straight out. The rotary brush can then be slid out sideways.
- Reassembly: Refit the brush and end cap in reverse order, ensuring the locking clip is rotated ¼ turn clockwise to lock.
- Storage: After use, empty the dust canister and clean the filters. Place the vacuum on the Charging/Storage Stand. The battery can be recharged or stored in a dry, cool place. Switch off and unplug the battery charger when not in use.
Troubleshooting:
The manual includes a troubleshooting guide for common issues:
- Will Not Switch On: Check if the battery is fully charged.
- Only 1, 2 or 3 Indicator Lights are lit: This indicates partial charge. All 4 lights are on when fully charged.
- Noisy Operation: Clean the filter, empty the dust canister, and check for partial blockages.
- Suction Not Strong: Clean the filter, empty the dust canister, check for blockages, ensure the battery is fully charged, and verify the speed setting (press the Speed Button for High power mode). If issues persist, a new filter or battery may be needed.
- Floor Head Hard to Push: Check if the rotary brush is jammed with debris (switch off and remove debris). The carpet may also be too long.
- Static Shock: This is a known phenomenon of static electricity discharge, especially on synthetic carpets in dry, cool environments. It is not a fault of the vacuum cleaner. Users can try wearing insulating footwear or increasing humidity/heat in the environment.
Warranty:
The product comes with a 12-month warranty from Kmart Australia Ltd, covering defects in materials and workmanship, provided it's used according to instructions. This warranty is in addition to consumer rights under Australian Consumer Law and New Zealand legislation. For technical queries, difficulties, or spare parts, contact H.E. Group customer service.