Assembly Replacement 4-3 Main/VNA PCB Assembly Replacement
S331L MM PN: 10580-00323 Rev. B 4-7
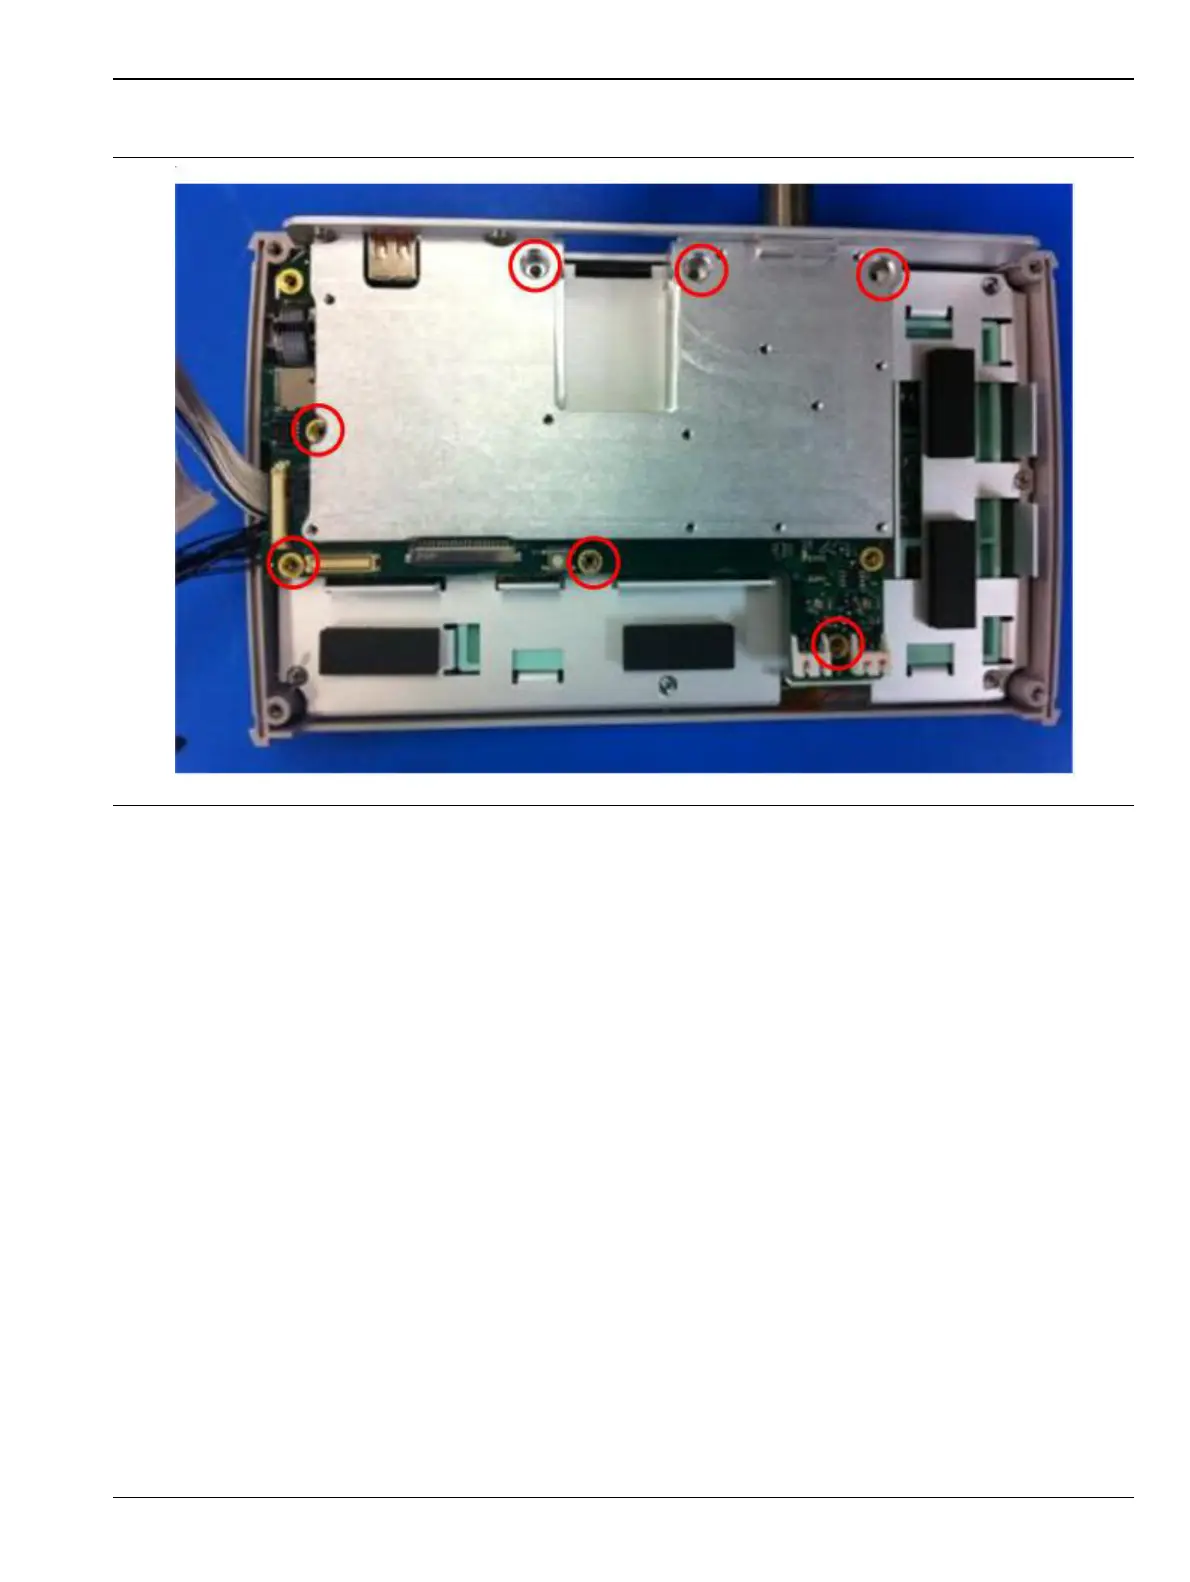
4. Remove the 7 screws holding the VNA assembly to the LCD bracket.
5. Gently separate the VNA from the LCD bracket.
6. Installation is the reverse of removal. Take care to properly fit the connector panel into the grooves in the
top of the case and confirm that none of the cables will be pinched when the back case is re-installed.
Figure 4-11. Remove 9 Screws

 Loading...


