EN
81
• If the air conditioner does not have a
specic function nothing will happen
when the corresponding button on the
remote control is pressed.
• The descriptions in the operating
instructions apply before the diagrams
for the remote control.
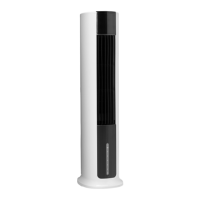
Positioning
The remote control has a range of 8 metres.
Point the remote control at the receiver on the
air conditioner. An audio prompt conrms the
reception. Doors and curtains etc. can block the
signal on the remote control.
FIG. 20
IMPORTANT:
• Do not expose the remote control to
water or any other liquid. Do not expose
the remote control to heat or direct
sunlight.
• Sunlight or strong articial light can
interfere with the receiver. Protect the
receiver from strong light.
• If the remote control aects other
products in the vicinity, move the
products or contact the retailer.
Replacing the batteries
The remote control has two batteries under a
cover on the back.
1. Open the battery cover.
2. Remove the old batteries and insert new
batteries with the correct polarity.
3. Replace the battery cover.
FIG. 21
IMPORTANT:
• Do not mix old and new batteries, or
dierent types of batteries.
• Remove the batteries if the air
conditioner is not going to be used for 2
months, or more.
• Recycle used batteries in accordance
with local regulations.
• All programmes are deleted when the
batteries are taken out and the remote
control must be reprogrammed.
Functions
1. TEMP DOWN
Reduces the set point temperature in steps of
1°C down to 30°C, or in steps of 2°F down to
88°F.
2. TEMP UP
Increases the set point temperature in steps of
1°C up to 17°C, or in steps of 2°F up to 62°F.
3. Switch
Starts and switches o the air conditioner.
4. FAN SPEED
Switches between speed settings:
AUTO Low High
5. MODE
Switches between modes in the following
order:
AUTO COOL DRY FAN
6. TIMER ON
Press to activate the setting of start delay. Each
time you press the button the setting increases
in steps of 0.5 hours up to 10 hours and steps of
1 hour from 10 to 24 hours. Cancel this function
by setting the time to 0.0.
7. SWING
Starts and stops the air deector to adjust the
required direction of the air.
8. SLEEP
This function produces a comfortable
temperature and saves energy when you are
sleeping. The function can only be used in COOL