10
3. INNI 3D Printer Usage Guide
Confirm that the bottle of zirconia slurry is labeled BCM-W500.
1) Confirm that the printer looks intact and ready for use.
2) Open the bottle of zirconia slurry (BCM-W500) and check the contents for impurities.
Precautions
Pre-check before printing
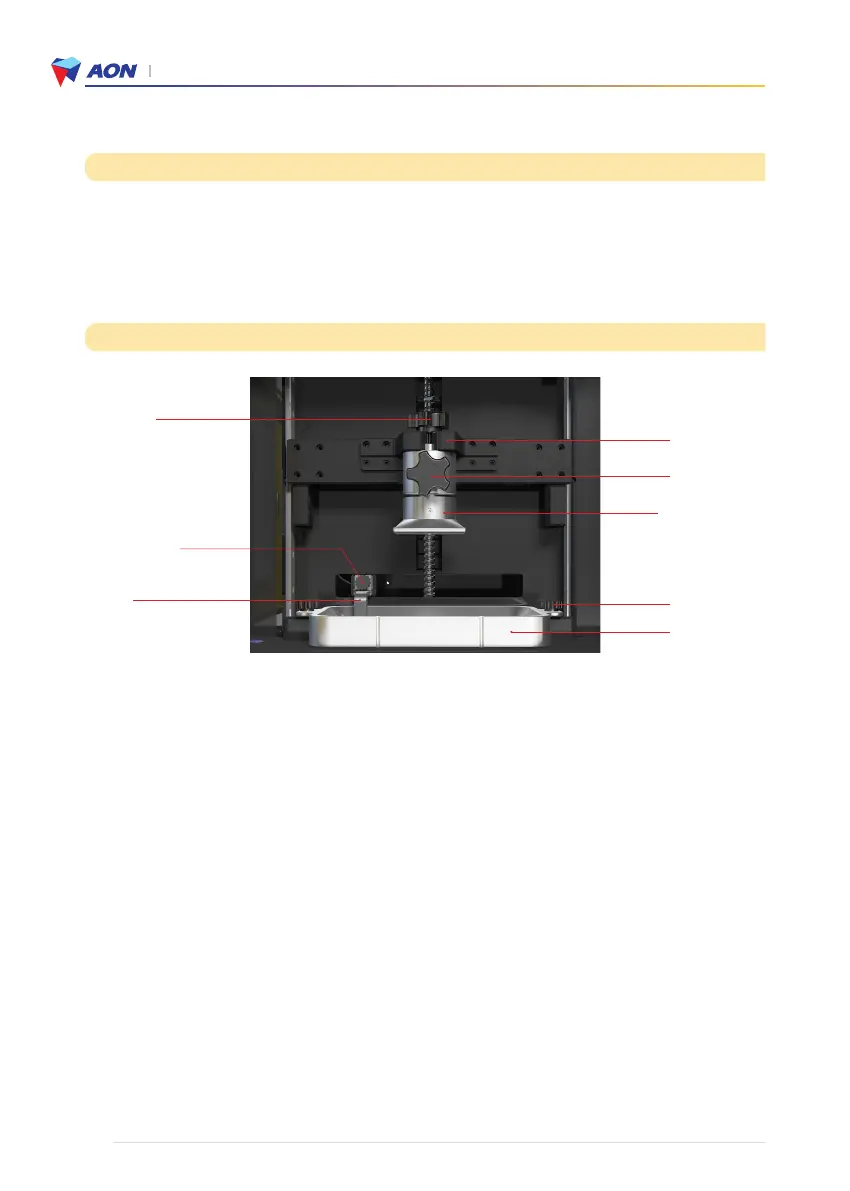
① KNOB-L30
④ Blade
④ -1 KNOB-Blade
③-1 KNOB-L20
Platform plate
①-1 Z-AXIS MAIN
STAGE ARM
② KNOB-L15
③ Modeling bed
1. Install printing components
1) Build platform
Loosen the top fixture ① and attach the build platform to the platform holder ①-1.
2) Middle fixture (②KNOB-L15)
Loosen and check for suitable spring strength and operation.
(Two full turns should allow the platform plate to move easily in all directions).
* This is an important step prior to preheating or blade mixing.
3) Modeling Bed : Attach to the printer using the modeling bed fixtures ③-1
4) Blade : Attach to the printer using the blade fixture ④-1.
2. Prepare printing - Zirconia slurry (BCM-W500)
1) Pour 150g of the slurry into the modeling bed.
2) Preheat : AON Slicer → Set up → Position control → Preheat (10/20/30mins)
* When preheat, a light will turn on inside the printer on the left side.
* During the preheating process, do not use any other printer operation
3) Blade mixing : AON Slicer →Set up → Position control → Blade mixing
4) Touch screen of printer → Position control → Home position → Tighten the middle fixture (②KNOB-L15) →
Plates → Start print
* Make sure that the middle fixture (②KNOB-L15) is tightened before printing.
* Please refer to the video on our website for more details. www.aoninni.com