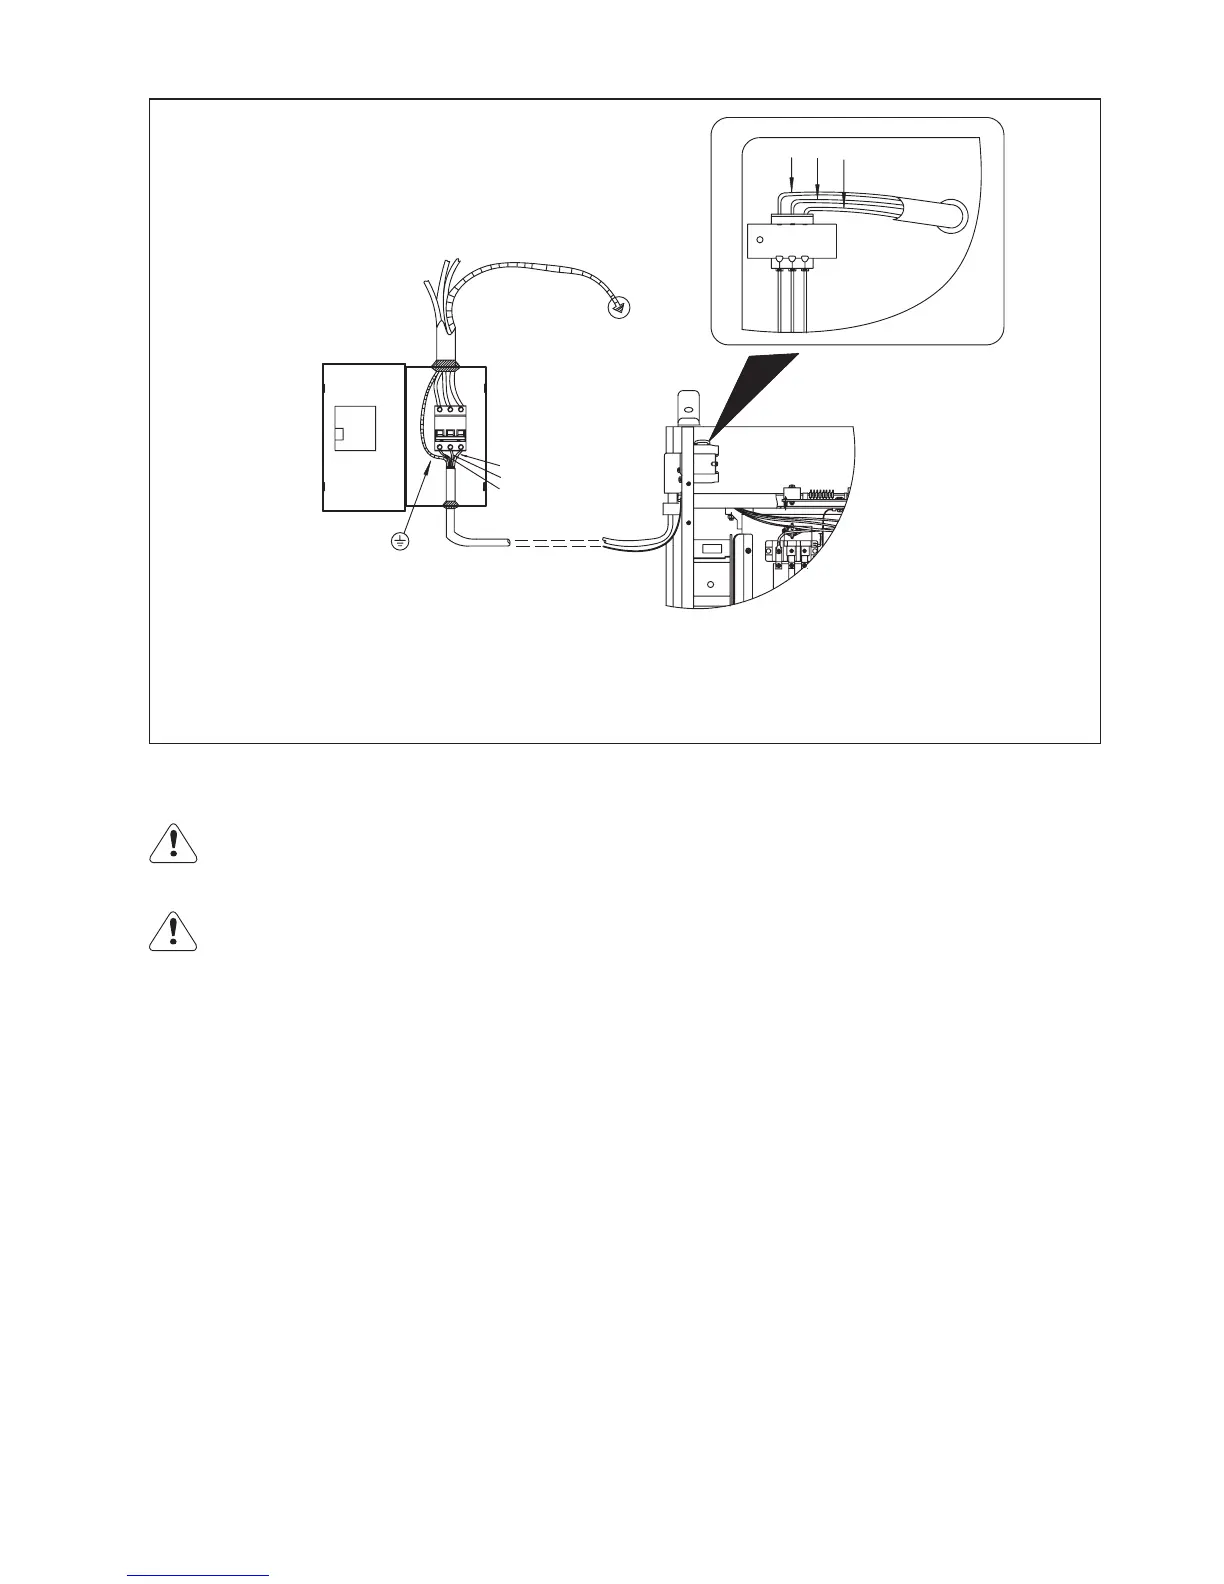
Fig. 5-5-2: Connection between input power supply cable and switch box
Operating guide
Warning! Operating the welding machine incorrectly can cause serious injury and damage. Do not use
the functions described here until you have read and completely understood all the following guides:
-“safety rules”
-“before commissioning”
Warning! Electric shock is very dangerous. As soon as the power source is switch on, the welding
electrode is power on. Make sure that the electrode does not touch any person or conductor or grounded
parts (e.g. lifting appliance etc.)
SMAW welding with basic electrode: E7016/E7018
1.Use short circuit copper block to connect two positive output terminals, then connect welding cable with short
circuit copper block;
2.Use short circuit copper block to connect two negative output terminals, then connect ground cable with short
circuit copper block;
3.Place switch on “ON” position, power on;
4.Choose “Panel control” mode on control panel;
5.Choose “Amp/Volt” switch on “Amp” position;
6.Adjust arc length “L/S/M” switch according to welding cable length;
7.Select “SMAW” by the SMAW/Gouging switch on front panel;
8.Adjust arc start current, arc force current, welding current according to electrode diameter, welding position;
9.Welding
Gouging
1.Switch off the mains switch;
2.Use short circuit copper block to connect two positive output terminals, then connect gouging torch cable with
short circuit copper block;
3.Use short circuit copper block to connect two negative output terminals, connect ground cable with short circuit
copper block, then connect the other end of the ground cable to the work piece;
4.Connect the gas hose to gas outlet of the air compressor or other gas supply tube;
5.Switch on the mains switch;
6.Select “Gouging” by the SMAW/Gouging switch on front panel;
7.Set the required current value by rotating “welding current” knob;
8.Increase arc force current properly;
L1
L2
L3
GND
L1
L2
L3
Yellow-Green protective GND wire is used for grounding!
Not zero wire! Please connect according to picture or
other correct way. Please disconnect mains power when
connecting!
If main case is grounded, this cable needs no grounding.
27
 Loading...

