56
3.Place switch on “ON” position, power on;
4.Choose “SMAW/TIG” switch on TIG position;
5.Choose “Panel control” mode on control panel;
6.Choose “Amp/Volt” switch on “Amp” position;
7.Select 2 step/4 step;
8.Adjust welding current according to plate thickness;
9.Adjust down slope time according to welding current value;
10.Open gas valve of shielding gas regulator, press torch trigger, adjust flow rate, release torch trigger;
11. Press torch trigger, HF arc starting;
12.Welding: 2 step - press and hold torch trigger; 4step - release torch trigger after arc is established;
13.Stop arc: 2 step - release torch trigger, current down slopes until arc stops; 4 step - press and hold torch trigger,
current down slopes until arc stops, and then release torch trigger;
14.Post gas flow for about 3~5s, close gas valve of shielding gas regulator.
Gouging
Note! “GOUGING” process is only available for the machine which rated current is ≥500A.
8-6 Technical data
Please refer to “ARC315/400/500/630” the relevant “4-6 Technical data” in details.
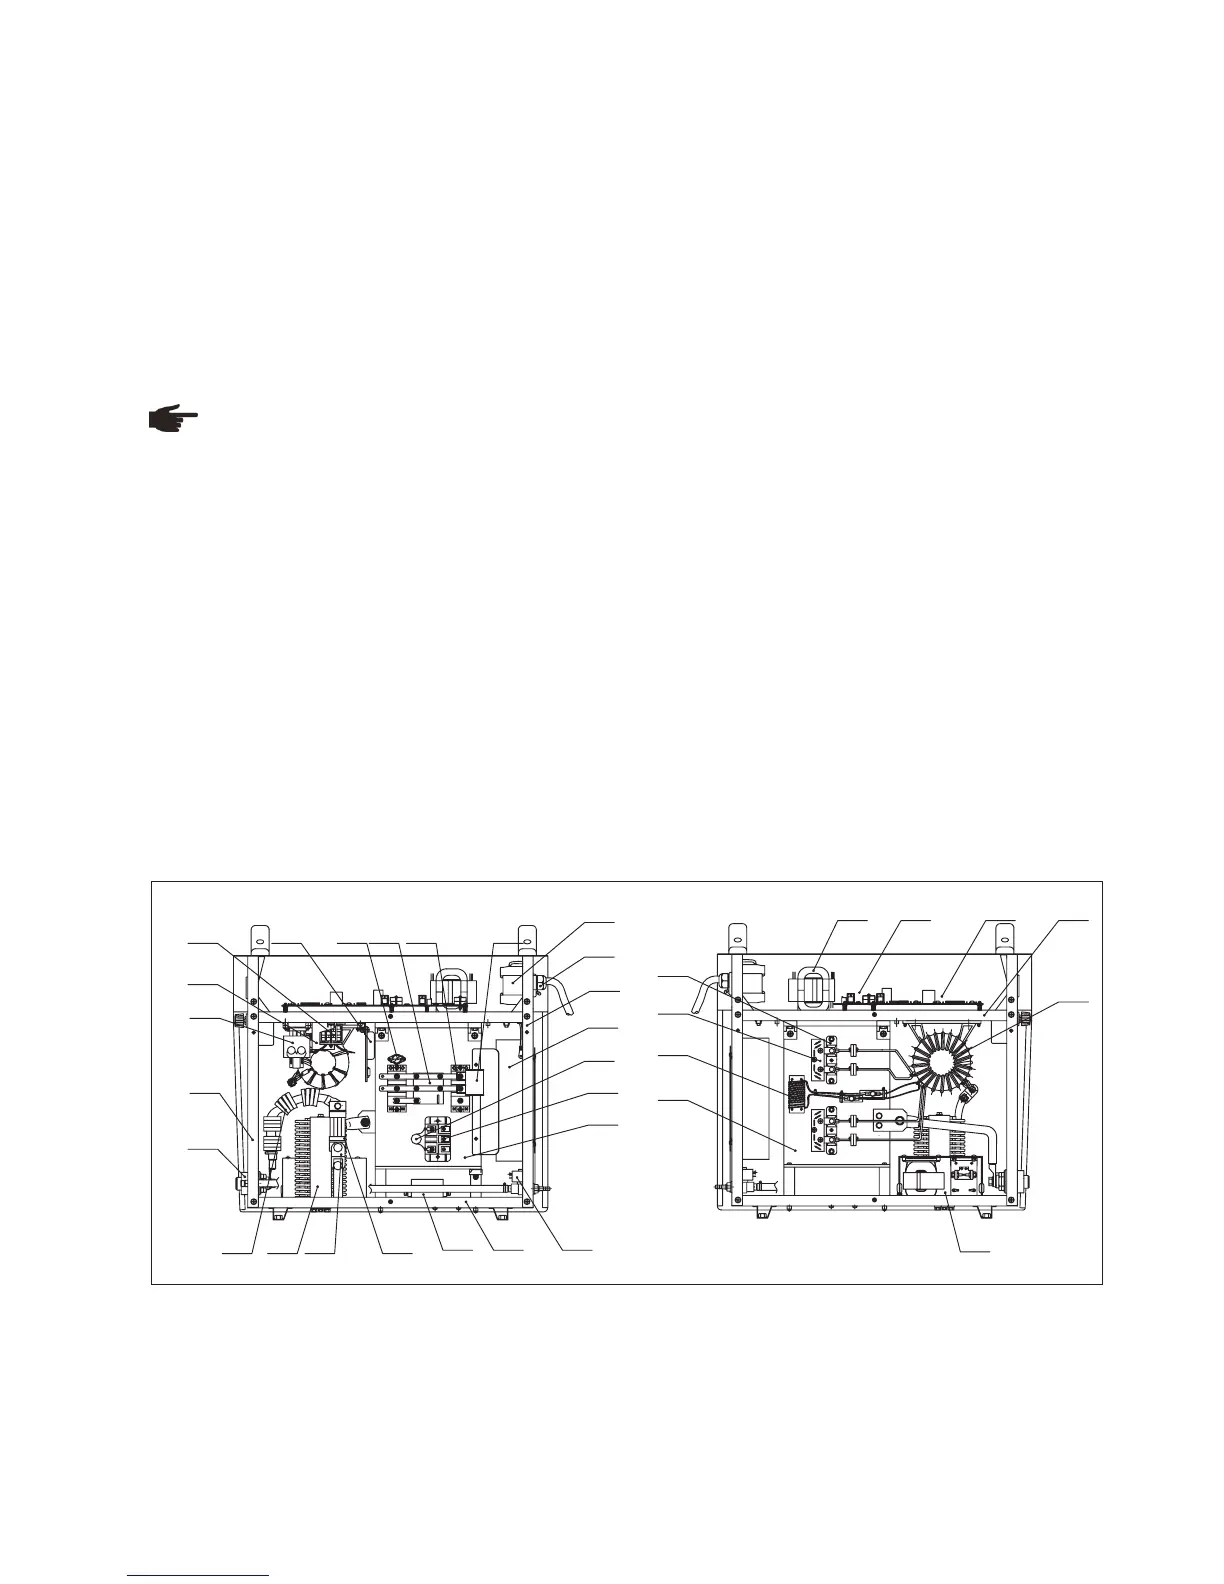
8-7 Main components list
TIG315/400/500/630
1.Switch off the mains switch;
2.Plug one end of the ground cable to the output terminal (-);
3.Connect the other end of the ground cable to the work piece;
4.Plug the gouging torch cable to output terminal (+);
5.Connect the gas hose to gas outlet of the air compressor or other gas supply tube;
6.Switch on the mains switch;
7.Select “SMAW” by the SMAW/TIG switch on front panel;
8.Set the required current value by rotating “welding current” knob;
9.Increase arc force current properly;
10.Open the gas valve of the compressed air, and regulate the needed shielding gas flow and pressure;
11.Choose proper carbon rod according to current;
12.Open gas valve on gouging torch, make gas flow towards to work piece;
13.Start Gouging.
1
2
4
5
89
10 11 1213
20
21
22
23
3
6
7
24
25
26
27 28 29 30
15161718
19
31
32
33
34
14
Fig. 8-7-1: Inner structure
 Loading...

