11-REMOTE CONTROLLER
11-1 Wire remote controller (support hot-plug)
Note! Match all ARC series (except ARC400-3T, ARC1000/1250), also match all TIG series (except TIG1000/1250).
The analog wire remote controller can be used for current regulation of this series power sources.
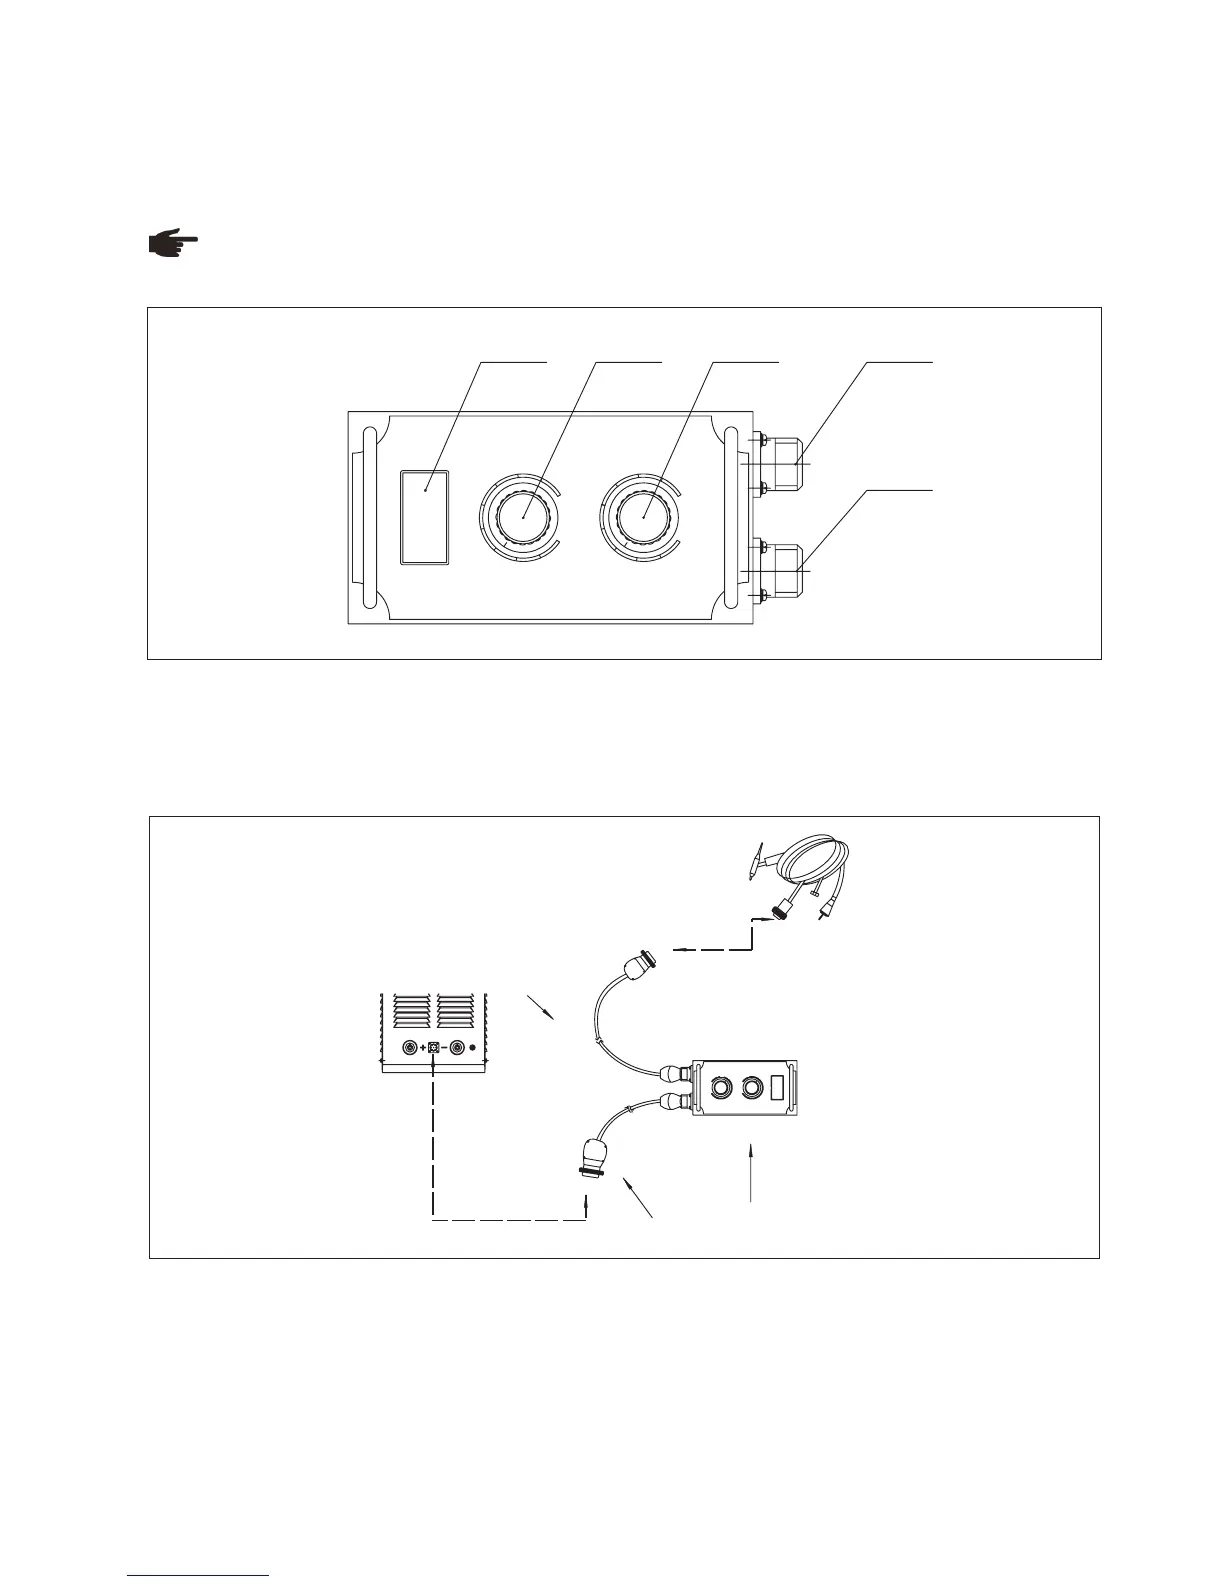
Fig. 11-1-1: Remote controller
1. “Amp” displayer
It displays preset value while in open load, and displays real value of welding current while in actual working.
2. “Welding current” regulation knob: same function with welding machine knob.
3. “Arc force current/ Down-slope time” regulation knob: same function with welding machine knob.
4. Socket: connect to remote control cable
5. Socket: connect to torch trigger cable (TIG welding ONLY)
Fig. 11-1-2: Remote controller connection
Operating guide:
1.Connect welding machine control socket and remote controller (socket 4, Fig. 11-1-1) via 7-pin control cable;
2.Connect remote controller (socket 5, Fig. 11-1-1) with torch trigger cable (TIG welding ONLY);
3.Place welding machine circuit breaker on “ON” position, power on;
4.Choose “Remote control” on welding machine control panel;
5.Adjust proper welding current, arc force current.
1
5 6
8
10
7
2
4
9
3
1
10
5
6
8
2
3
4
7
9
A
WELDING CURRENT
DOWN-SLOPE T I ME
ARC F O RCE/
1 2 3 5
4
1
5 6
8
10
7
2
4
9
3
1
10
5
6
8
2
3
4
7
9
A
ARC FORCE/D ECAY TIME
7-pin p l ug
WELDI NG CUR RENT
Wire re m ote c o ntroller
7-pin p l ug
75