51
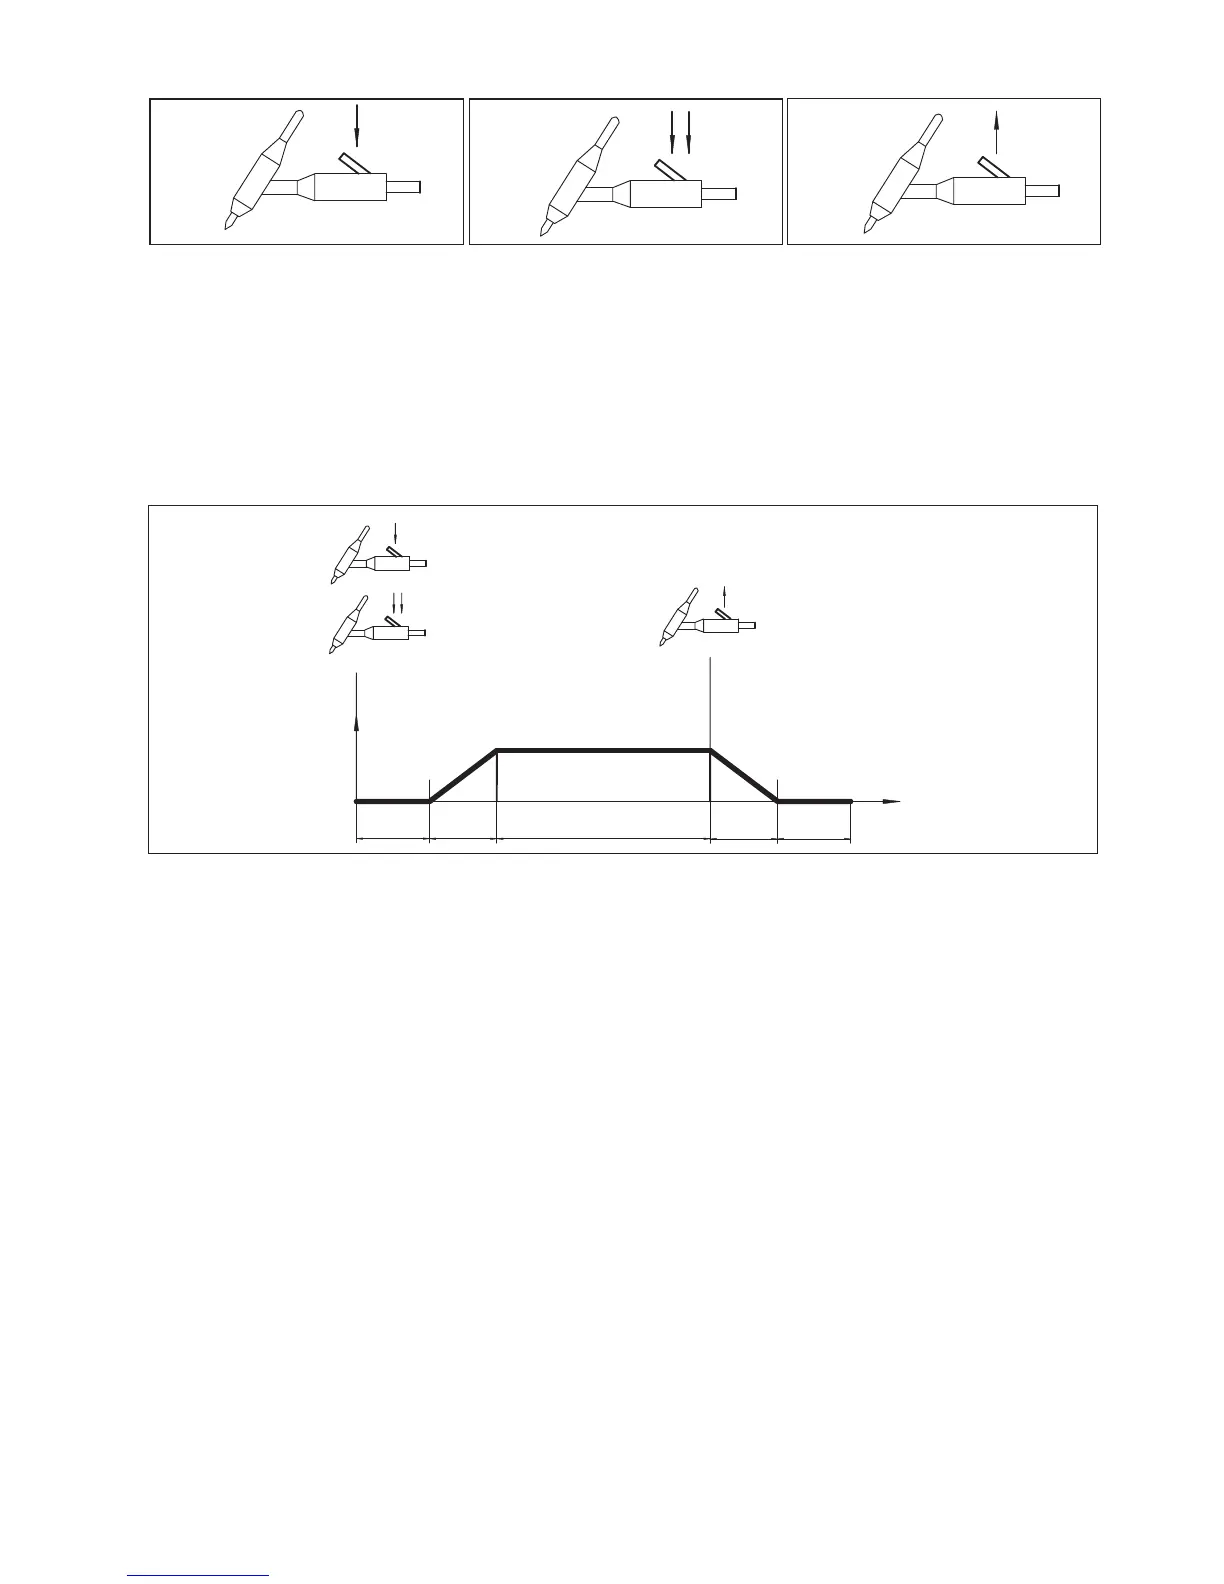
Fig. 8-3-2: Press torch trigger Fig. 8-3-3: Hold torch trigger Fig. 8-3-4: Release torch trigger
2-step operation mode (Fig. 8-3-5):
a. Press and hold torch trigger to start welding.
Open solenoid valve, shielding gas will flow out to expel air from torch hose (pre-gas time depends on the hose
length). Then, HF ignition device works and starts arc.
Output current continuously increases from initial current to welding current.
b. Release torch trigger to stop welding.
Release torch trigger, welding current will continuously decrease at a certain rate and time until it reaches to zero.
The solenoid valve will continue to operate for a period of time (post-gas time), allowing the shield gas to protect
tungsten electrode and molten pool. Then the solenoid valve stops working, gas stops and welding finishes.
Fig. 8-3-5: 2-step operation mode
4-step operation mode (Fig. 8-3-6):
a. Press and hold torch trigger to start welding.
Open solenoid valve, shielding gas will flow out to expel air from torch hose (pre-gas time depends on the hose
length). Then, HF ignition device works and starts arc.
Output current starts at initial current to welding current, and time of initial current output depends on the time that
torch trigger is pressed and held.
b. Release torch trigger.
Start normal welding.
c. Press and hold torch trigger again when the welding completes.
Welding current will continuously decrease at a certain rate until it reaches to crater-filler current and the time is
called down slope time. Then the output current is continuously lowered to zero and arc blowout.
Time of crater-filler current depends on the time that the torch trigger is pressed and held again.
d. Release torch trigger.
The solenoid valve will continue to work for the selected period of time (post-gas time), allowing the shielding gas
to protect tungsten electrode and molten pool. Then the solenoid valve stops running, gas stops and welding
completes.
UP-SLOPE
t
CURRENT
DOWN-SLOPE
POST-GAS
PRE-GAS
I
 Loading...

